Is your macbook case sleek, stylish, portable and well suited to your lifestyle? Well this case is the antithesis of that. Before we plunge our fist of discovery into the intestinal tract of experience, let me fill you in with some background.
Background
I used to work in the movies, darling. This meant that I met a whole bunch of artistic and technical people, who spend their professional lives making stuff look cool. Need a gloomy island for a thriller? covered. Need iron man to support a story line that involves getting Scarlett Johansson in her bra? no probs. something something james bond? yeah got that covered too. Everyone I worked with was talented, the fuckers.
One day when I was waiting to meet a client, someone from bad robot wafted into the reception holding what looked to be a Gutenberg bible. I got chatting, because this was pretty much the most unusual thing I’d seen all week. It turned out that they had bought a BookBook cover for their 17″ MacBook (Yes, this was that long ago.)
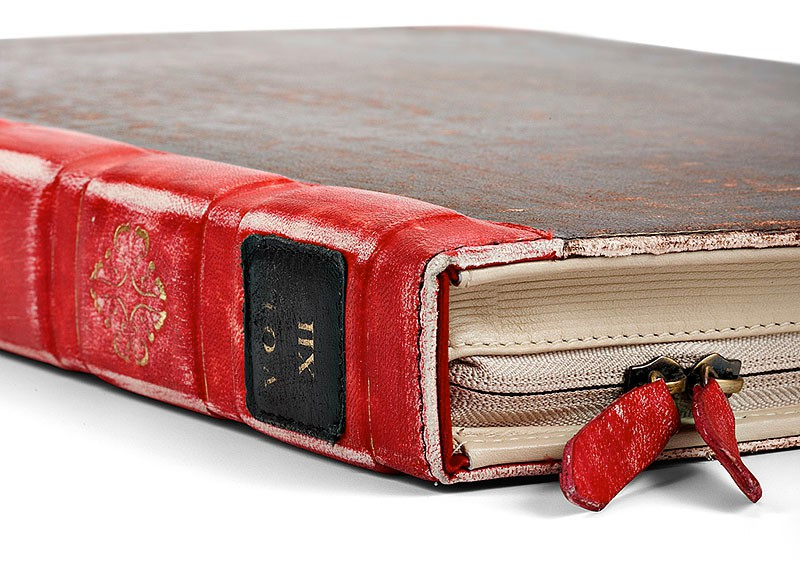
What made it even nicer is the filigree they had lasered onto the top cover. It was gears flowing into heather leaves. Bear in mind, this was a time when lasers were very much the preserve on high industry.
Obviously I thought it was a bit of a gimmick, which lacks any useable features over just pure aesthetics. However I took the liberty of spending work money on buying a few for “testing”. It turns out that not only do these look great, but offer spectacular protection. The company I was working for had about 25 macbook pros. They traveled around the world and had hard, short lives. But, None of the macs that were in the BookBook cases ever came back damaged (excluding water damage.) compared to a large amount of the “naked” one.
I have a BookBook for my personal laptop, this one has been bashed about for around 12 years. Its been through at least three bike crashes, numerous droppings, and many many international flights.
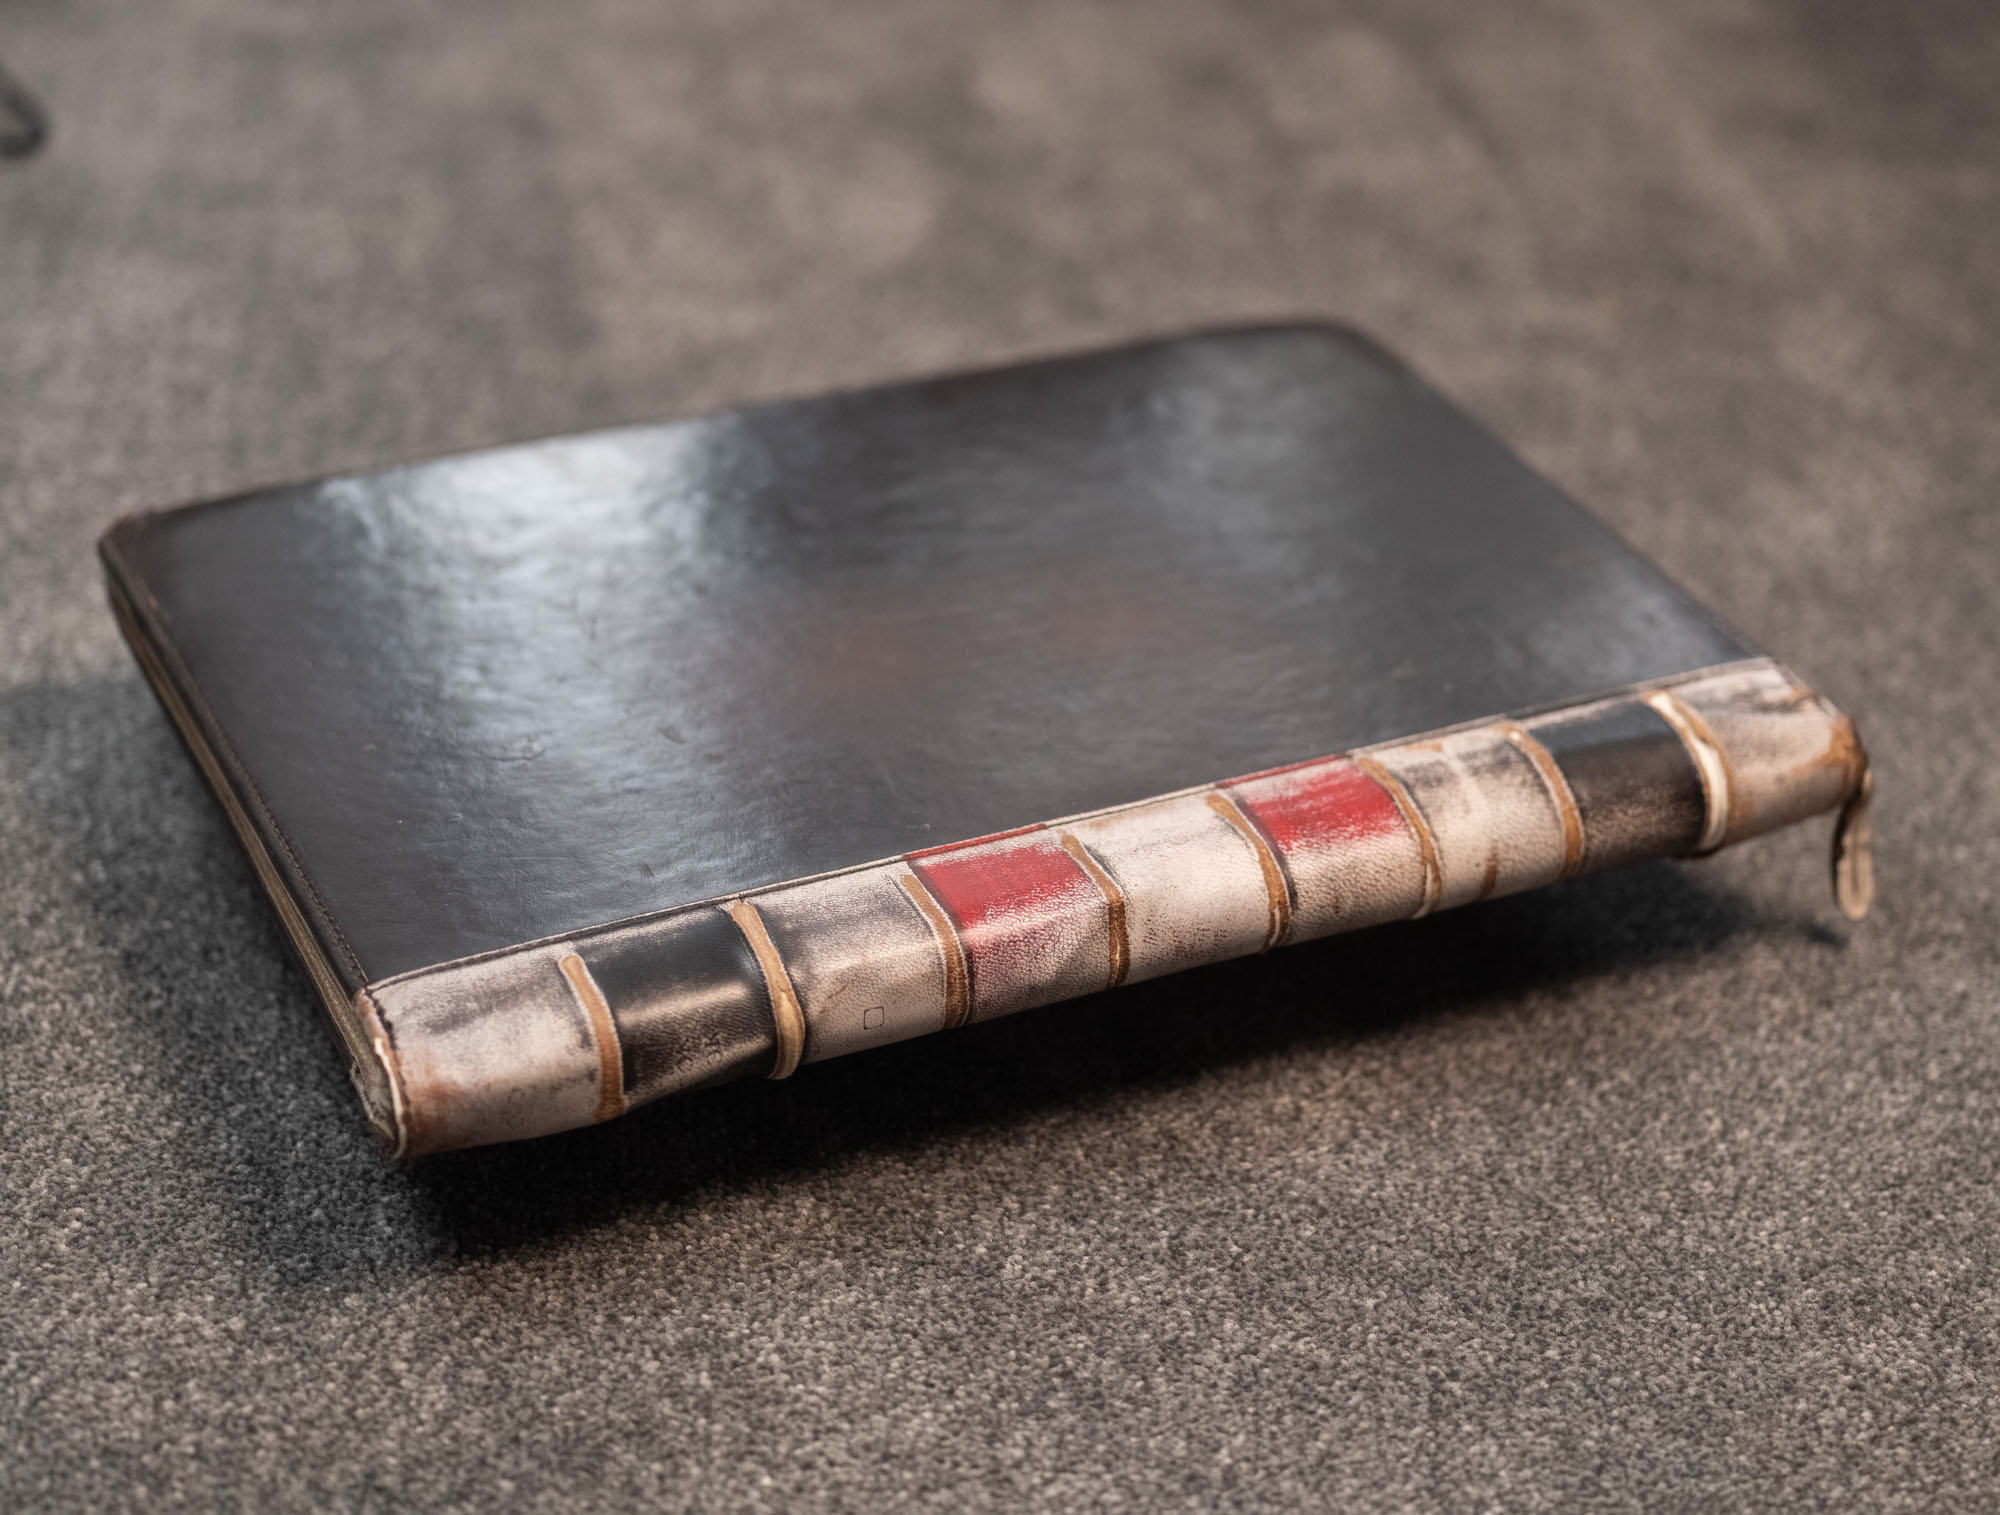
In short, its knackered.
Work Work Work
I recently changed job. This means a new macbook. I looked to get a new BookBook case, because its the best cover out there. Turns out they don’t make them any more. They only have a stupid “sofa” cover, that looks like some horrid five minute craft abomination. This left me sad, so I cast around for a good alternative. There are knockoffs, but I’m unsure of the quality.
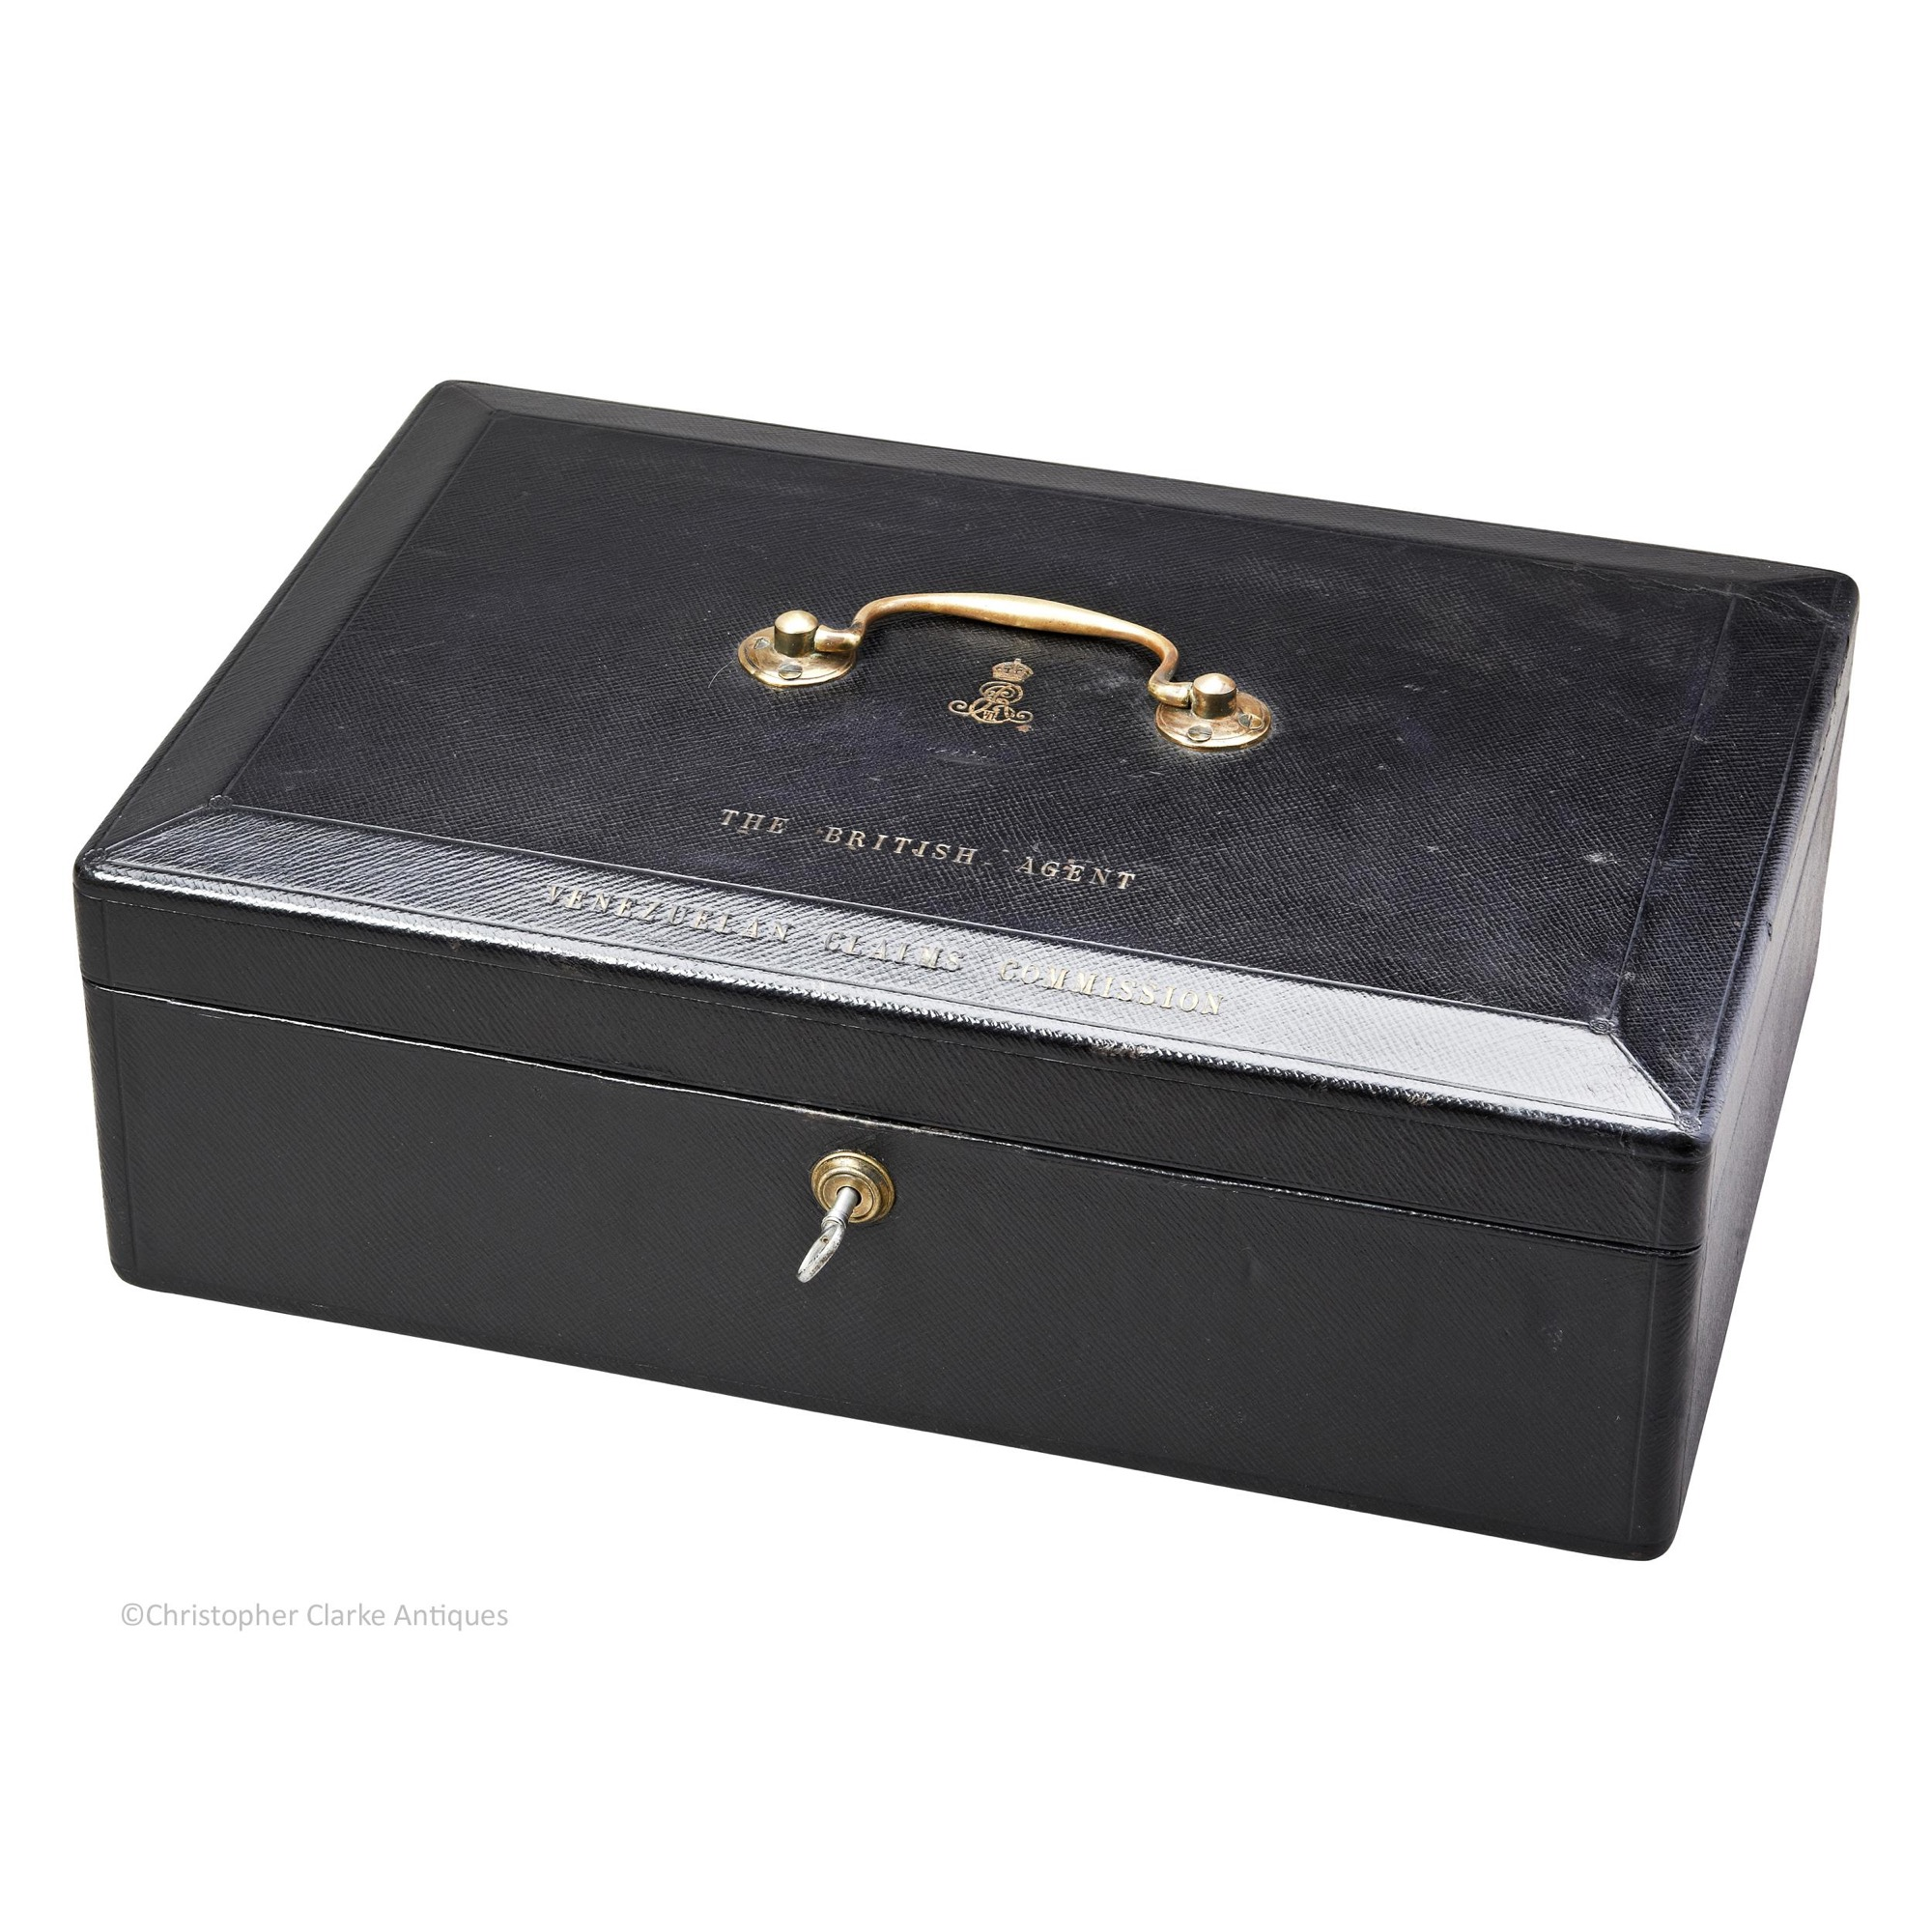
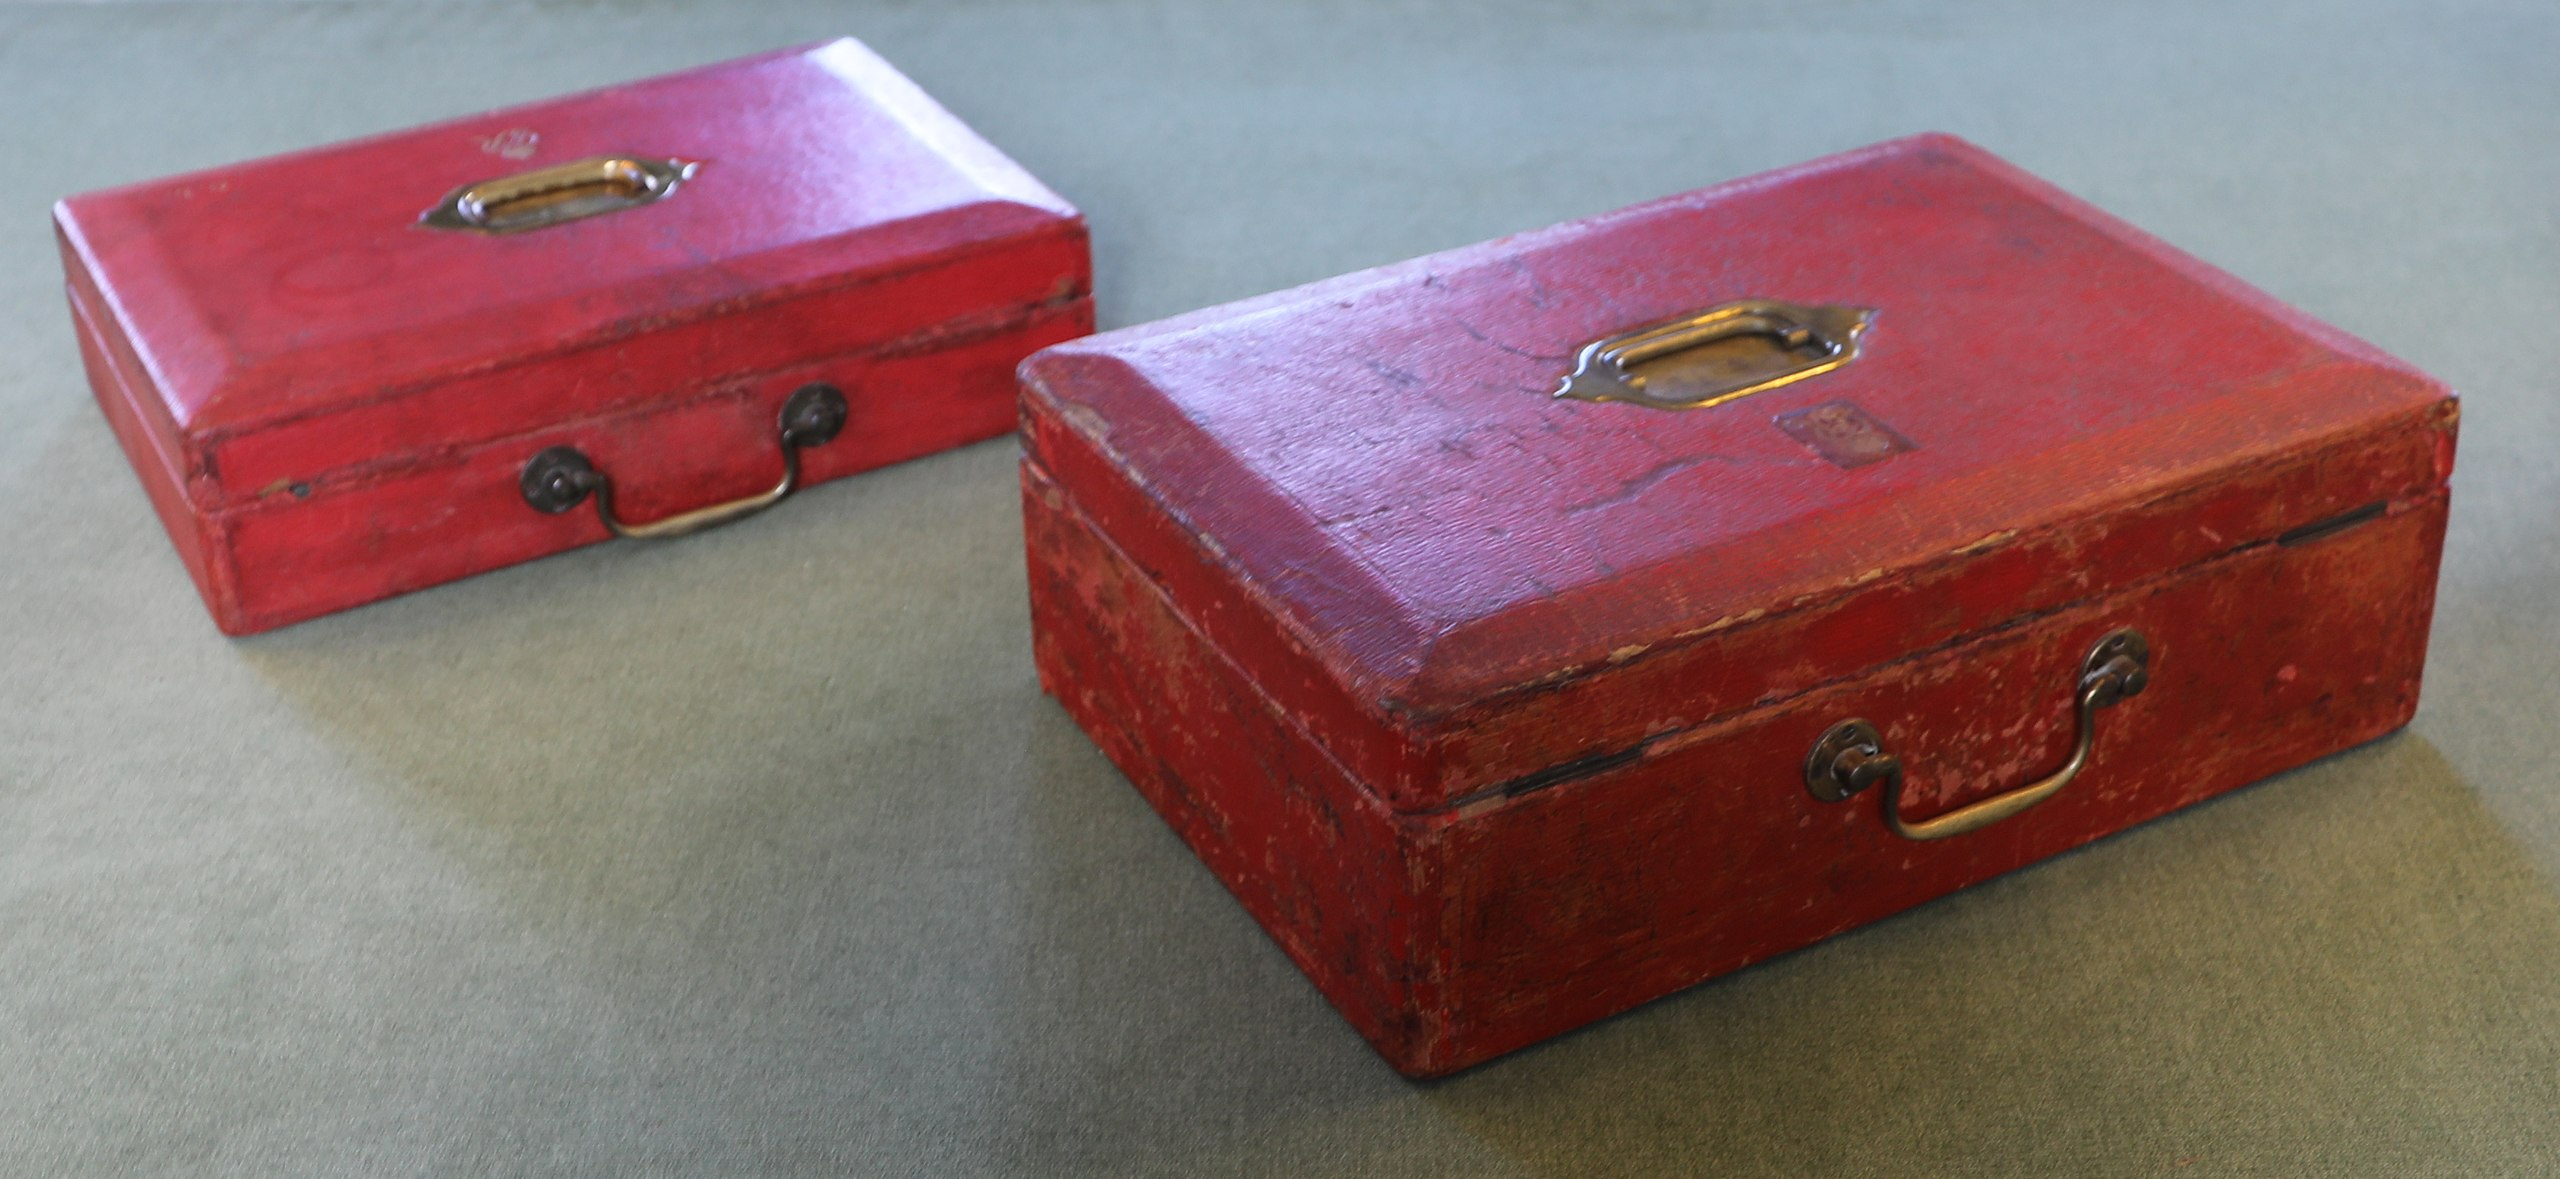
I really like the look of Despatch boxes. So I looked to see whether one can get a cover that looks like one. They do exist, but they cost more than I want to pay.
But I still want that sweet sweet Boxy goodness
The plan
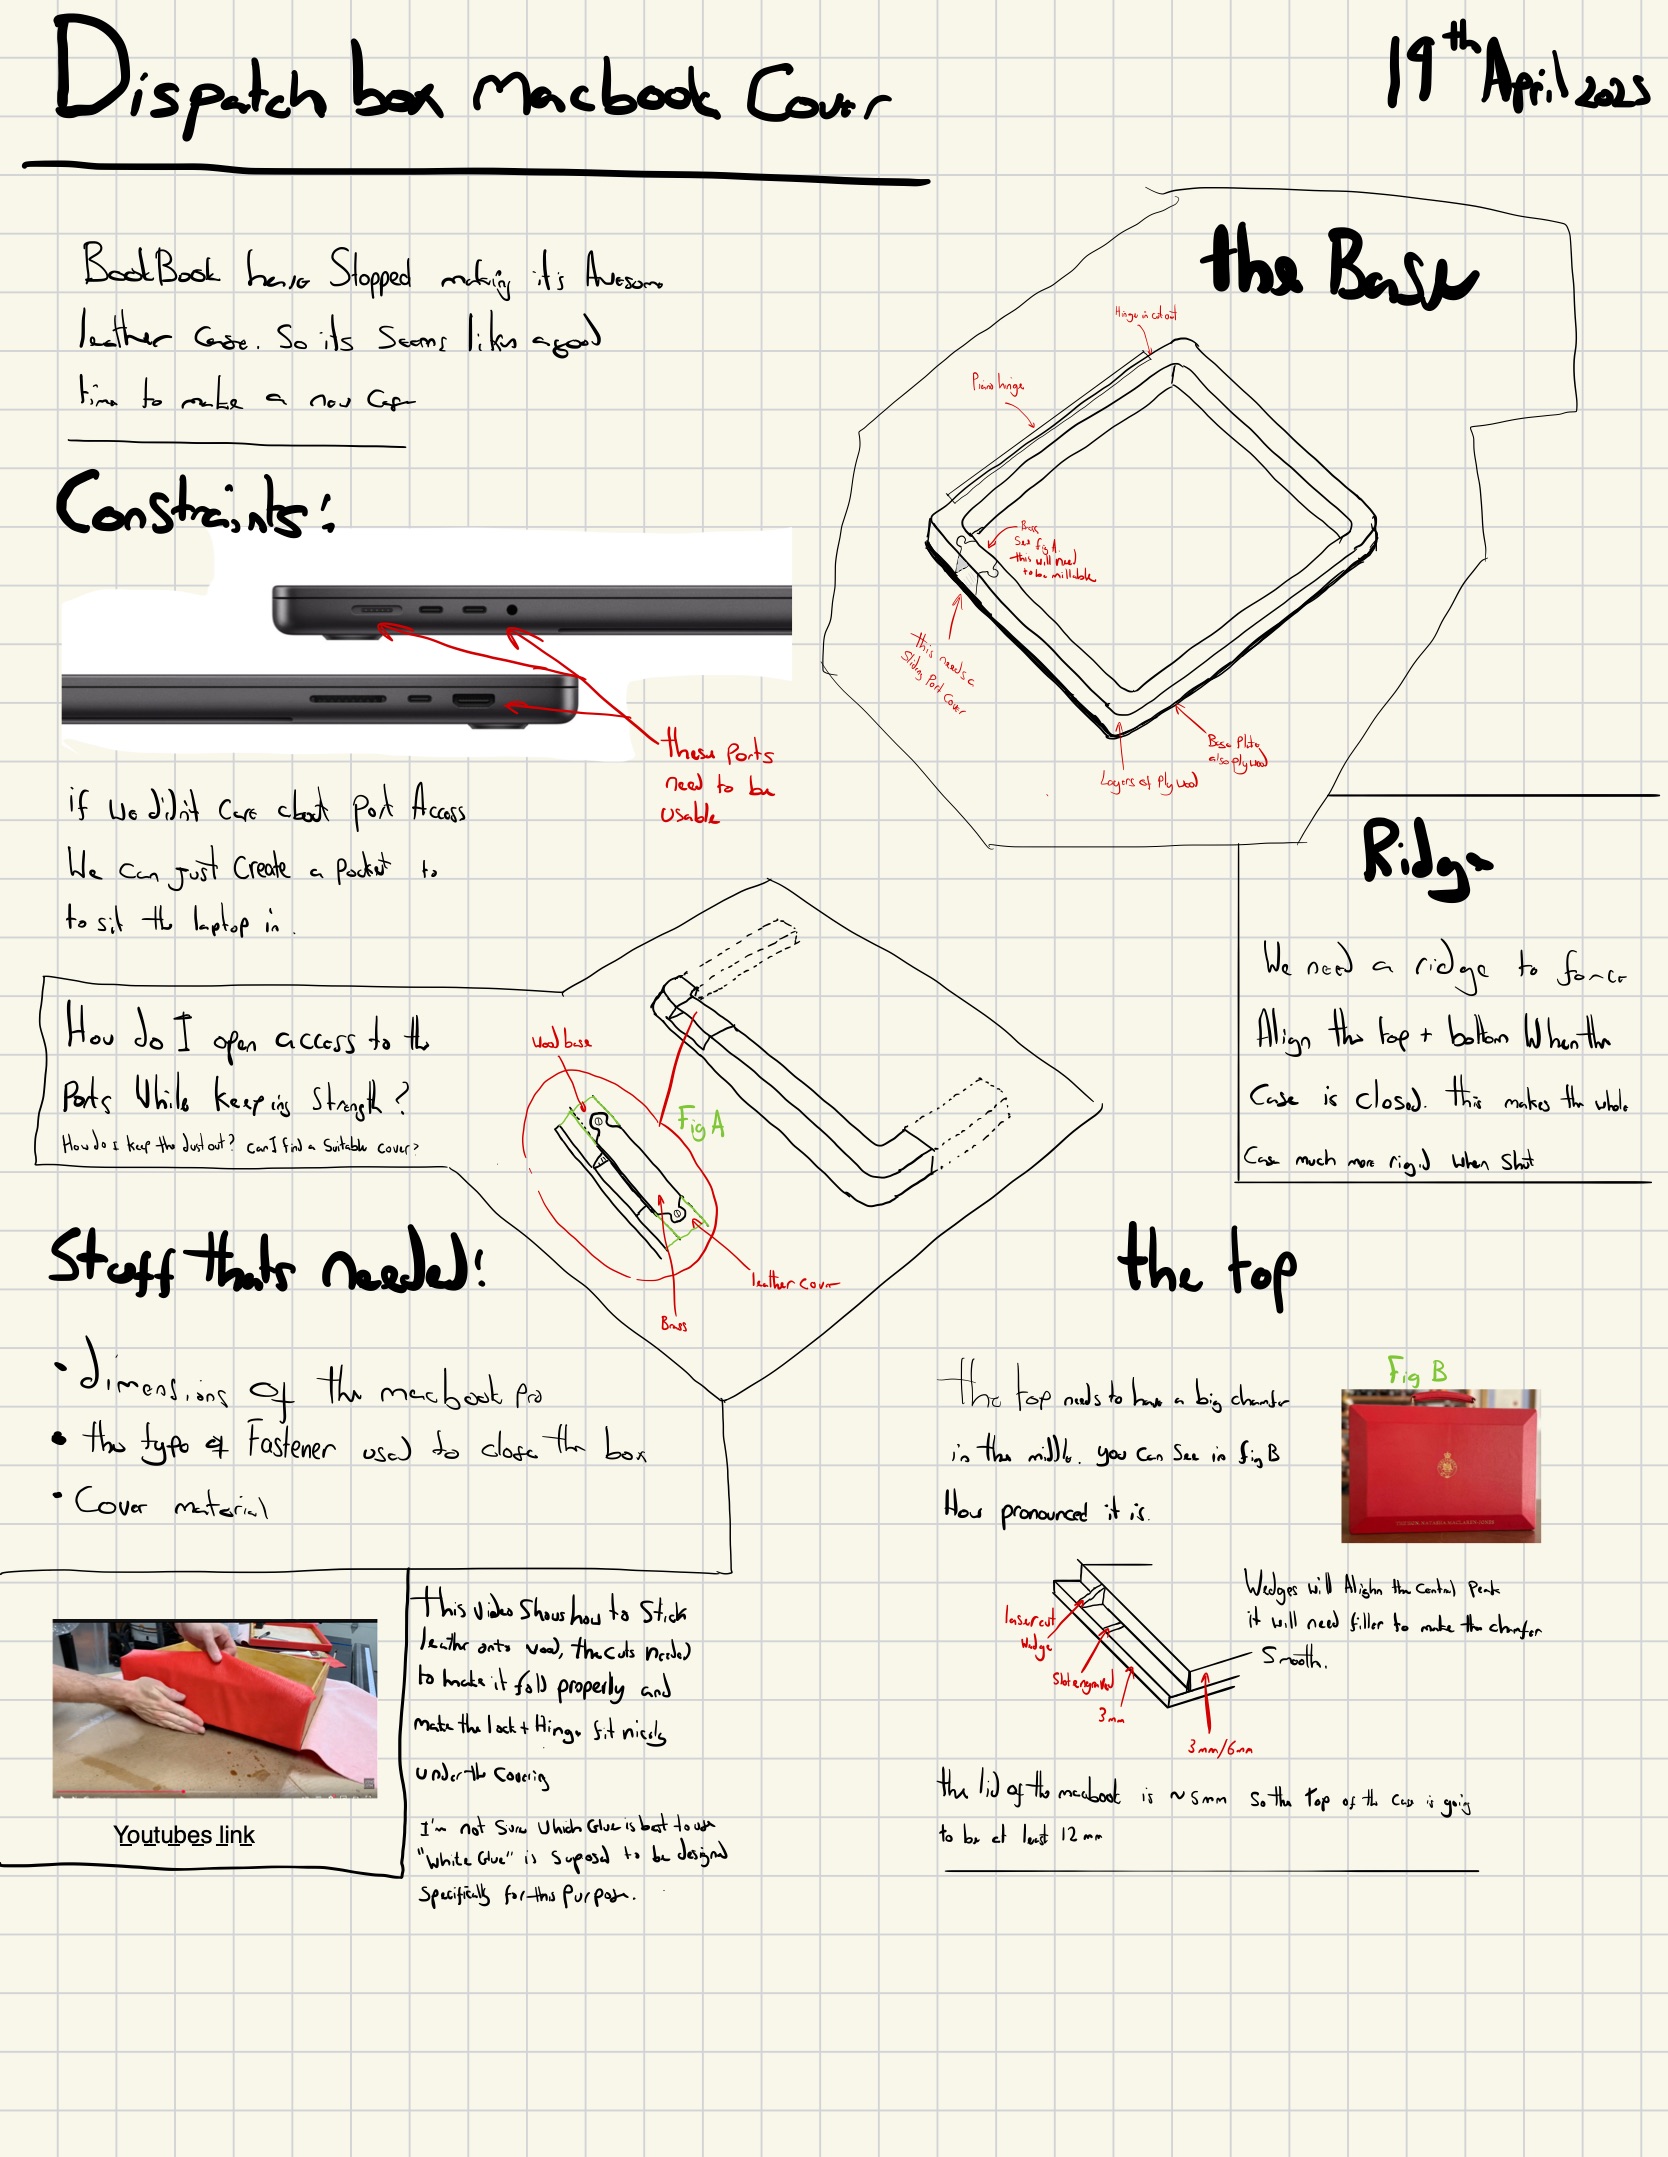
I have access to a laser cutter, this means that joinery is now not a daunting prospect. Mainly because I can plan the design out in parametric CAD, and relatively easily translate into sub-mm accurate cuts in plywood.
I sketched out a plan with some rough dimensions, yes, that is my real writing, no I can’t read it either:
In Worcester, there is a brilliant shop called remade, which sells offcuts of material. Moreover, being so close to Morgan they also sell offcuts of really good quality leather.
I have a good source for laser safe plywood which is not only good quality but doesn’t prop up authoritarian regimes.
Anyway, I have the materials, and rough plan. Here is the rough plan converted to dimensioned drawings:
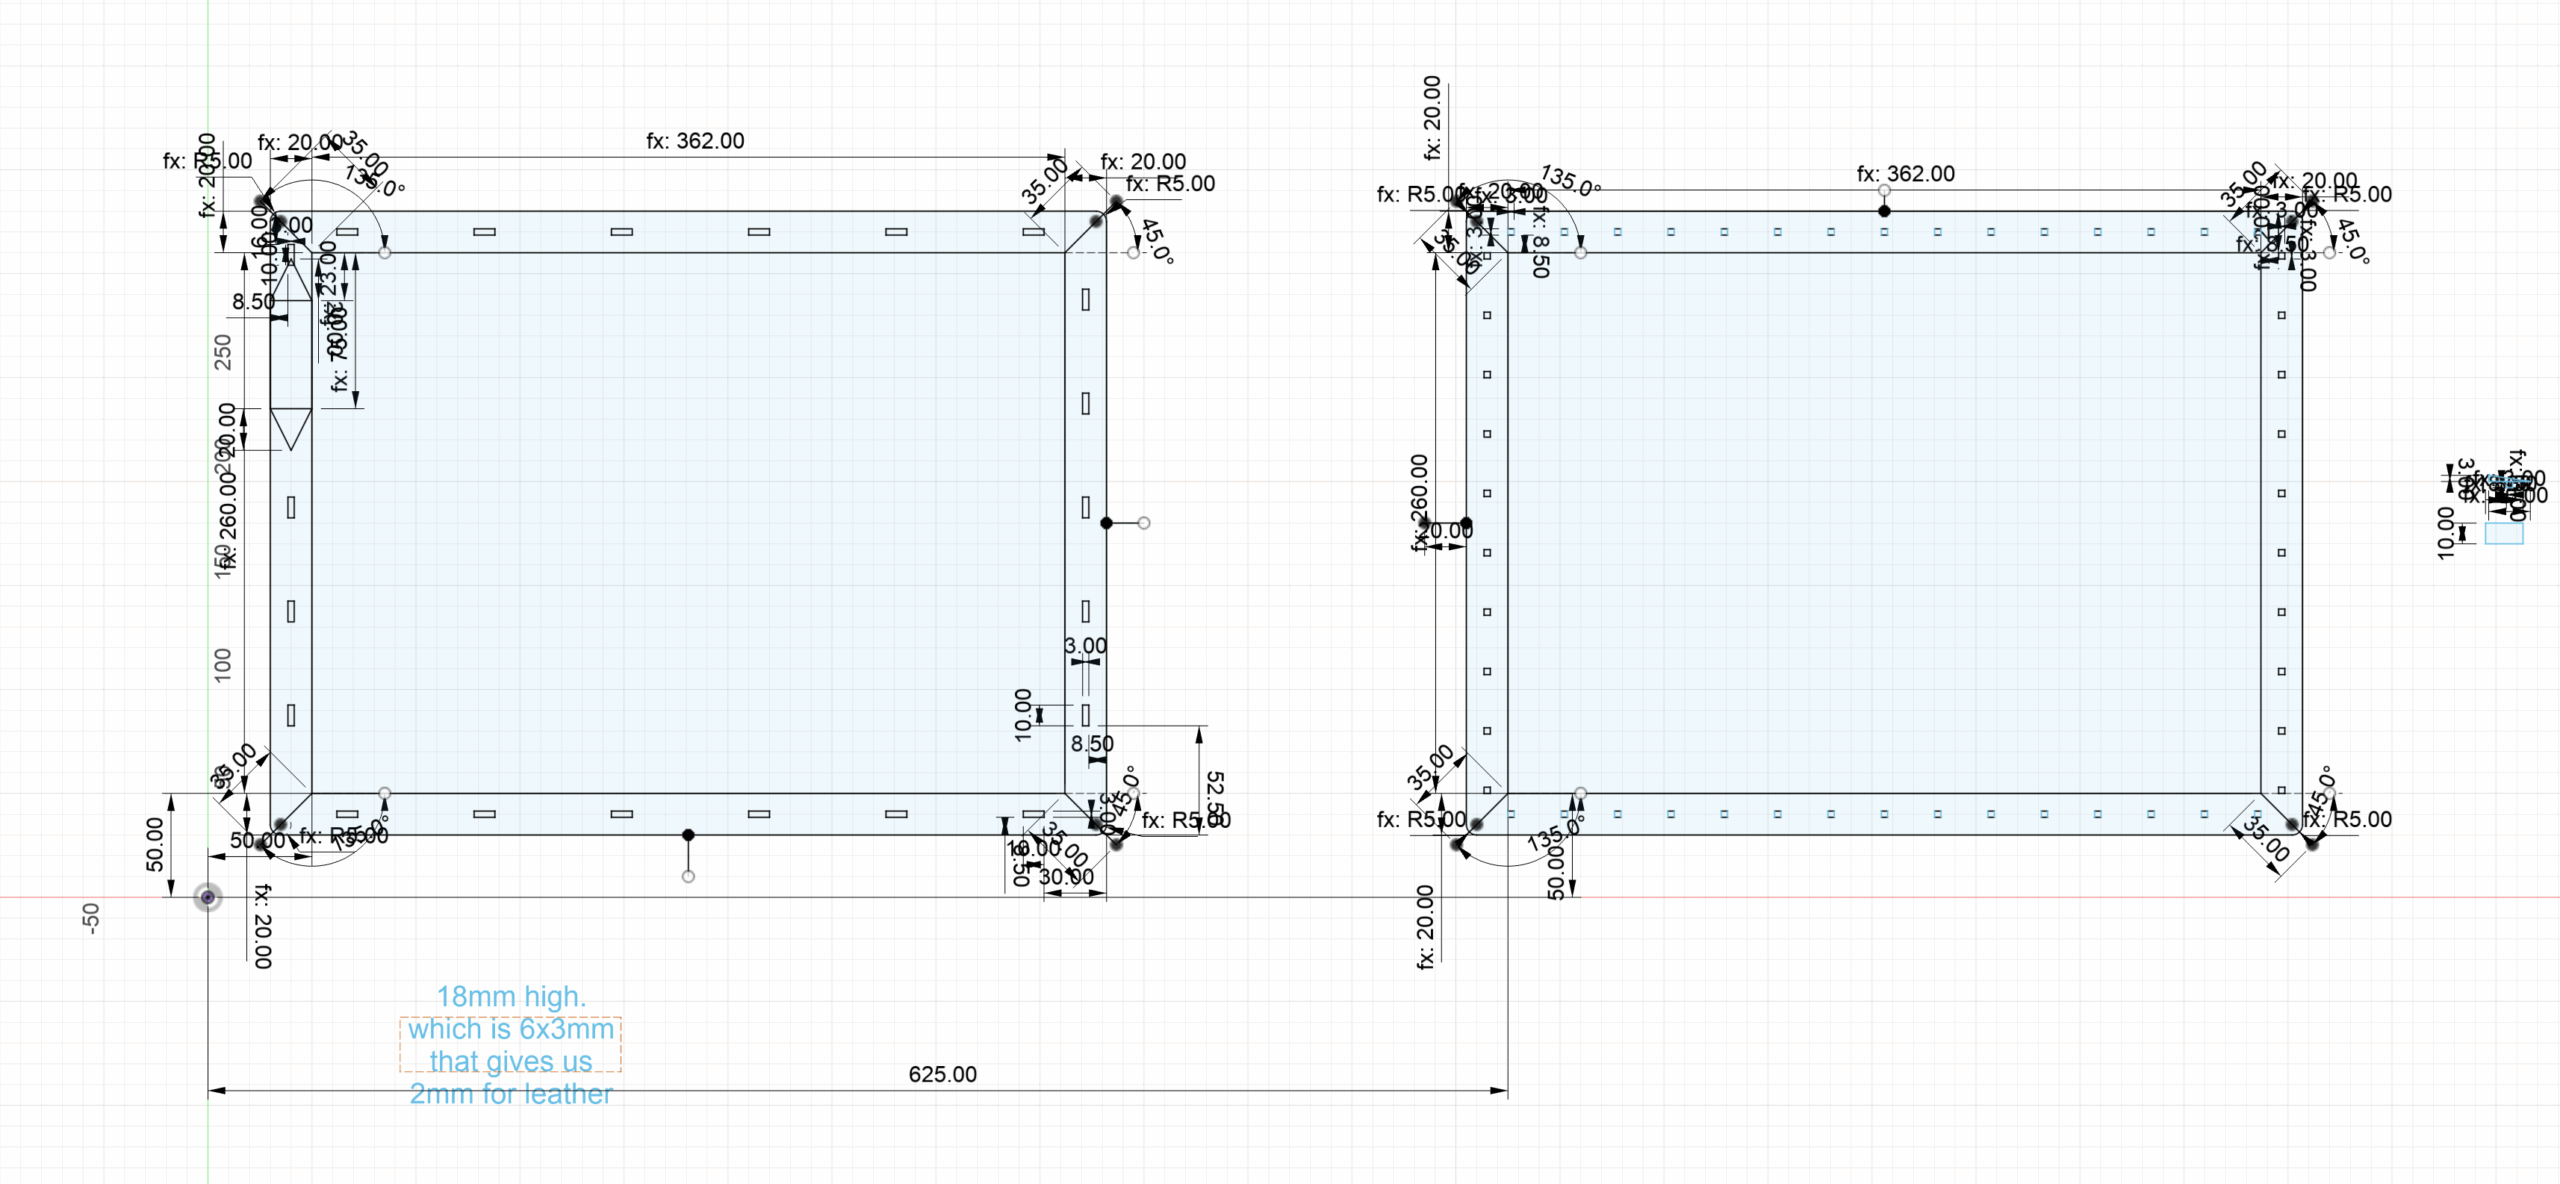
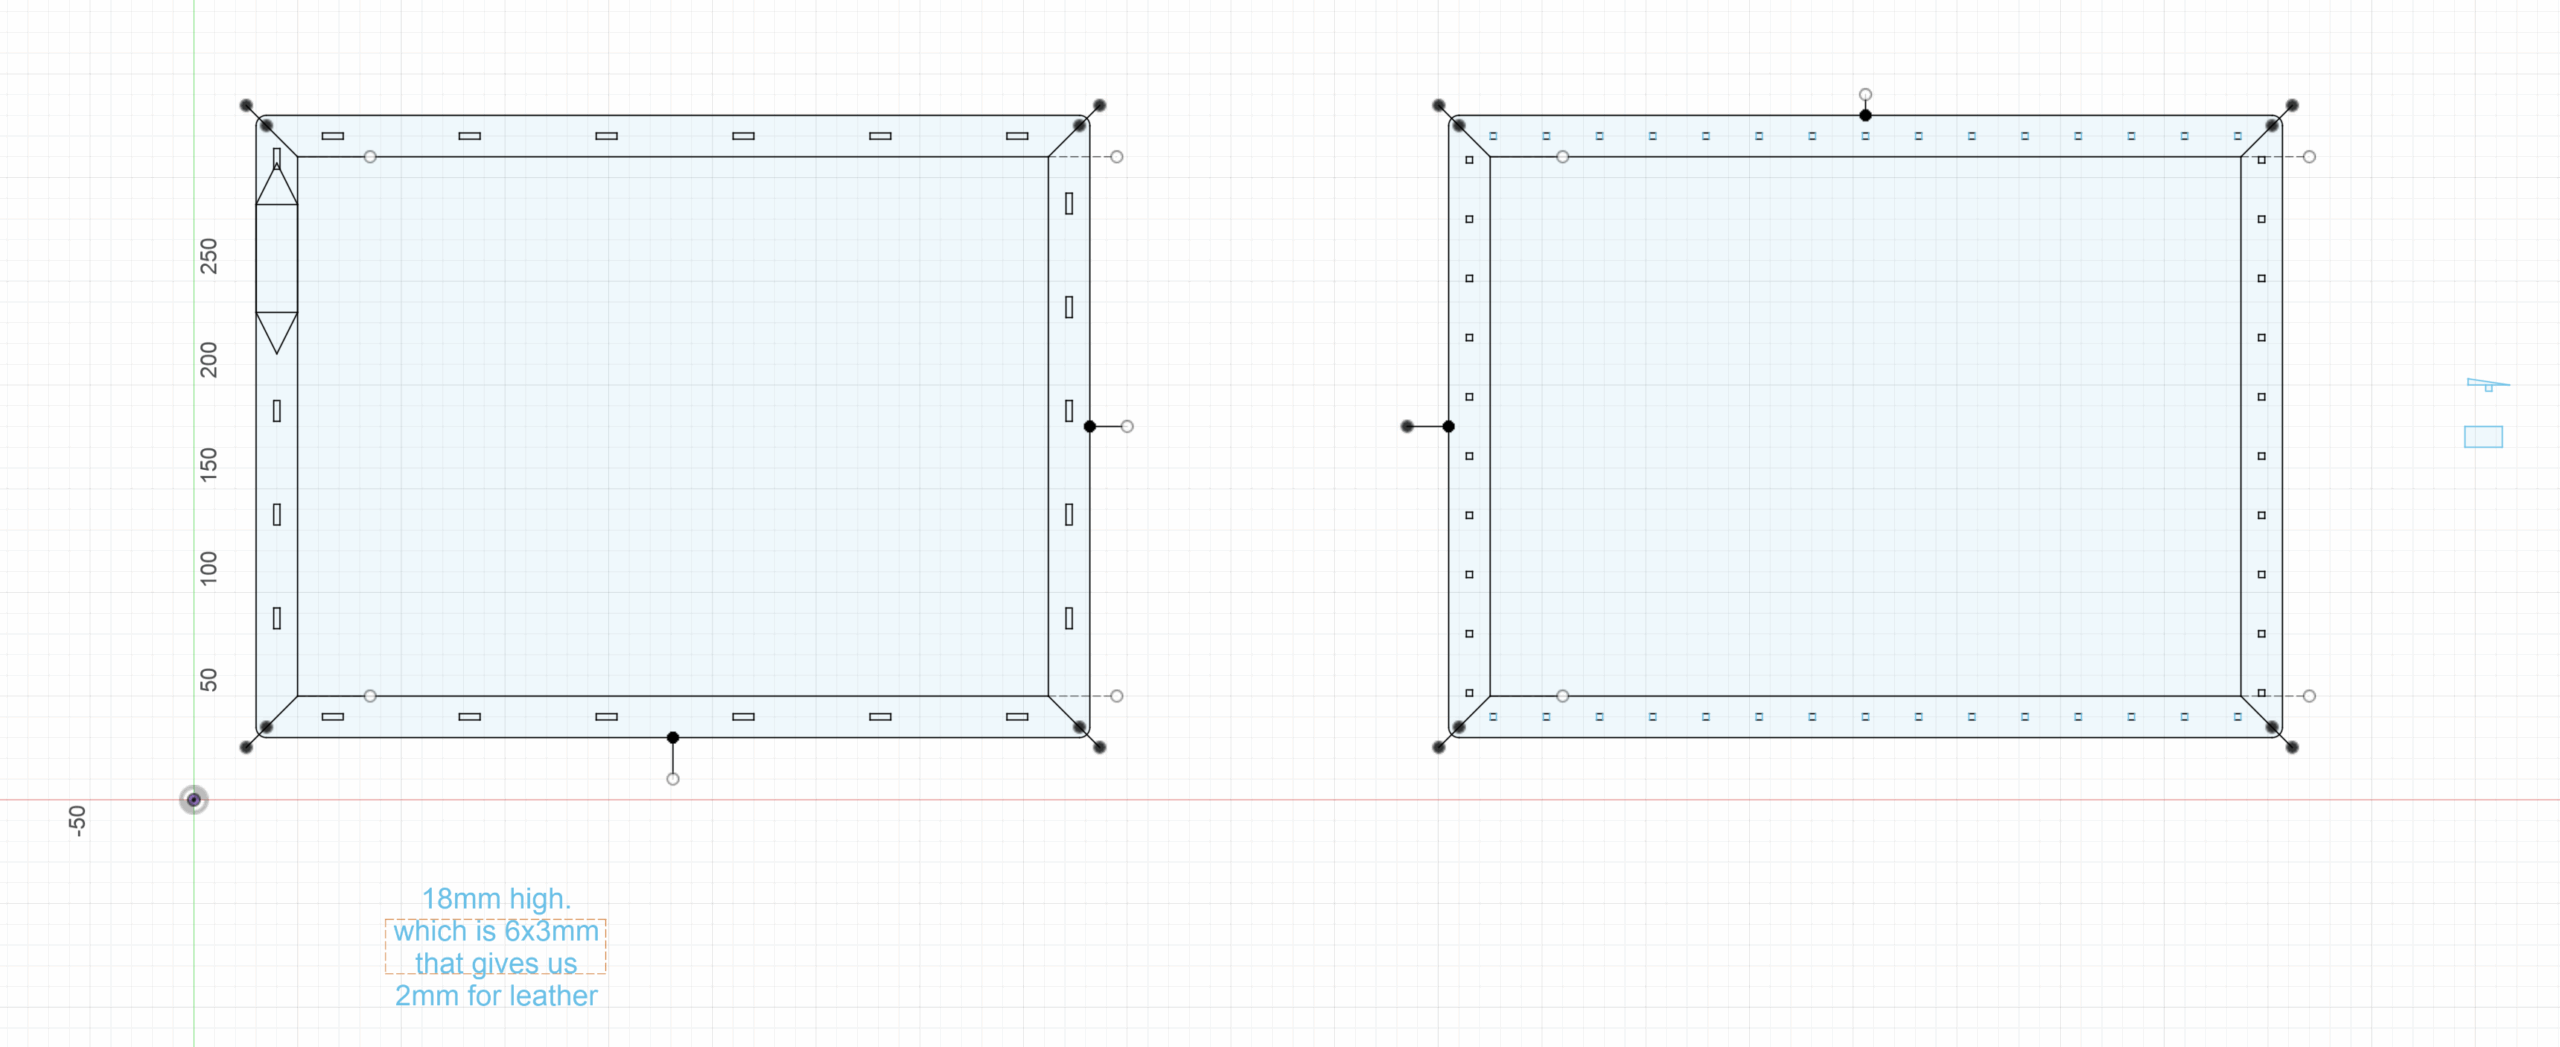
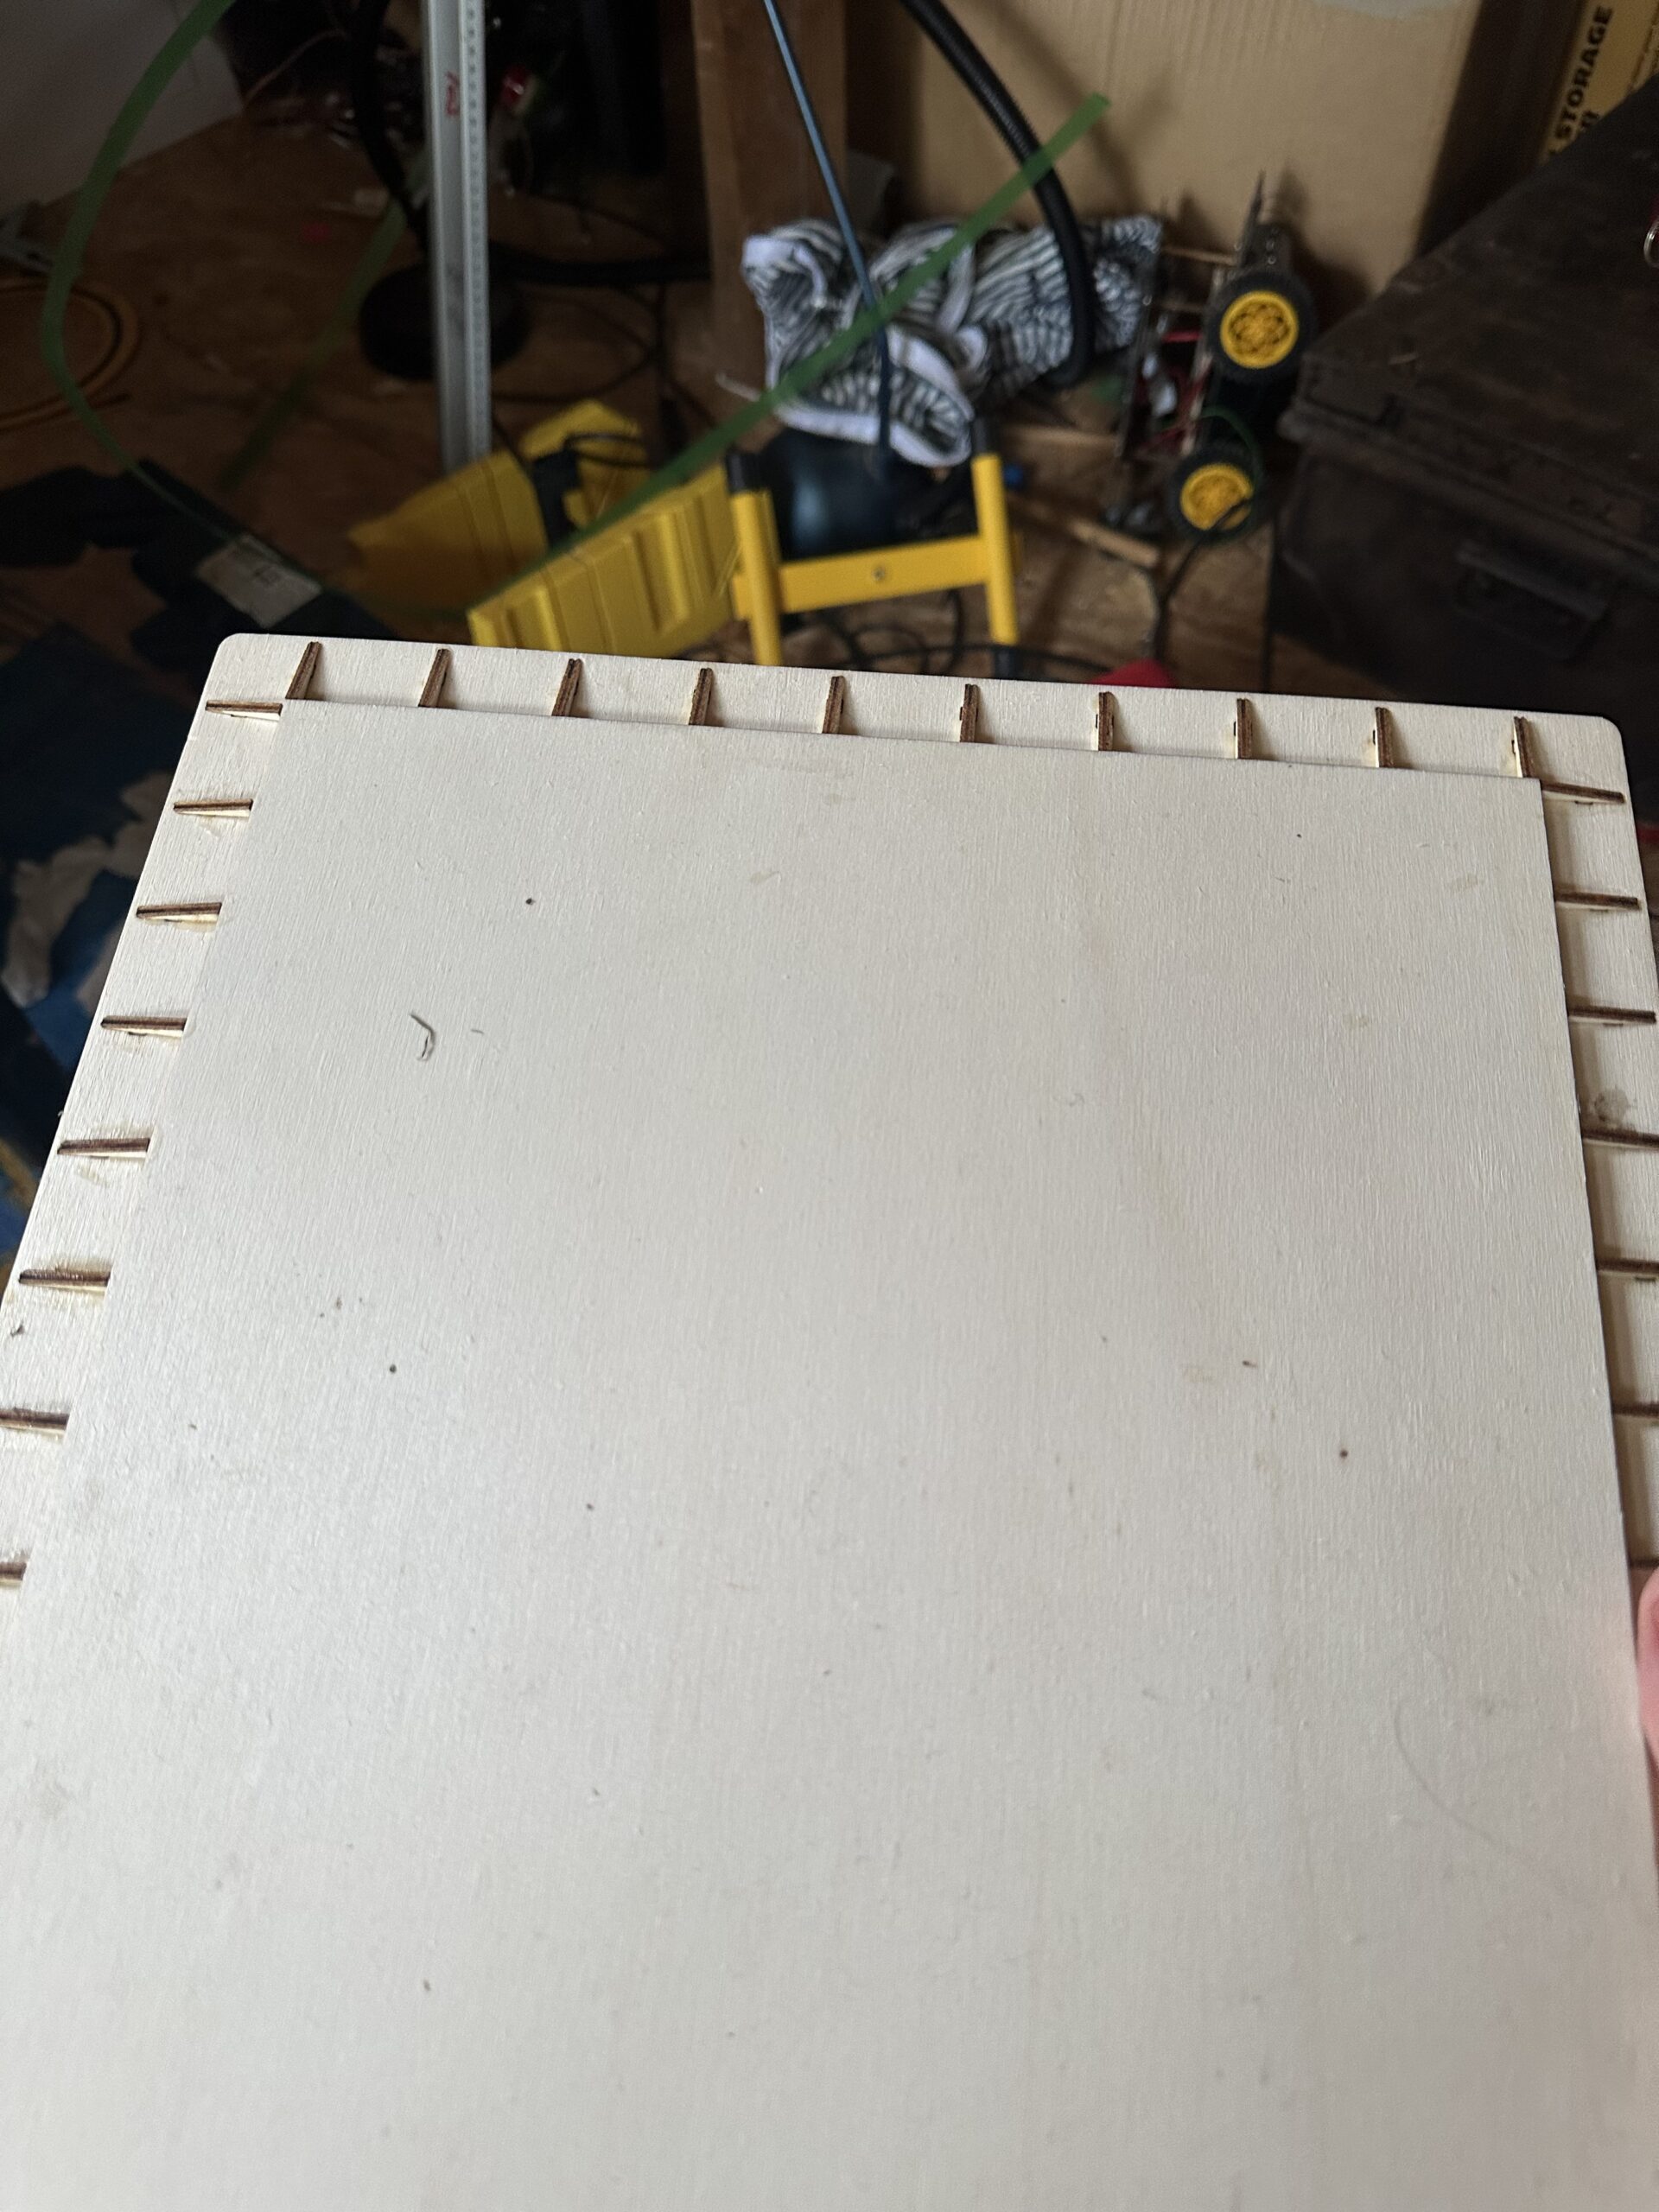
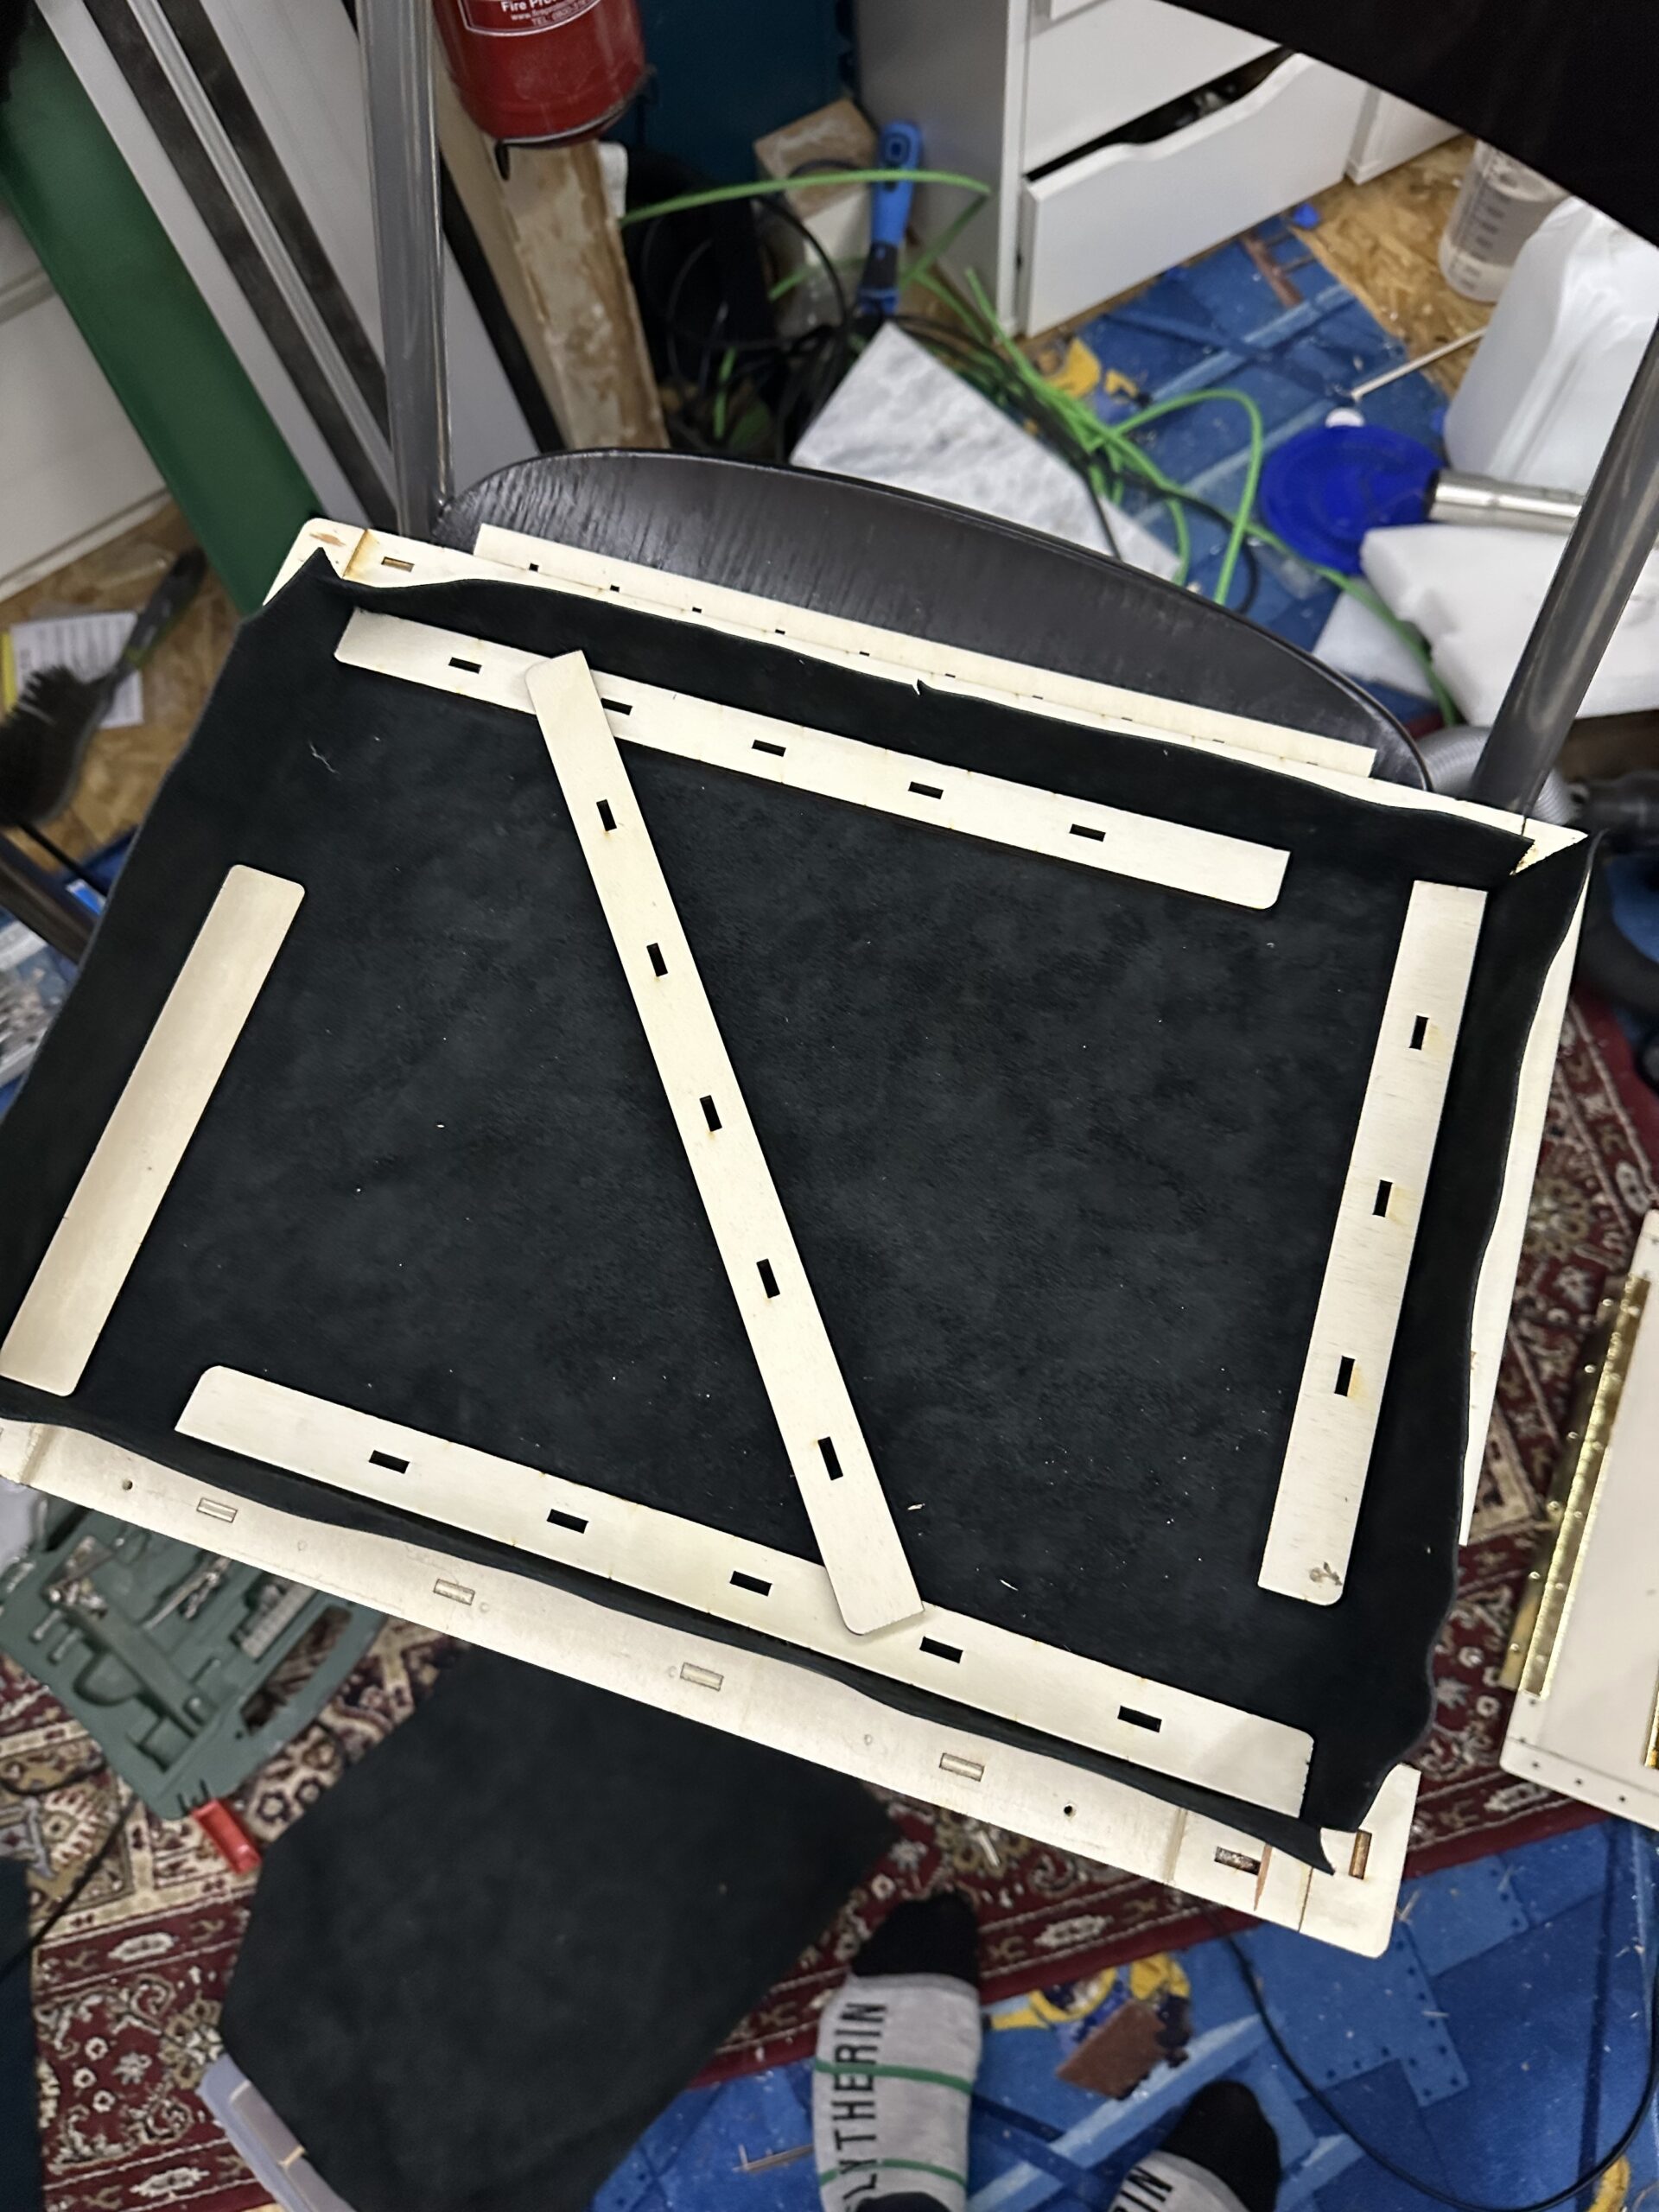
Its a bit easier to see without the dimensions. The “walls” are achieved by stacking and gluing slithers of plywood on top of each other. I use “biscuits” to align the slithers during glueing. They also provide significantly more strength once the glue has dried. There are two types of biscuit, the rectangle for the bottom assembly, and the slanted ones for the top.
The Build
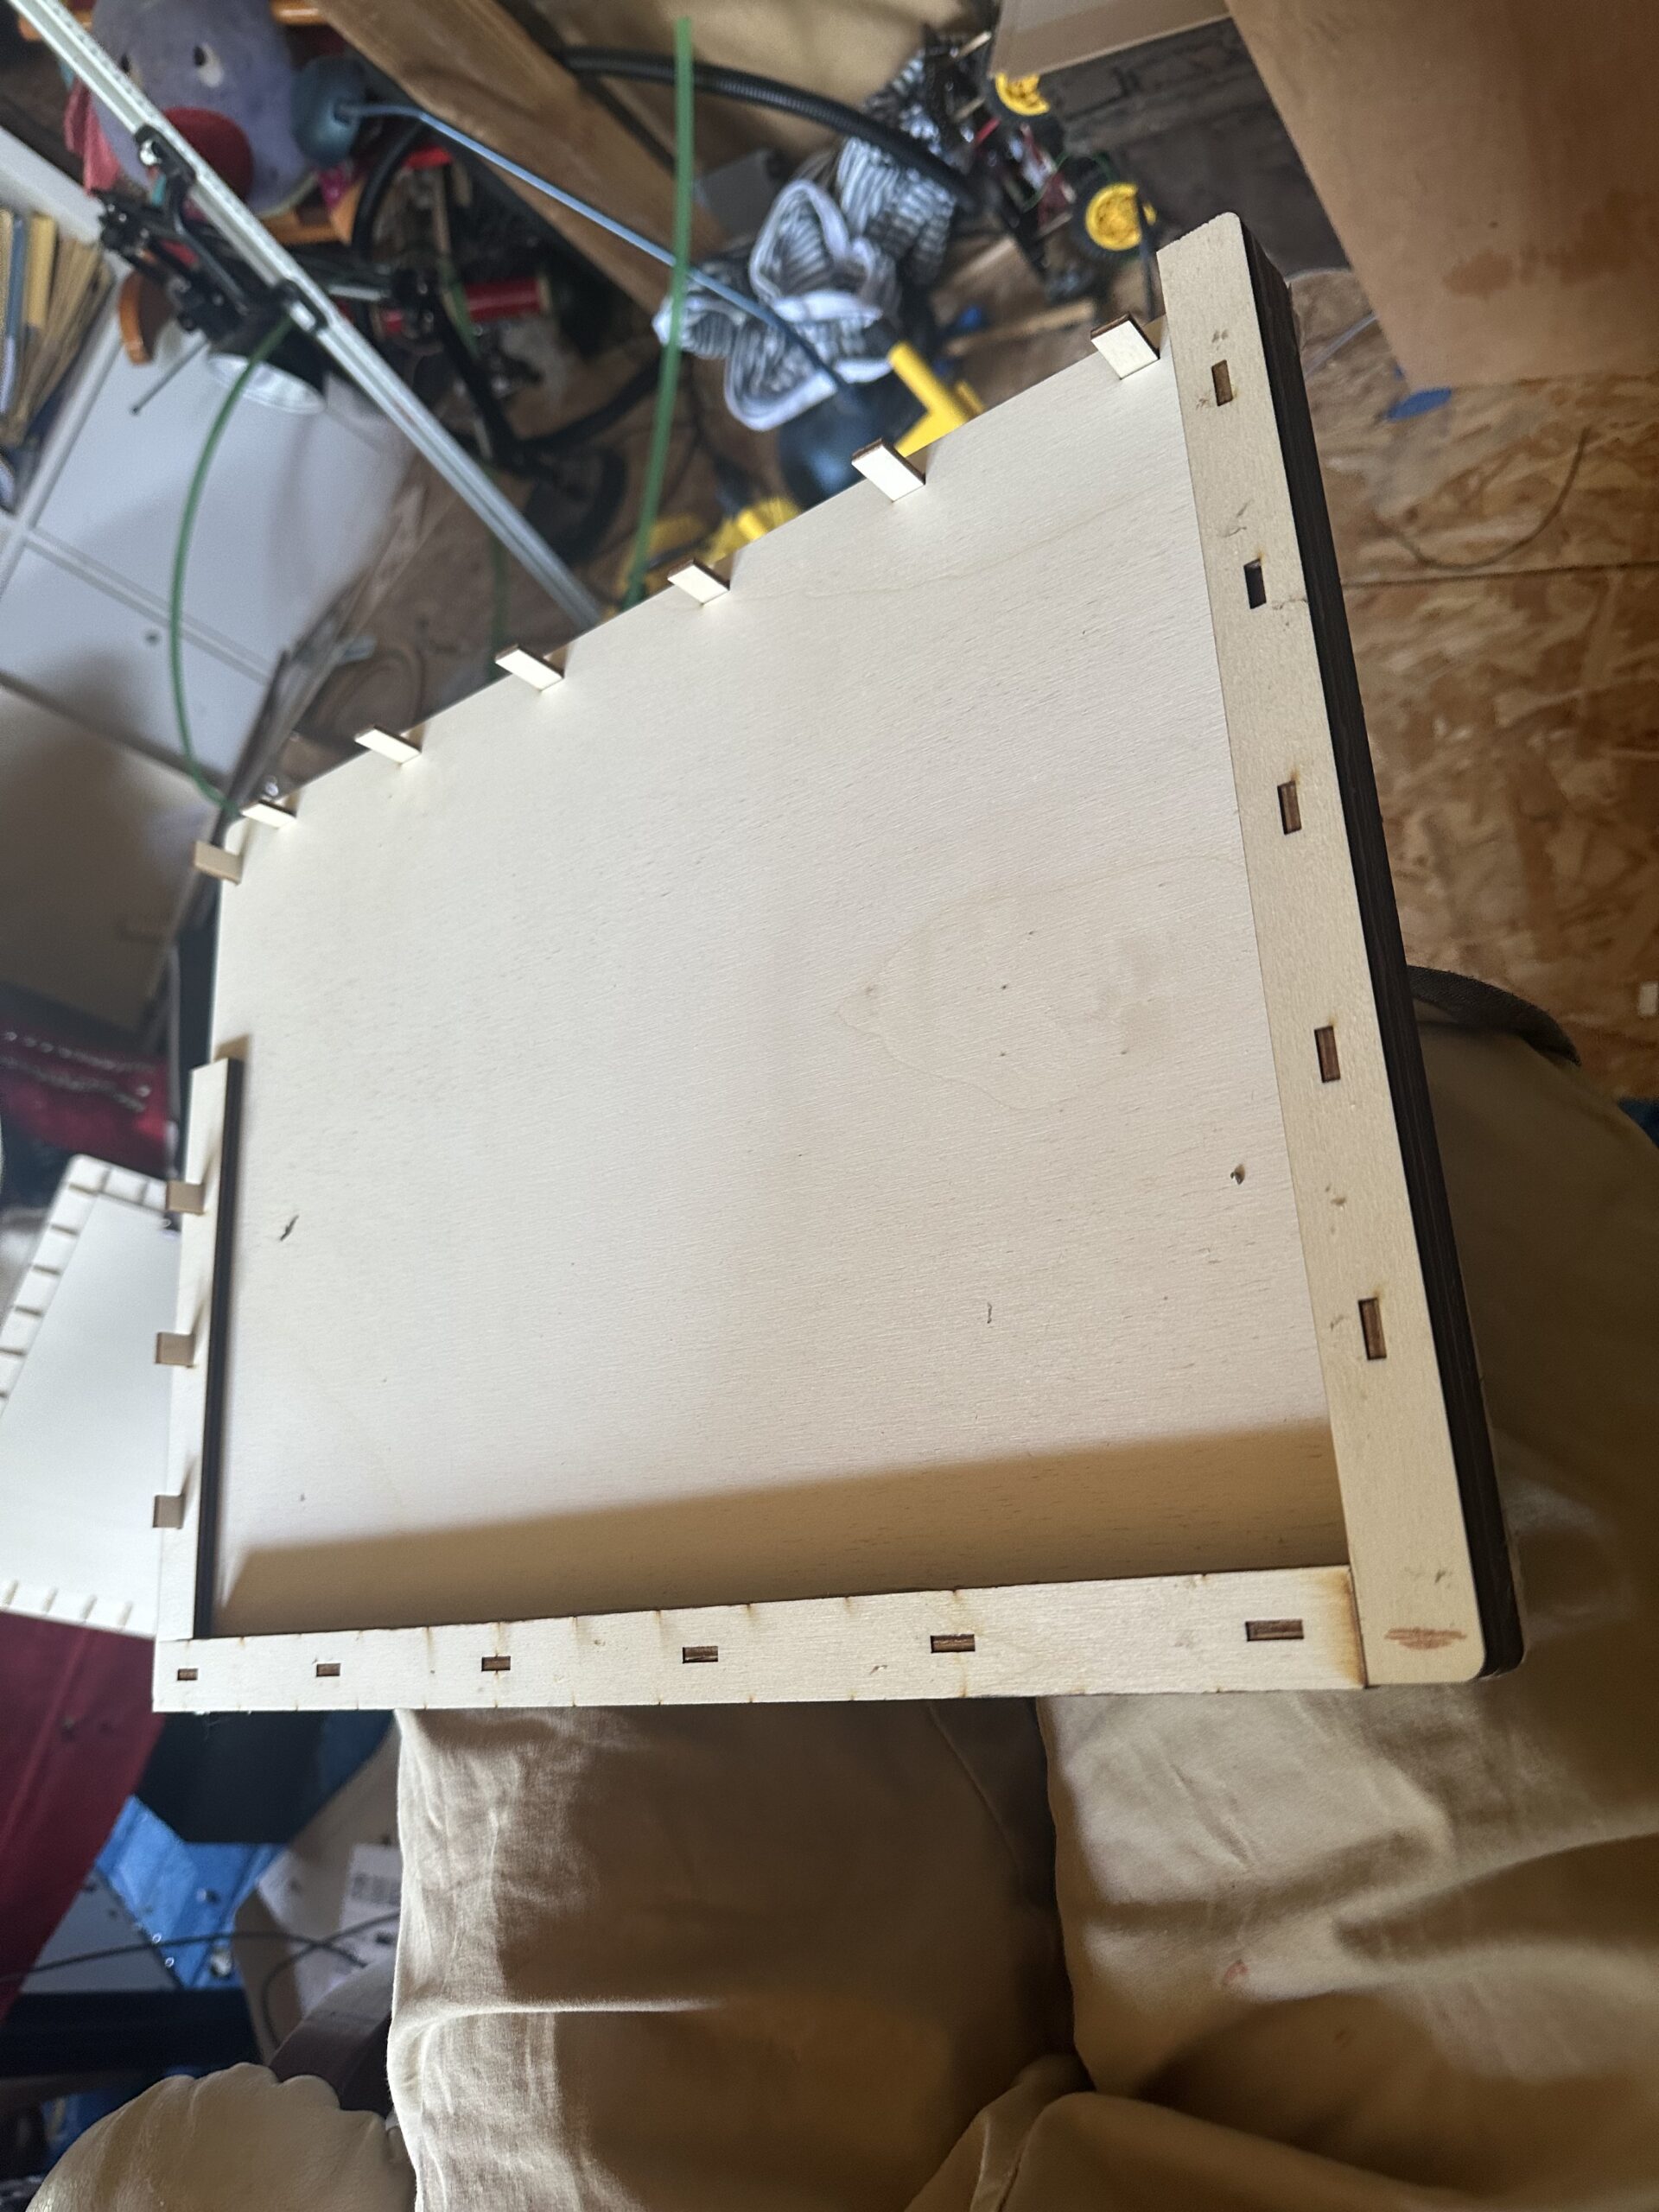
Here is a dry fit. You can see the biscuits in various states of exposure. I think this is version one, because I made a mistake on the top left of the box and put the biscuit the wrong way round.
Here you can see the ribs that hold the top plate in place. These are glued first, to make sure the top plate sits in the right position. The bottom of the ribs poke through the bottom to locate the “lip” of the lid.
This is after I have filled the gaps between the ribs, but before sanding.
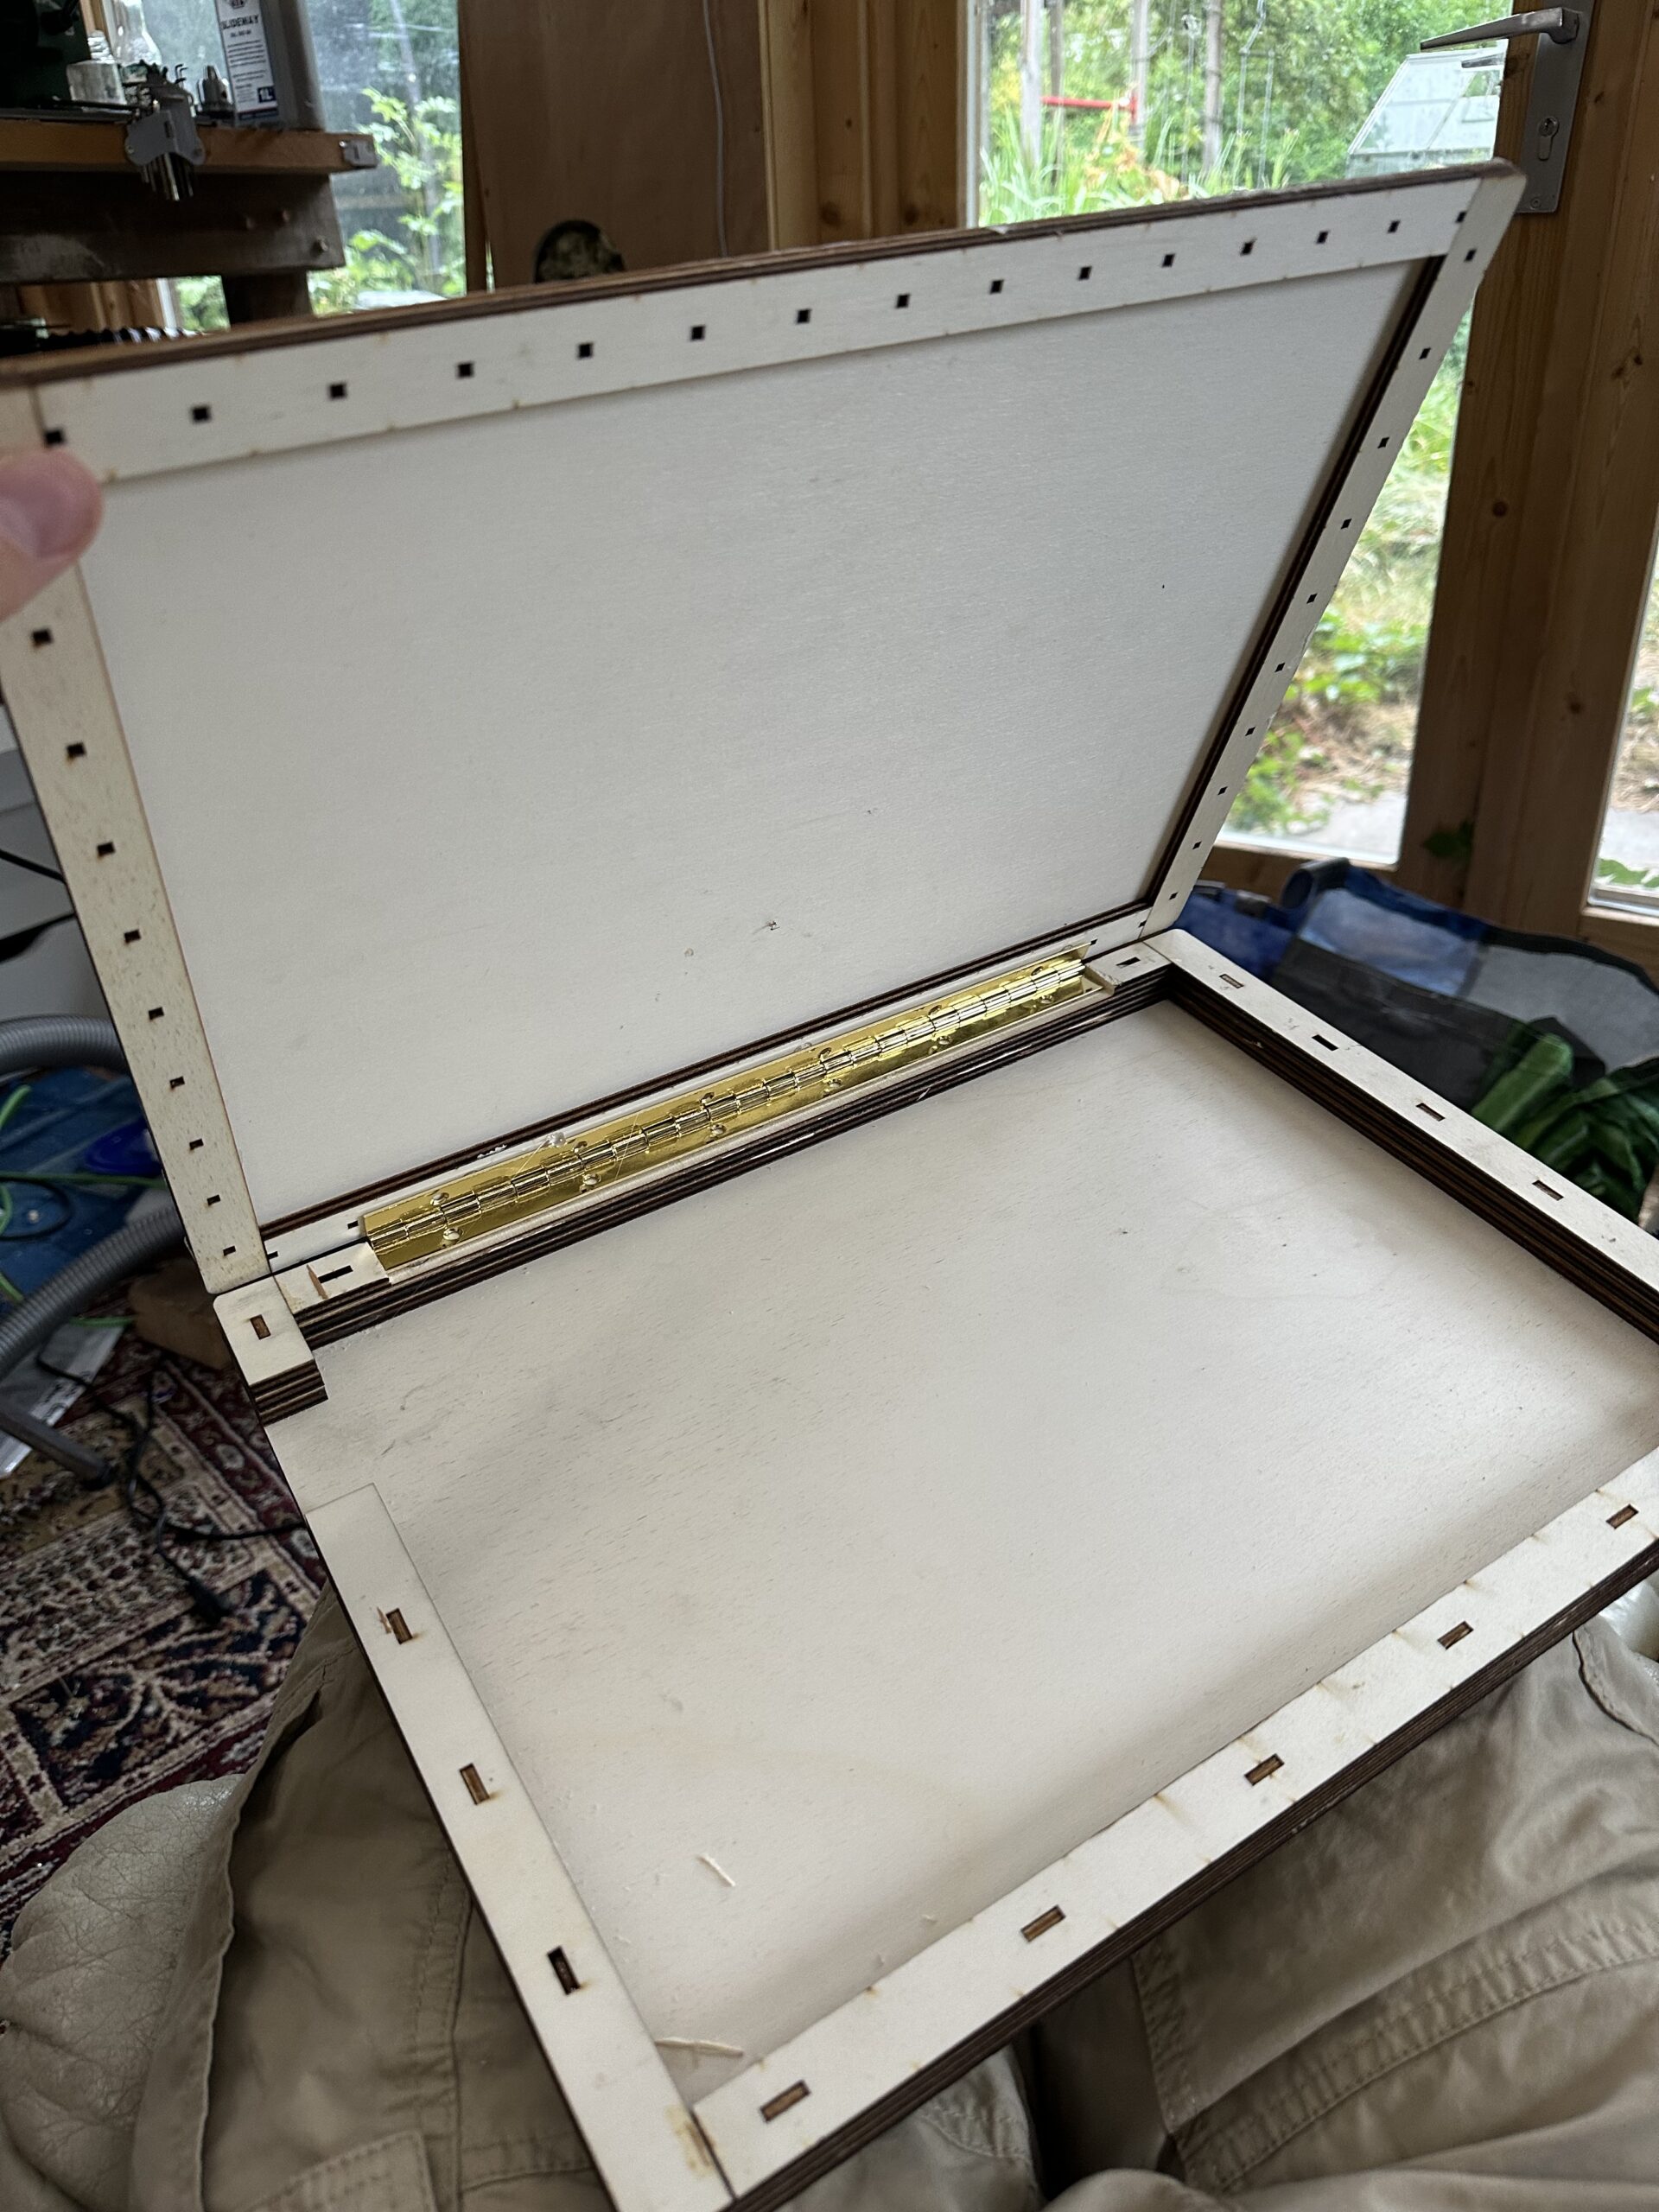
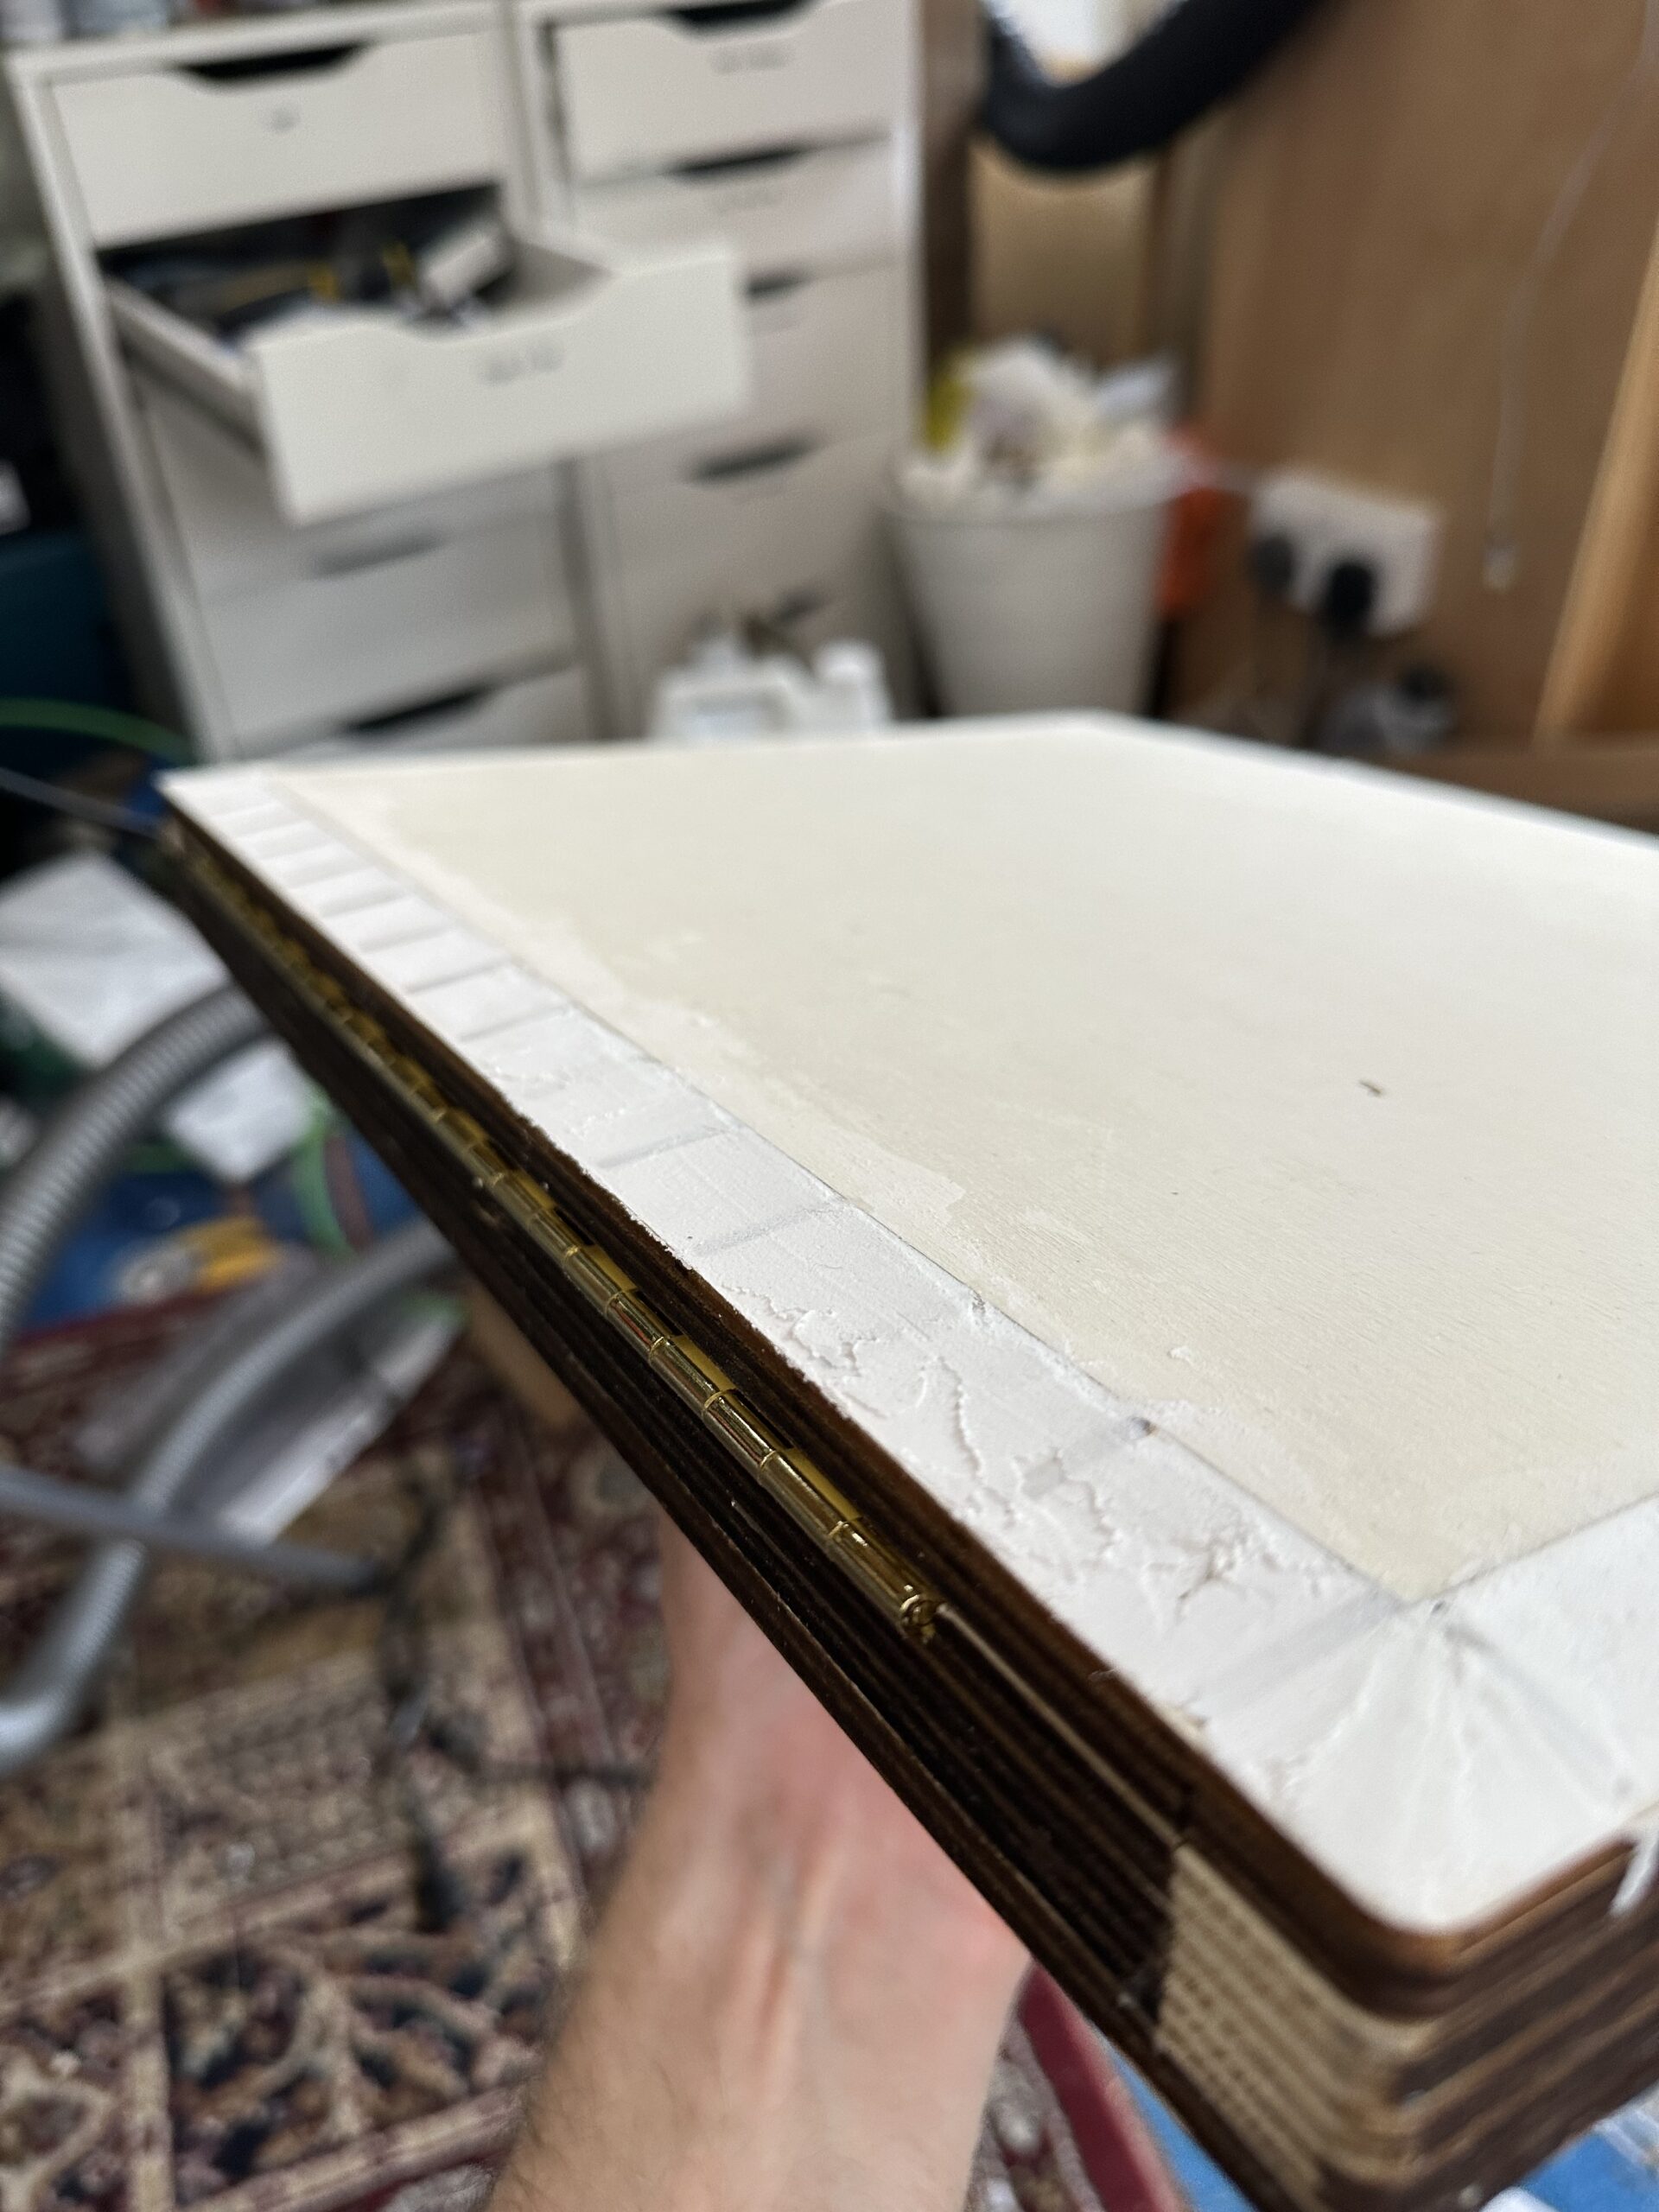
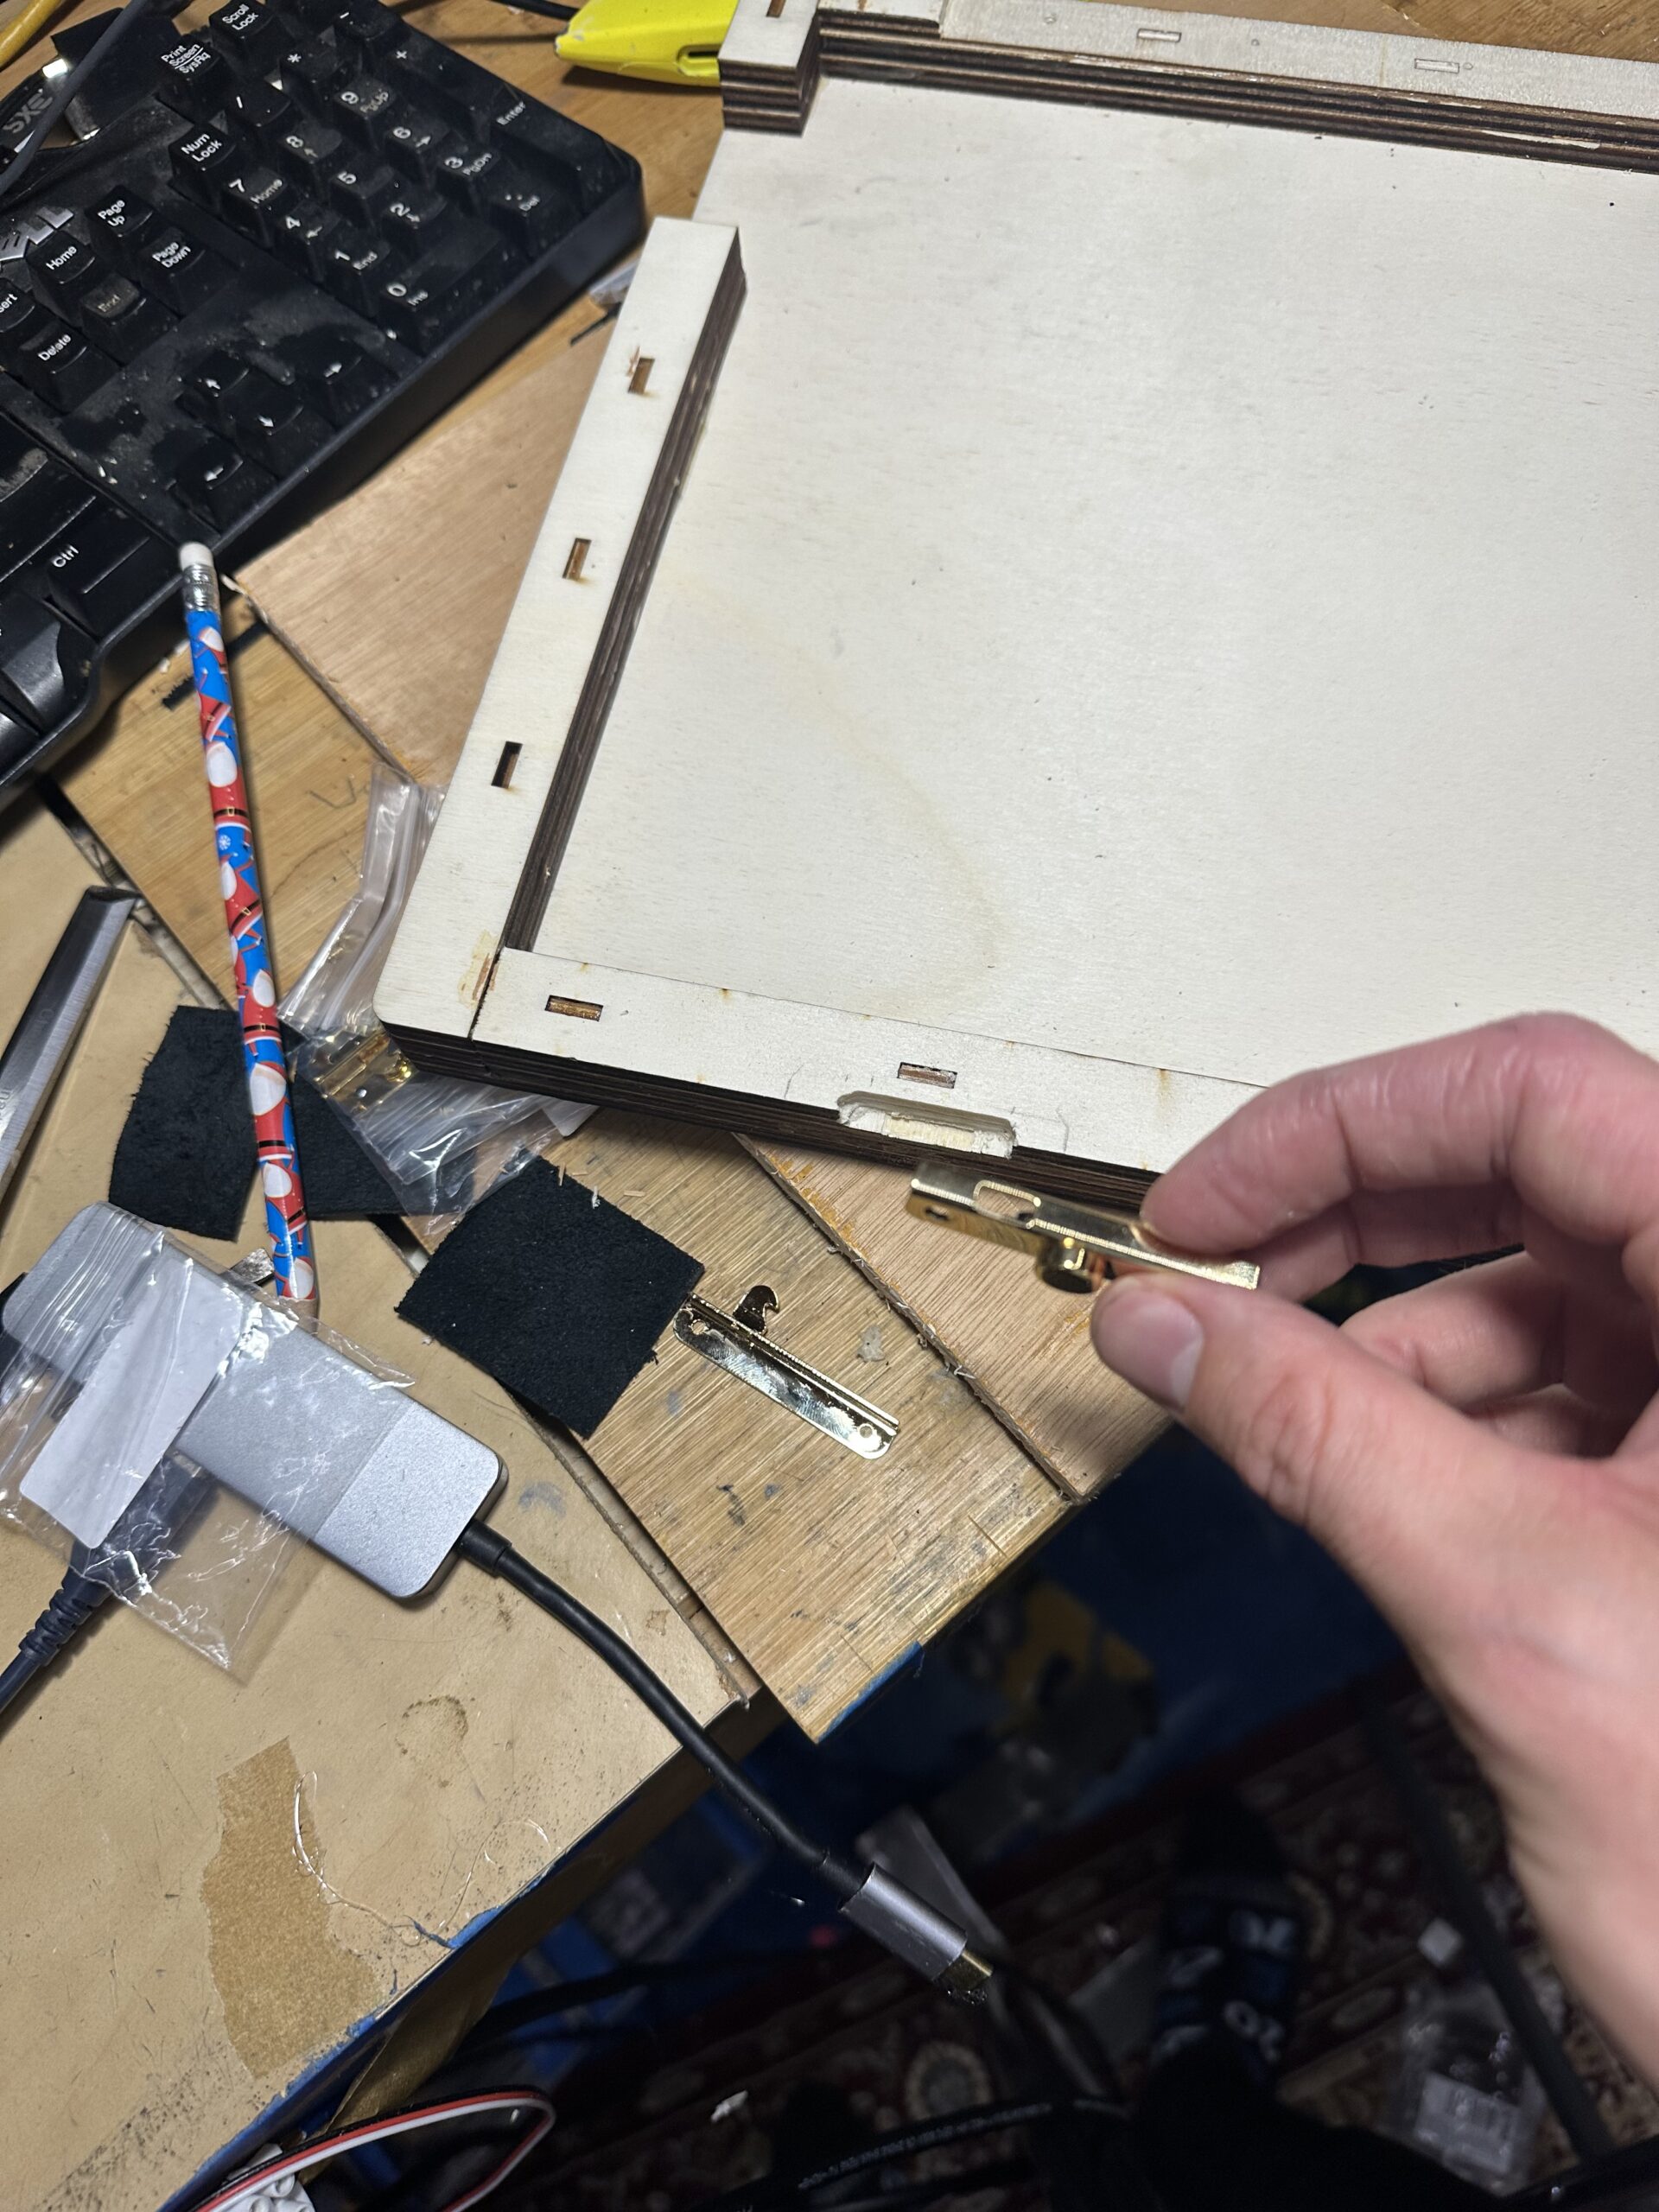
Here I am trying to fit the hinge. It was a fiddly process. I needed to get the right depth, and make sure that the hinge was exactly parallel with the lid, to stop it opening at a funny angle. To make things worse, there is only 6mm of plywood for the screws to bite into for the lid, so any mistakes are costly.
Using hot glue allowed me to locate the hinge and test. I started to cut a pocket for the bottom of the hinge with a chisel. I didn’t have enough skill to make that neat, so I used a mill to pocket it out instead.
Working out the dimensions for the leather lining. The laser I had wasn’t able to effectively cut leather, so it was a very manual process. This is my attempt at the traditional way to line the inside of a box.
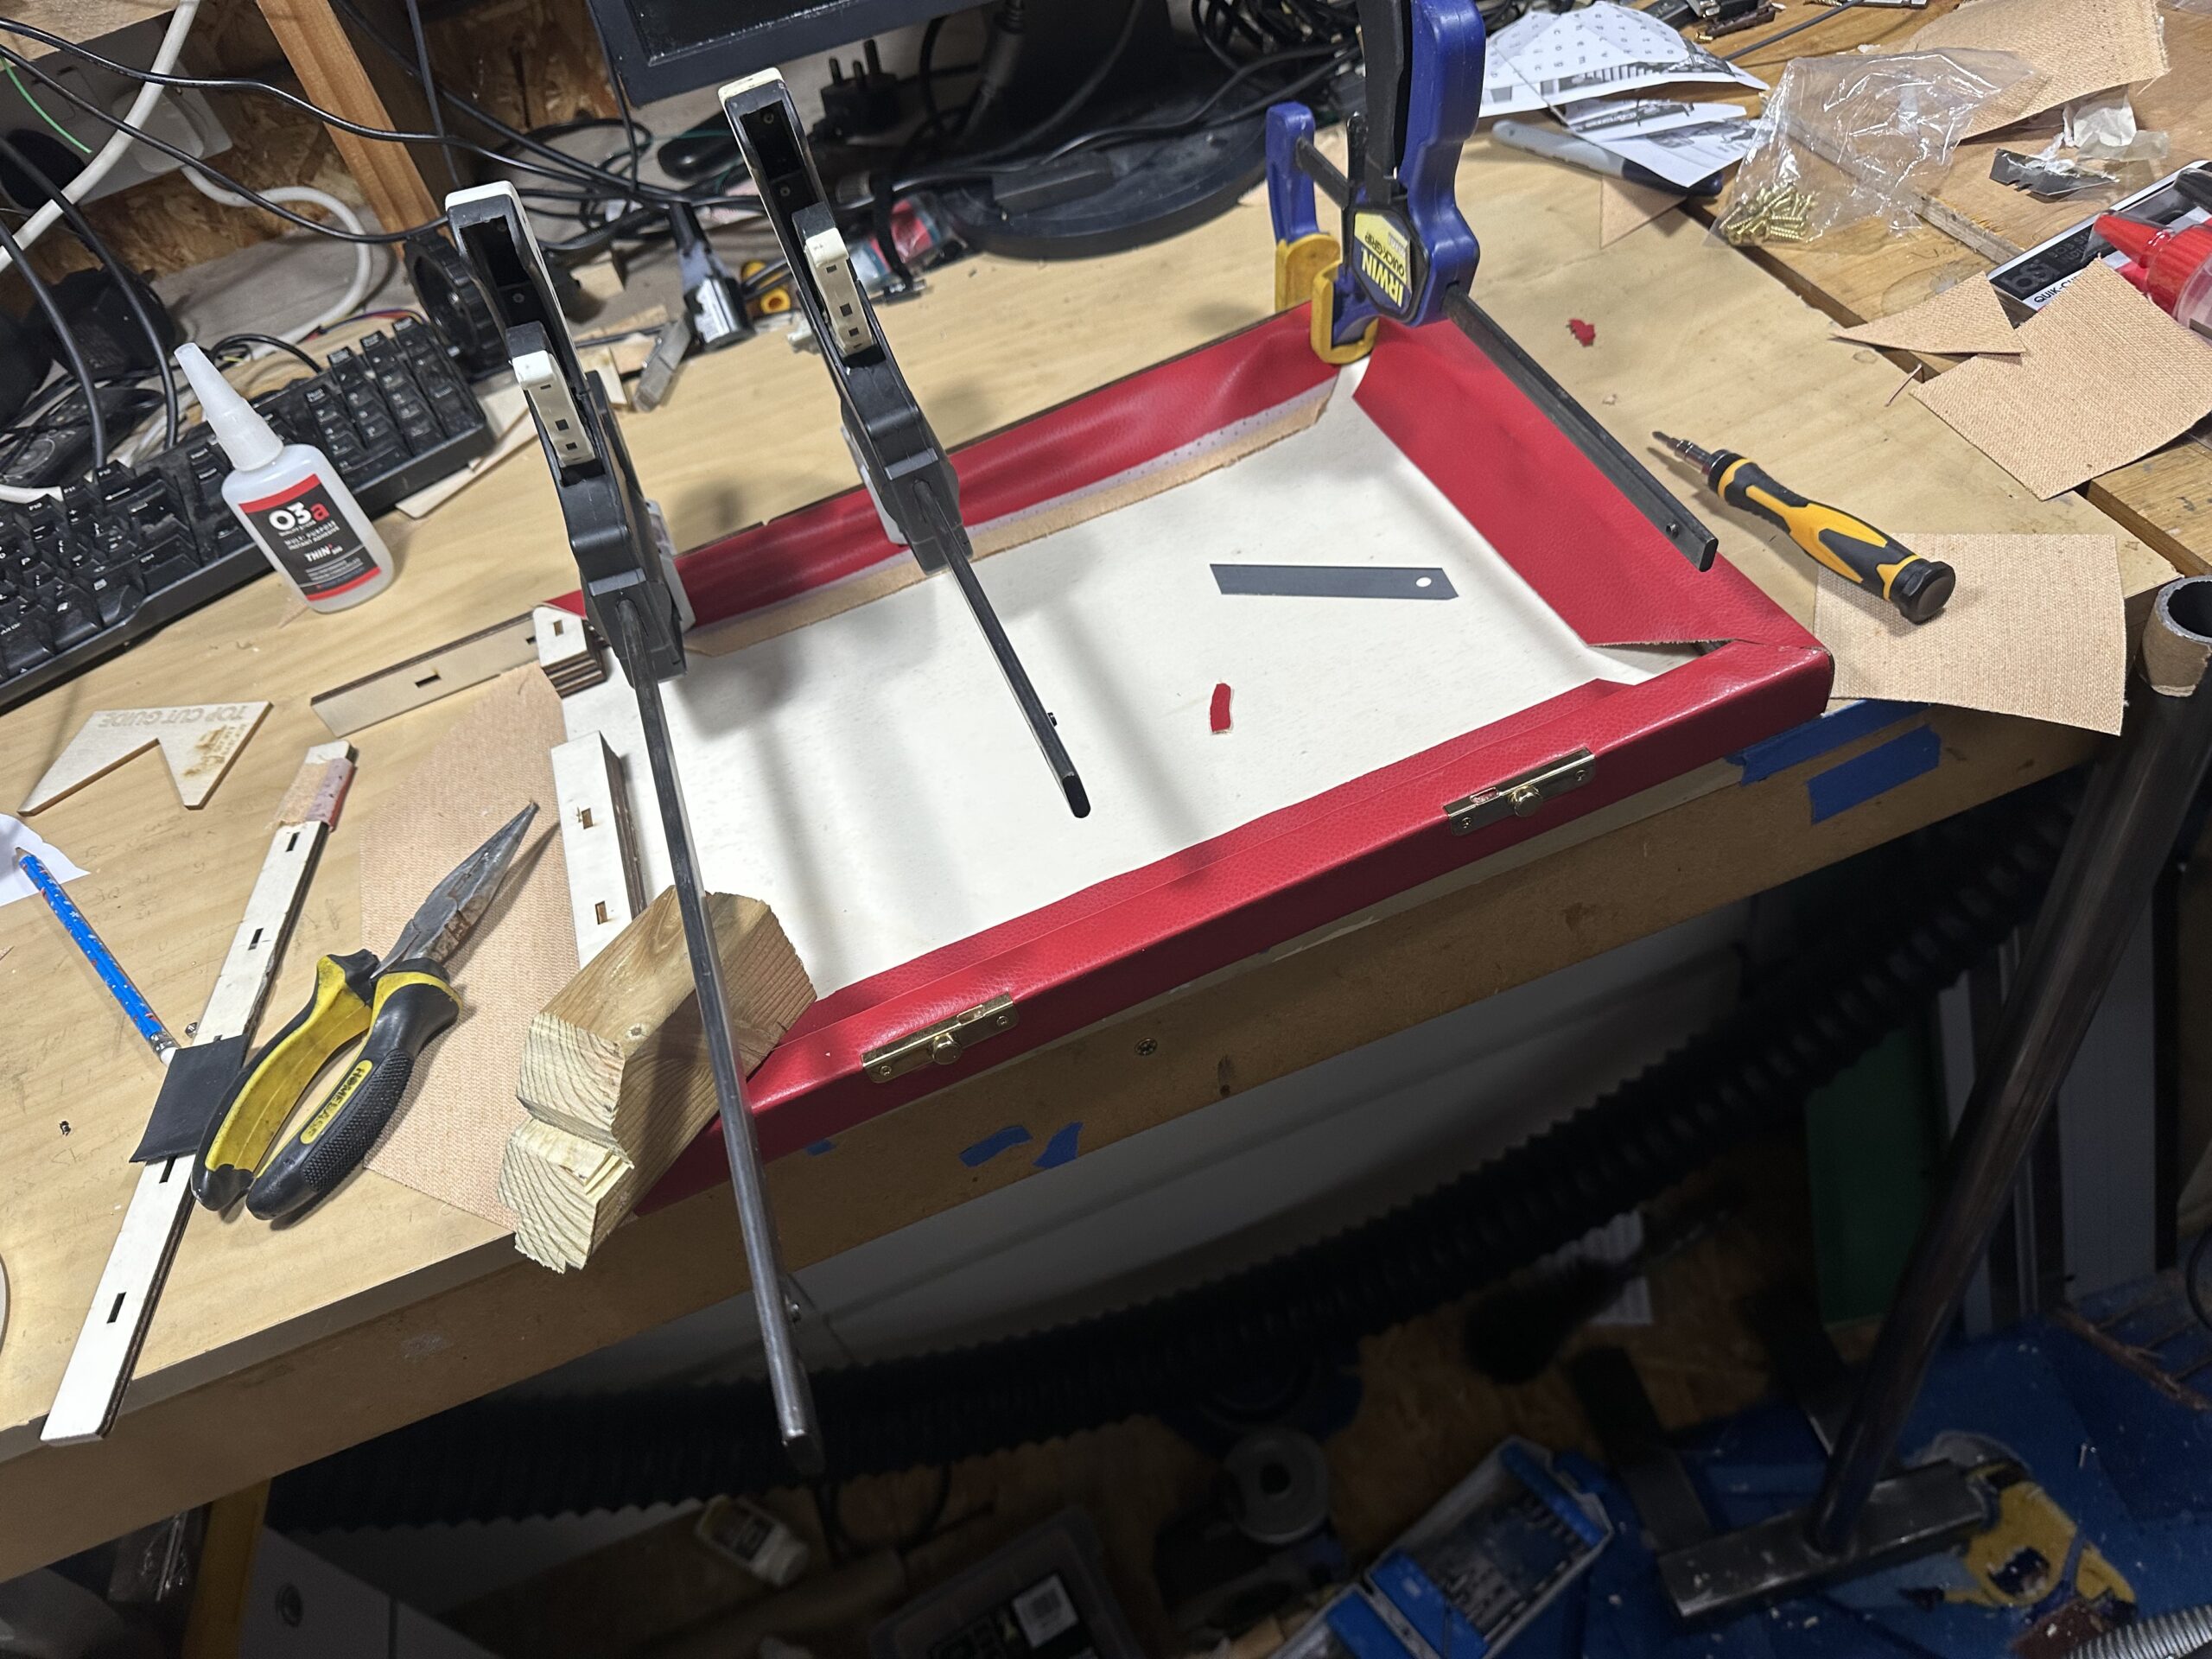
Cutting pockets for the clasps. These little fuckers are ~£15 each. They are good quality, but also require a decent amount of skill to fit them, or a big mill if you have access to one (I didn’t it made it hard)
Again, alignment is critical, not only does it need to look symmetrical, it has to line up with the lid or it wont close properly. The tolerances are around 1mm left/right and 0.5mm forwards/backwards.
To line the outside, I decided to use PU Leather. Two reasons: One because I wasn’t confident that I wouldn’t fuck it up, and Two: it seems unethical to waste something that is an animal product.
It also can’t be “skived” to make it thinner. However this means that neat joins is impossible. Each corner needs a brass wear plate to cover up the shitty join I made.
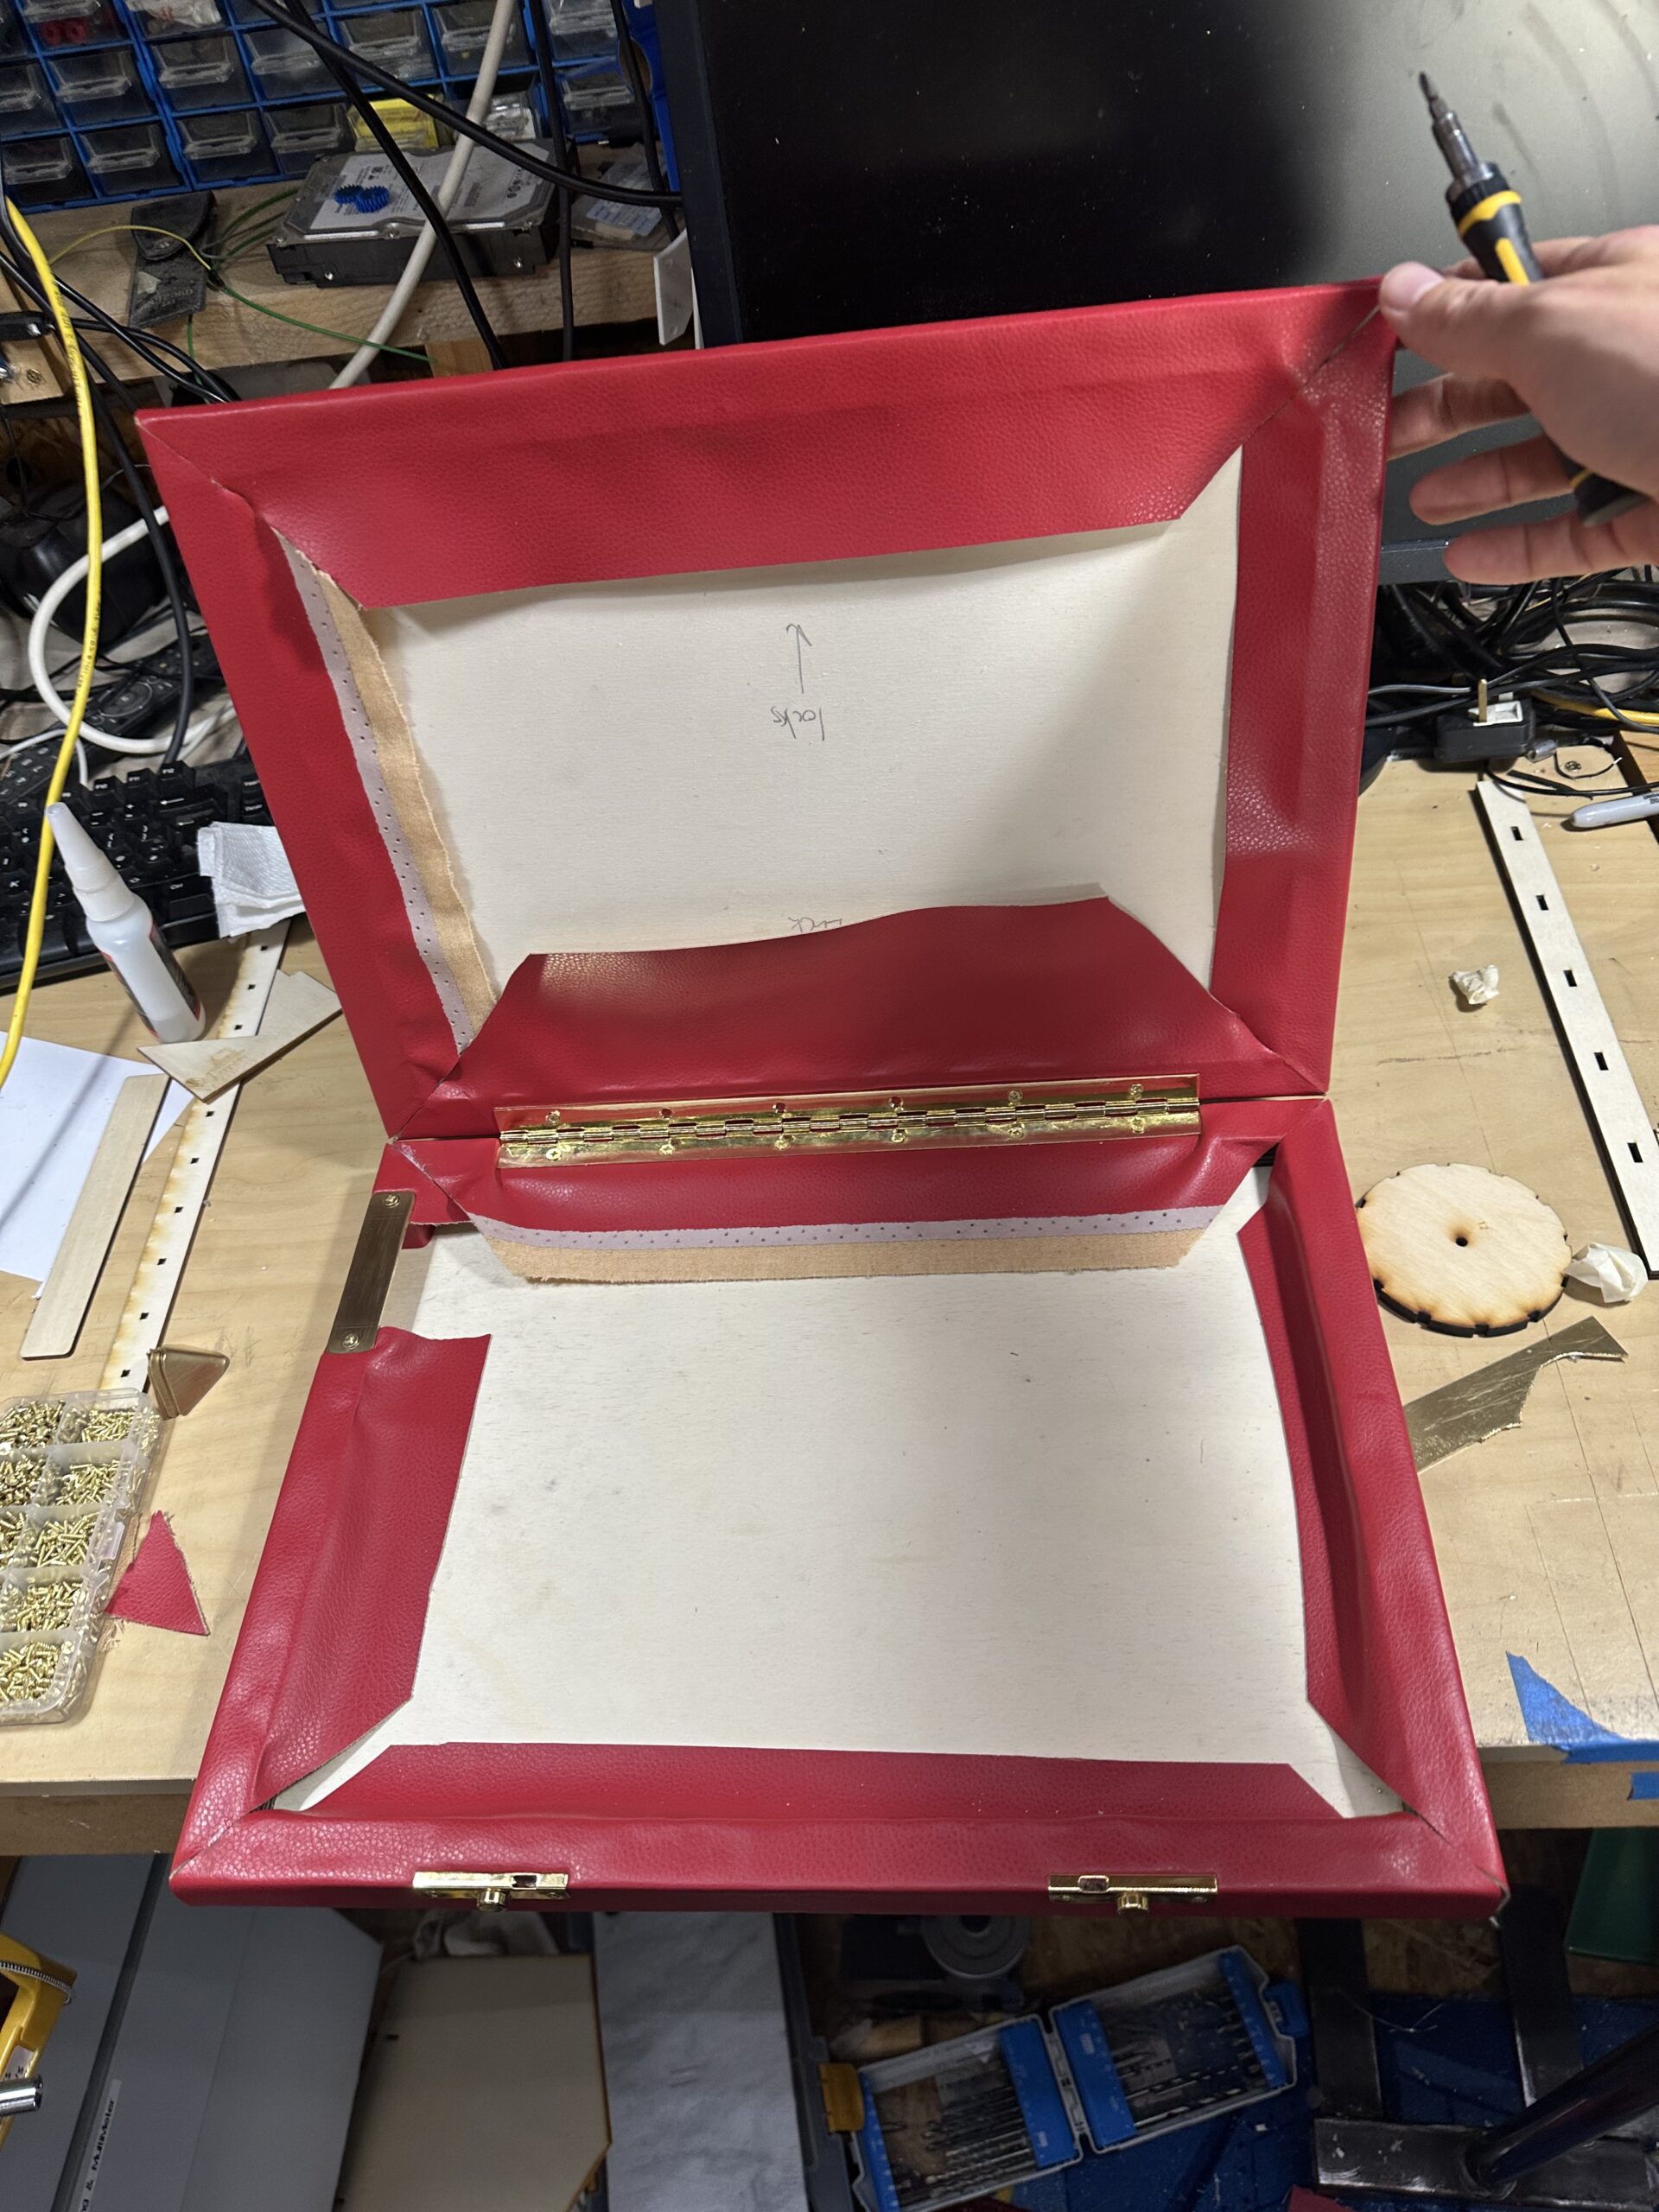
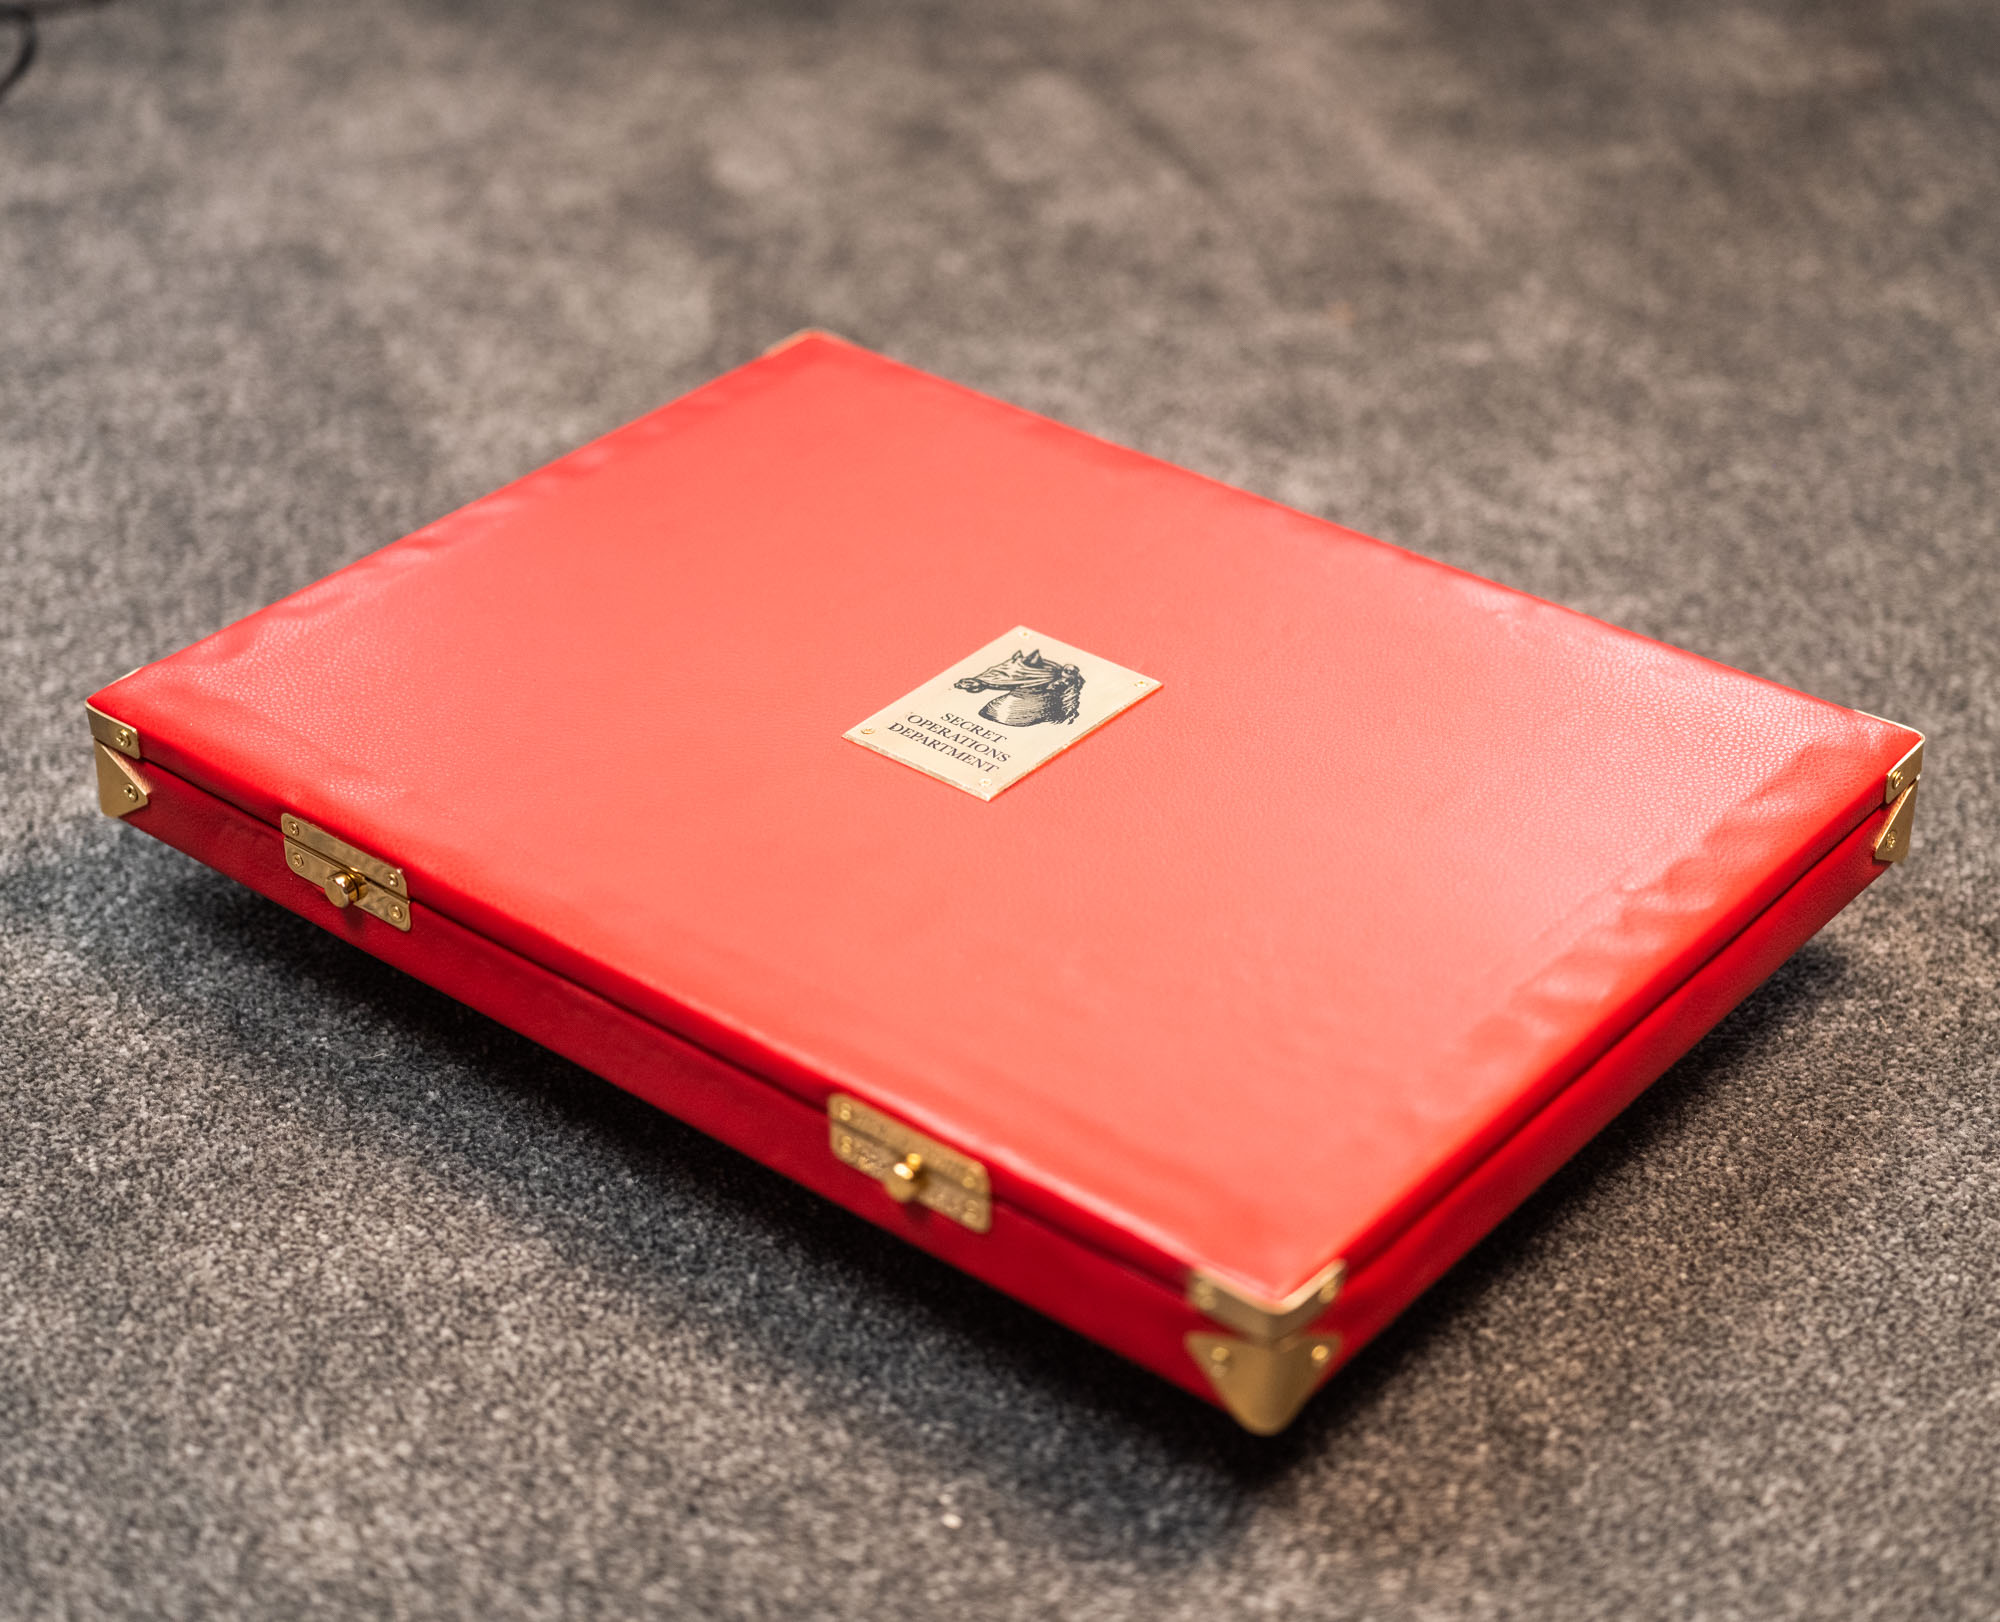
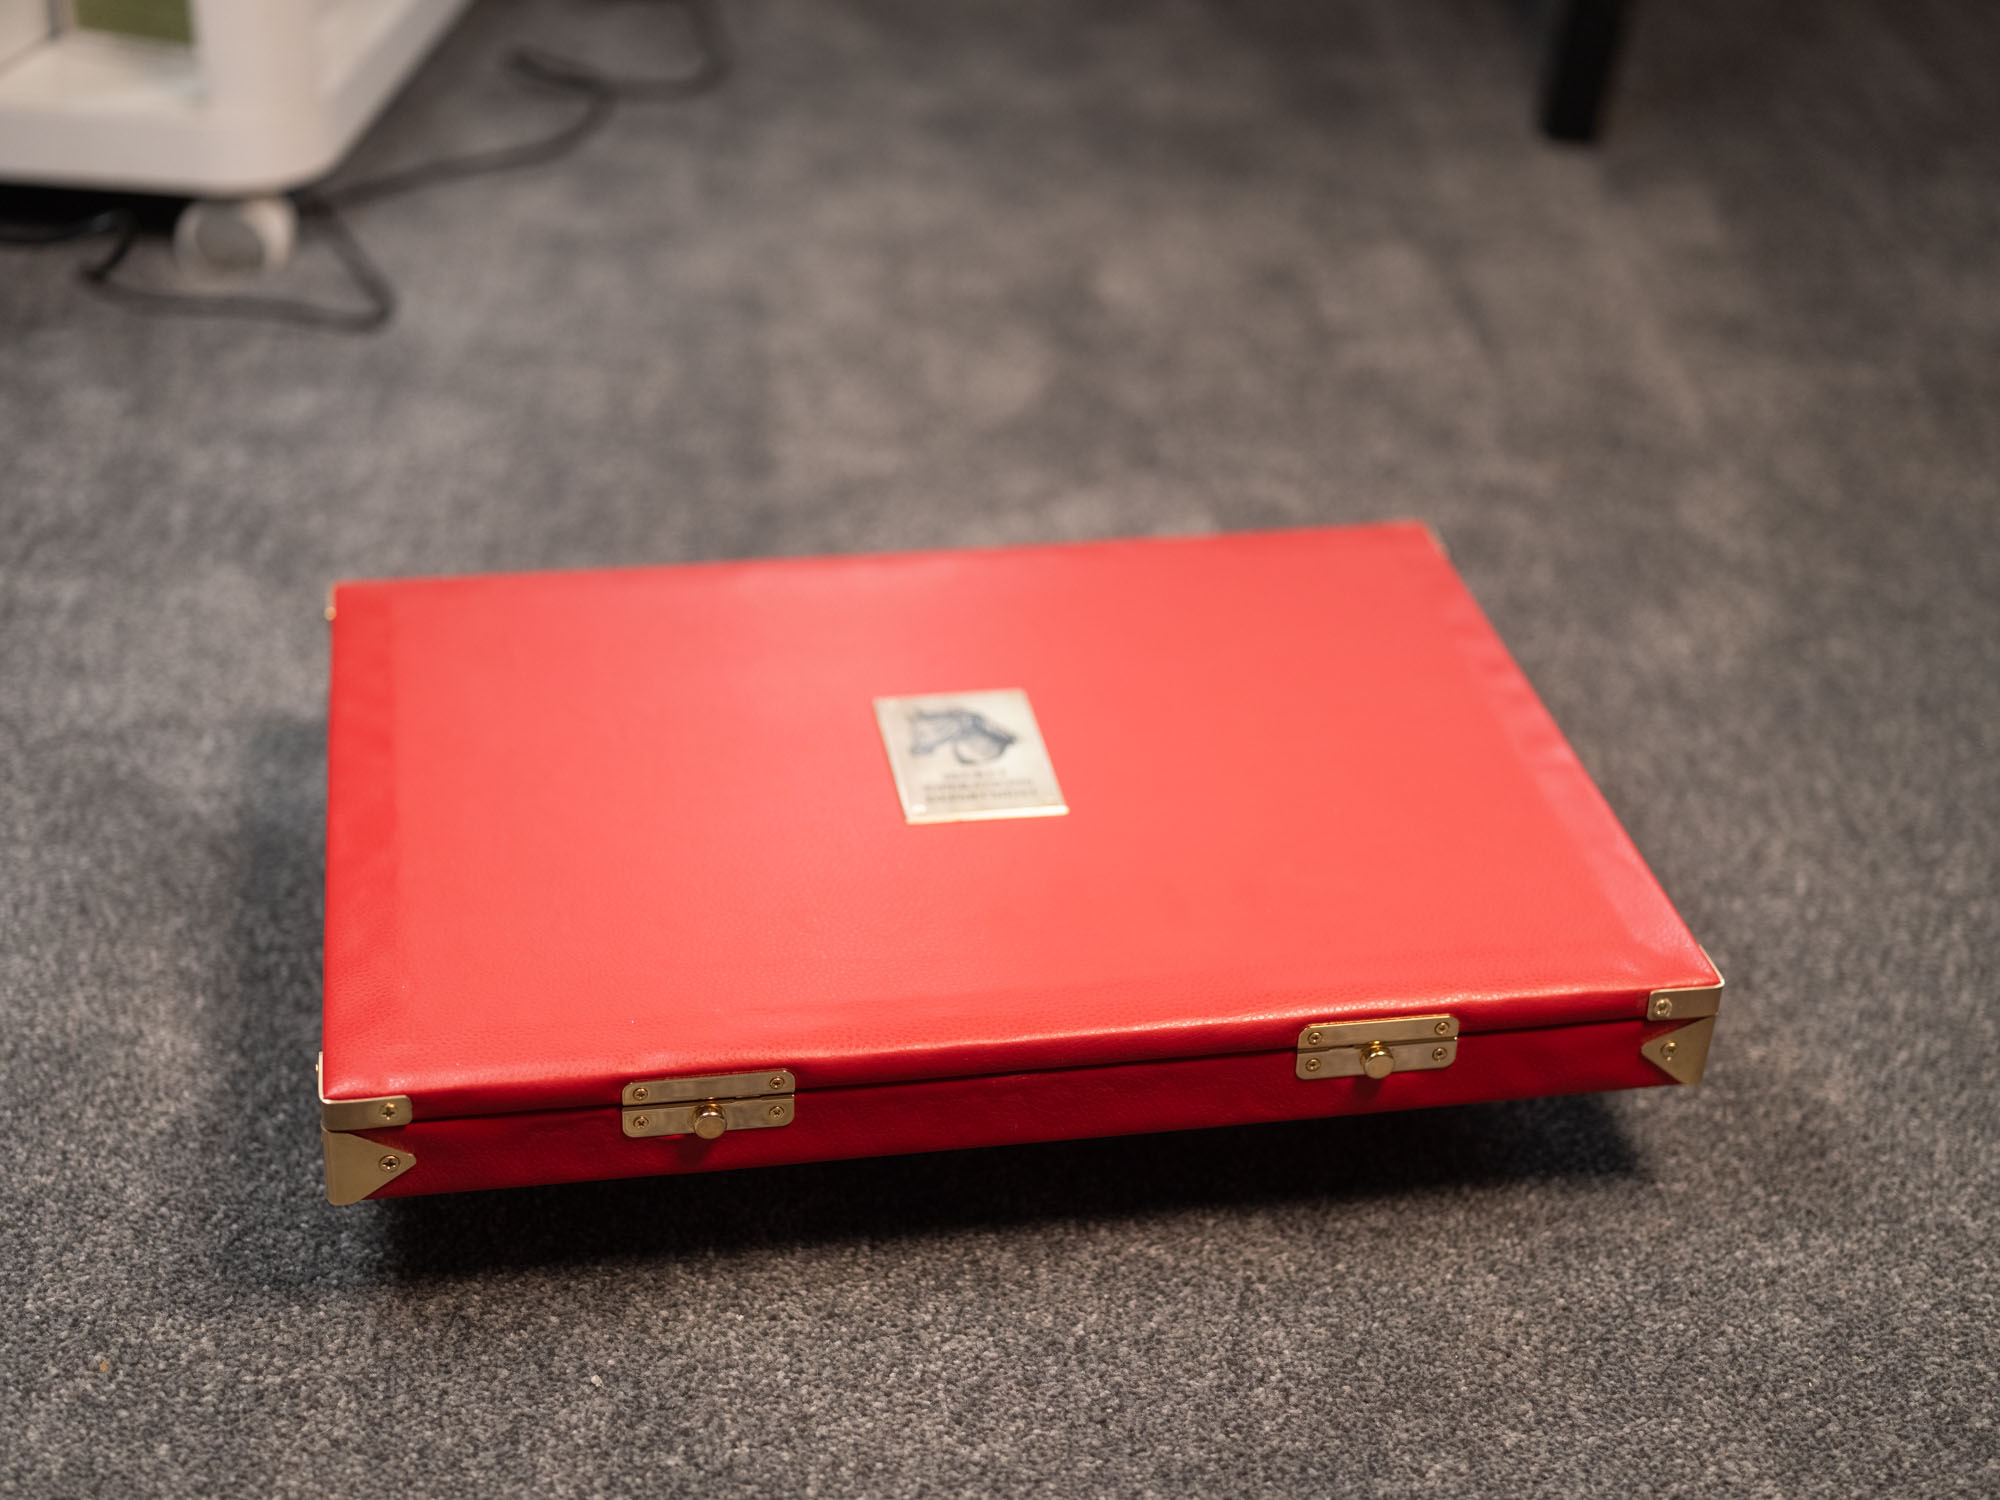
Nominally finished. Lots of cutting and sticking required to make it neat, well, neater. Here you can see the brass joining plate on the left. This is here for support, a bit of flare, and to allow access to the charging port and two USB-C.
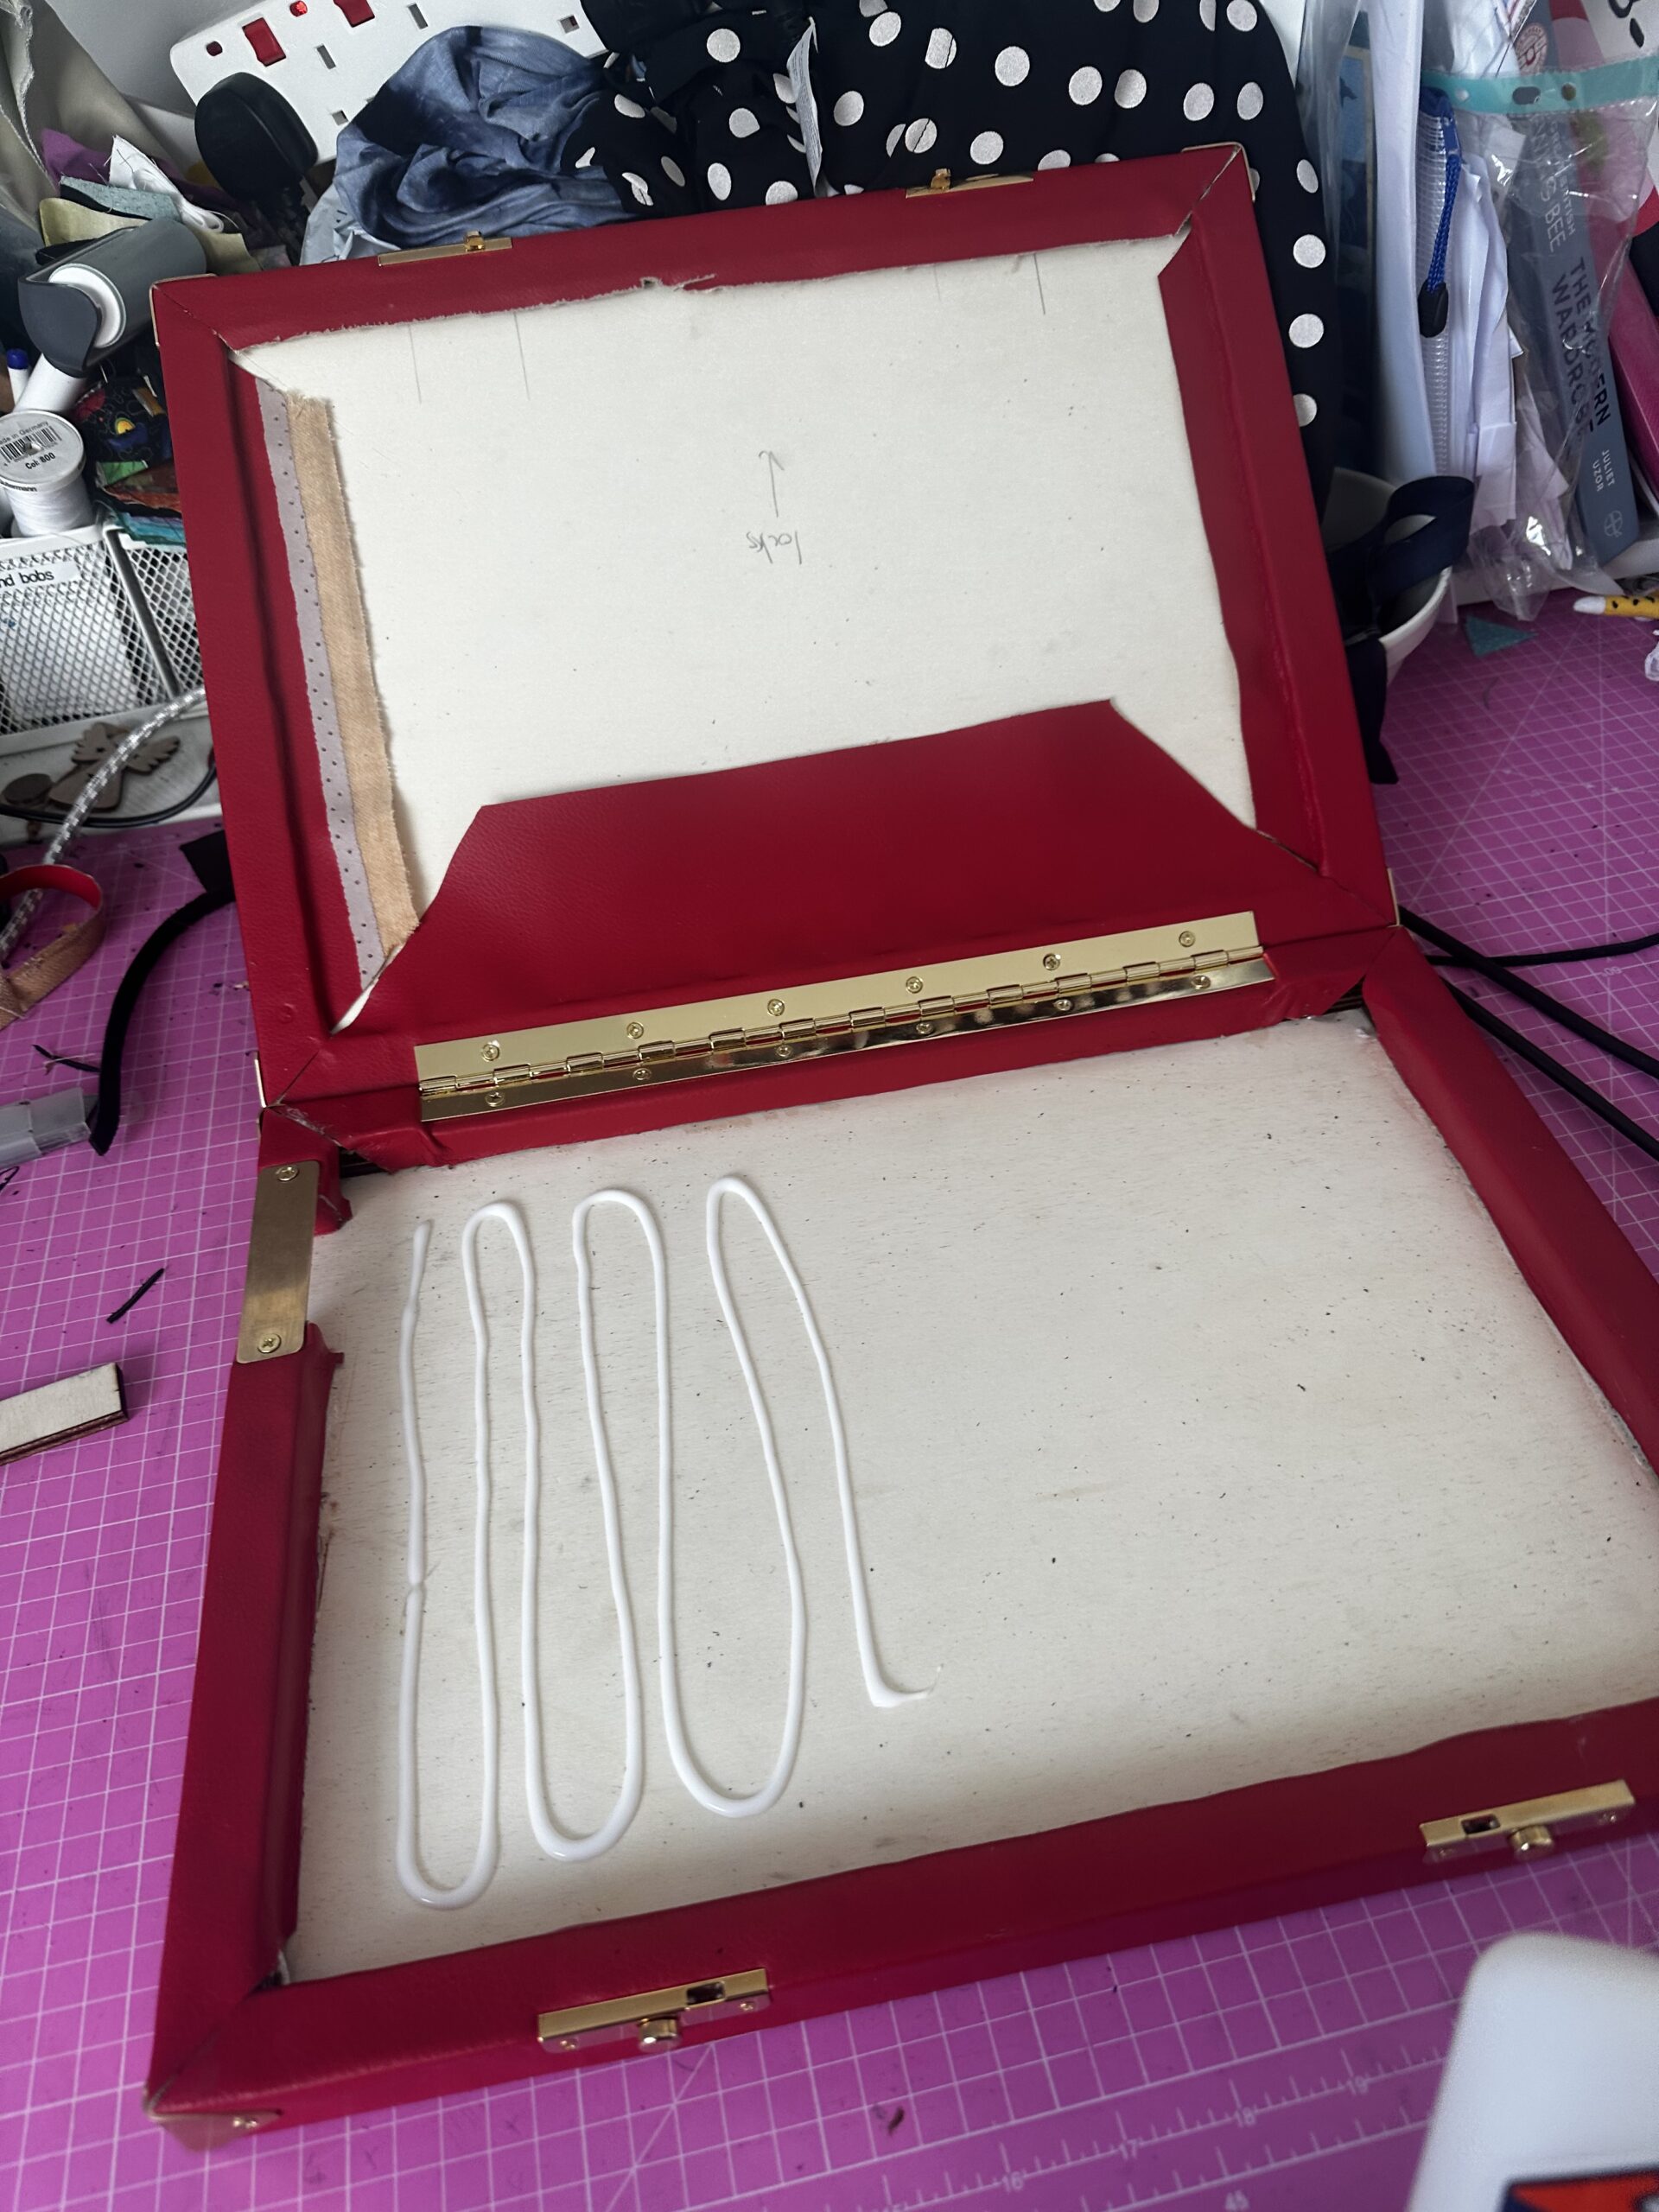
The glueing of the leather lining. I was more confident about the leather lining, so here is me PVA-ing the leather to the base. Because the PVA is slightly moist, the weight used to keep the leather in place also de-warped the base.
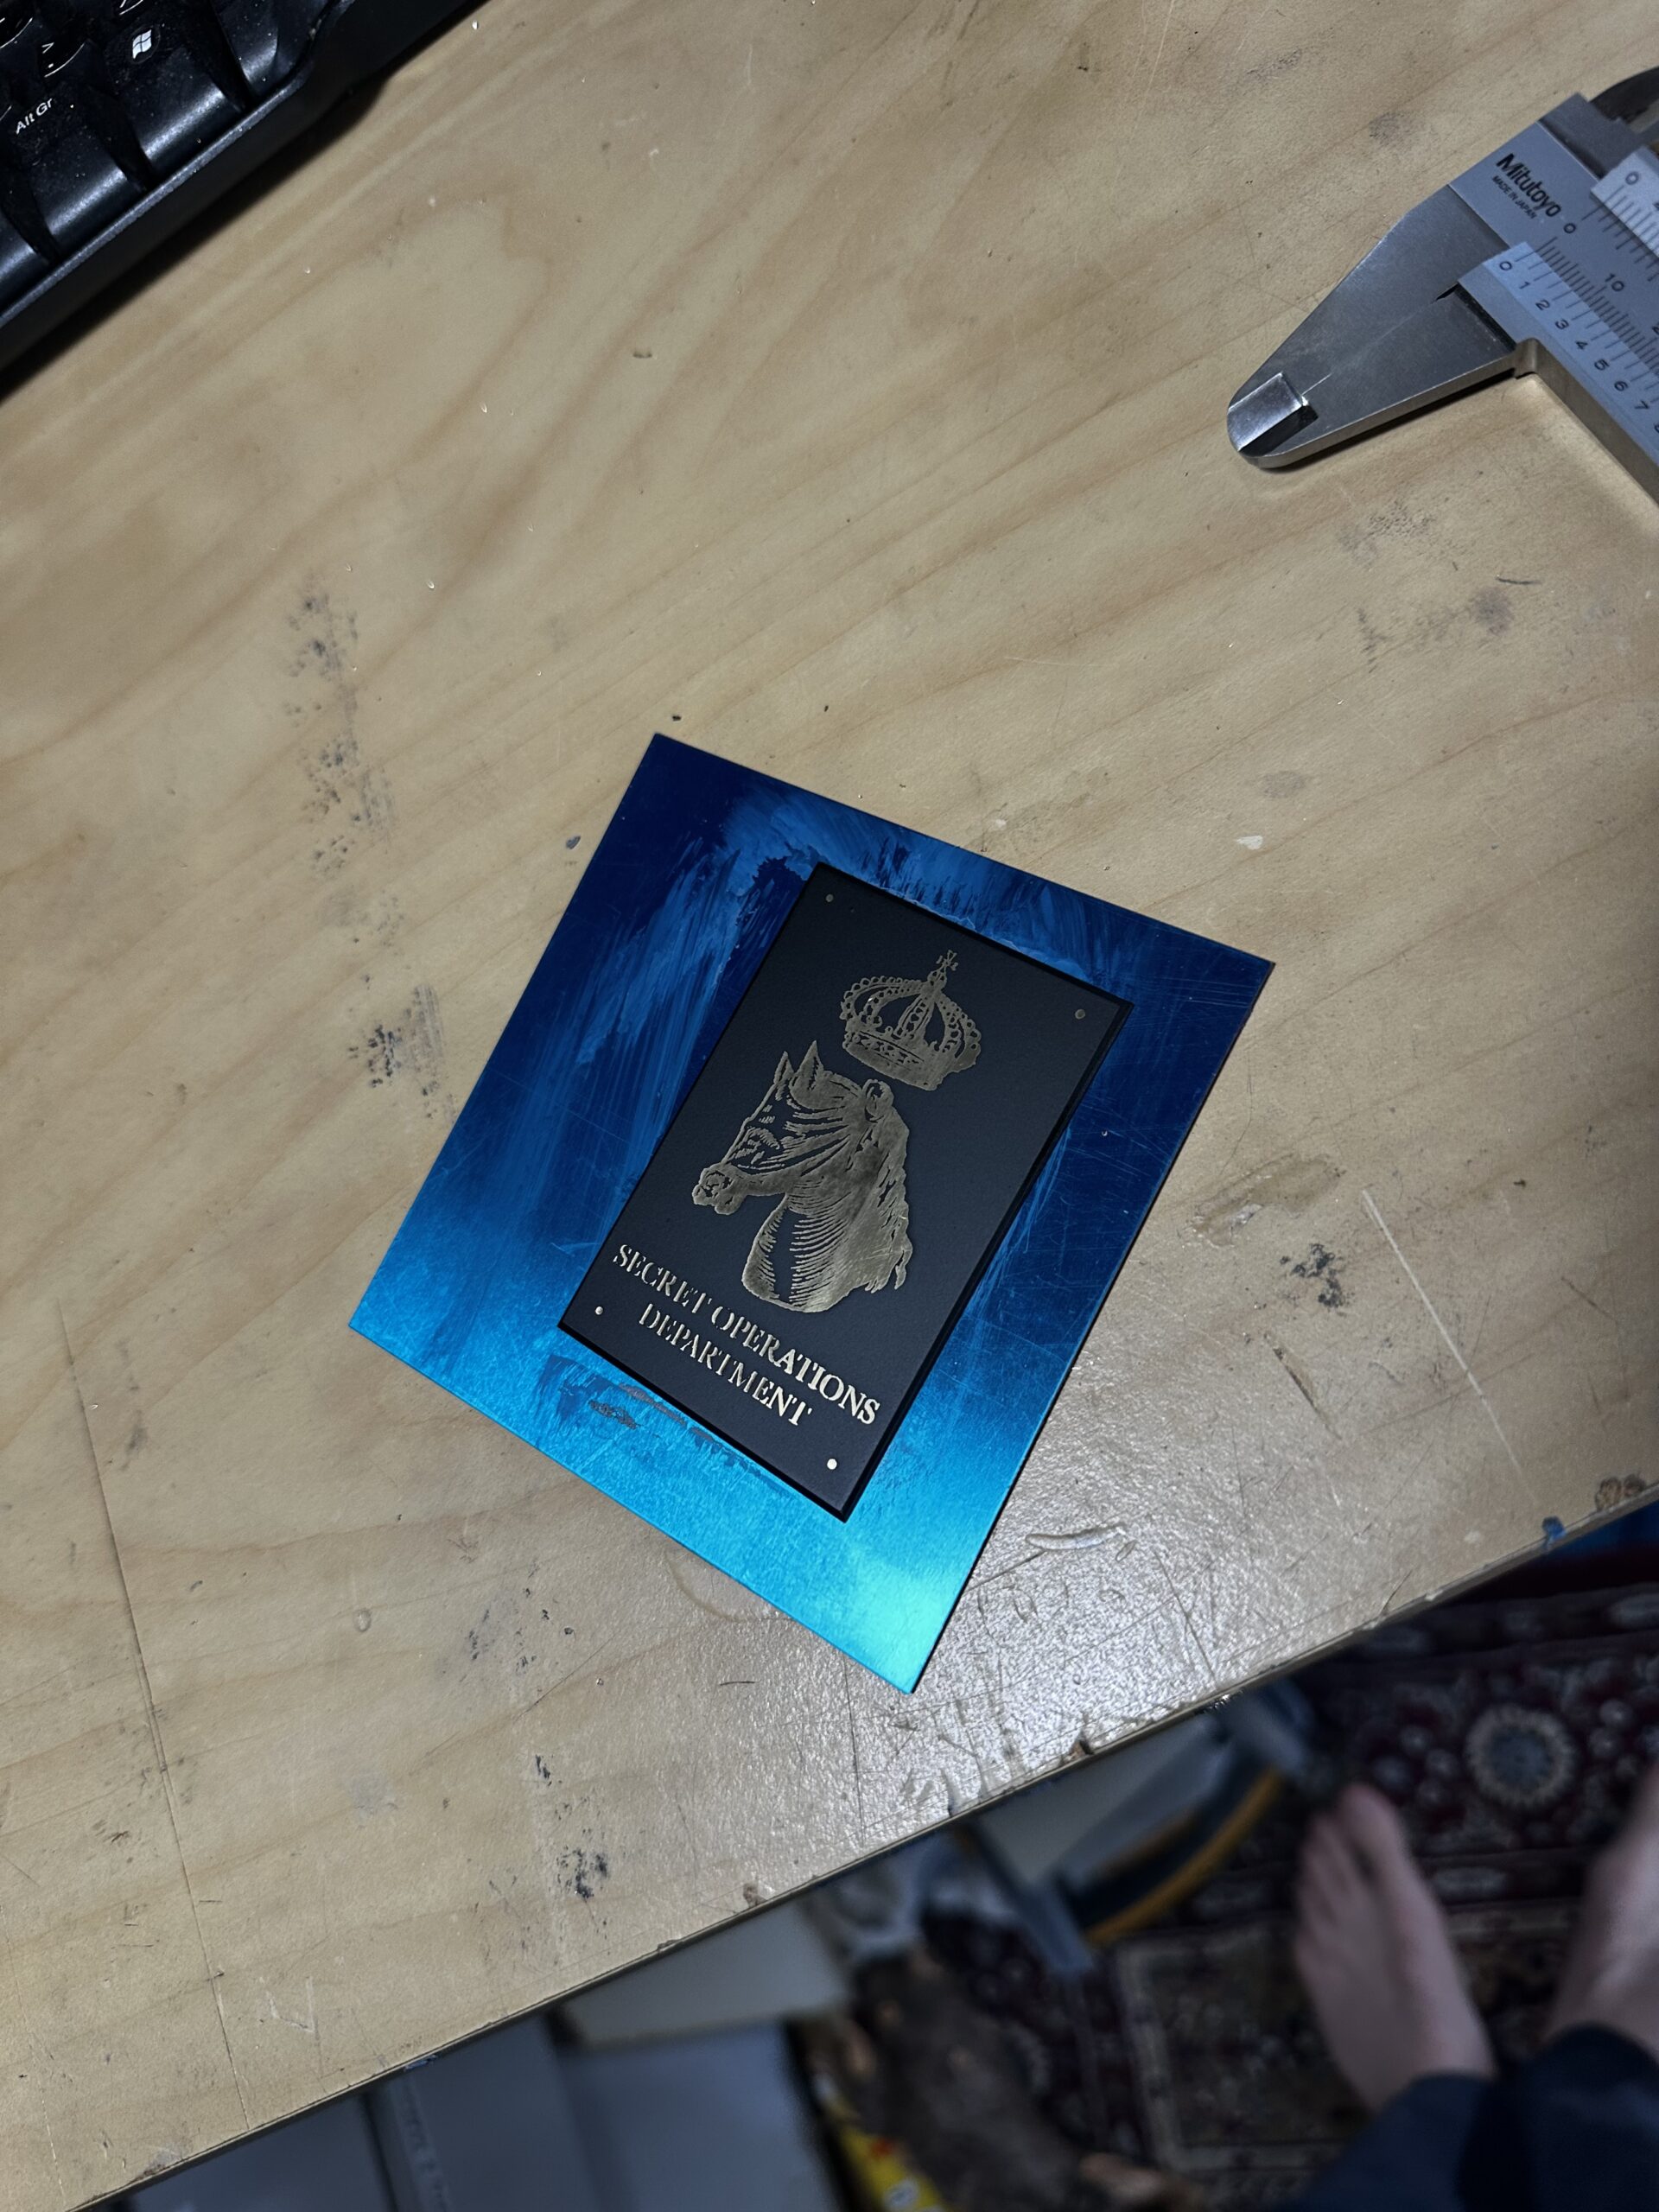
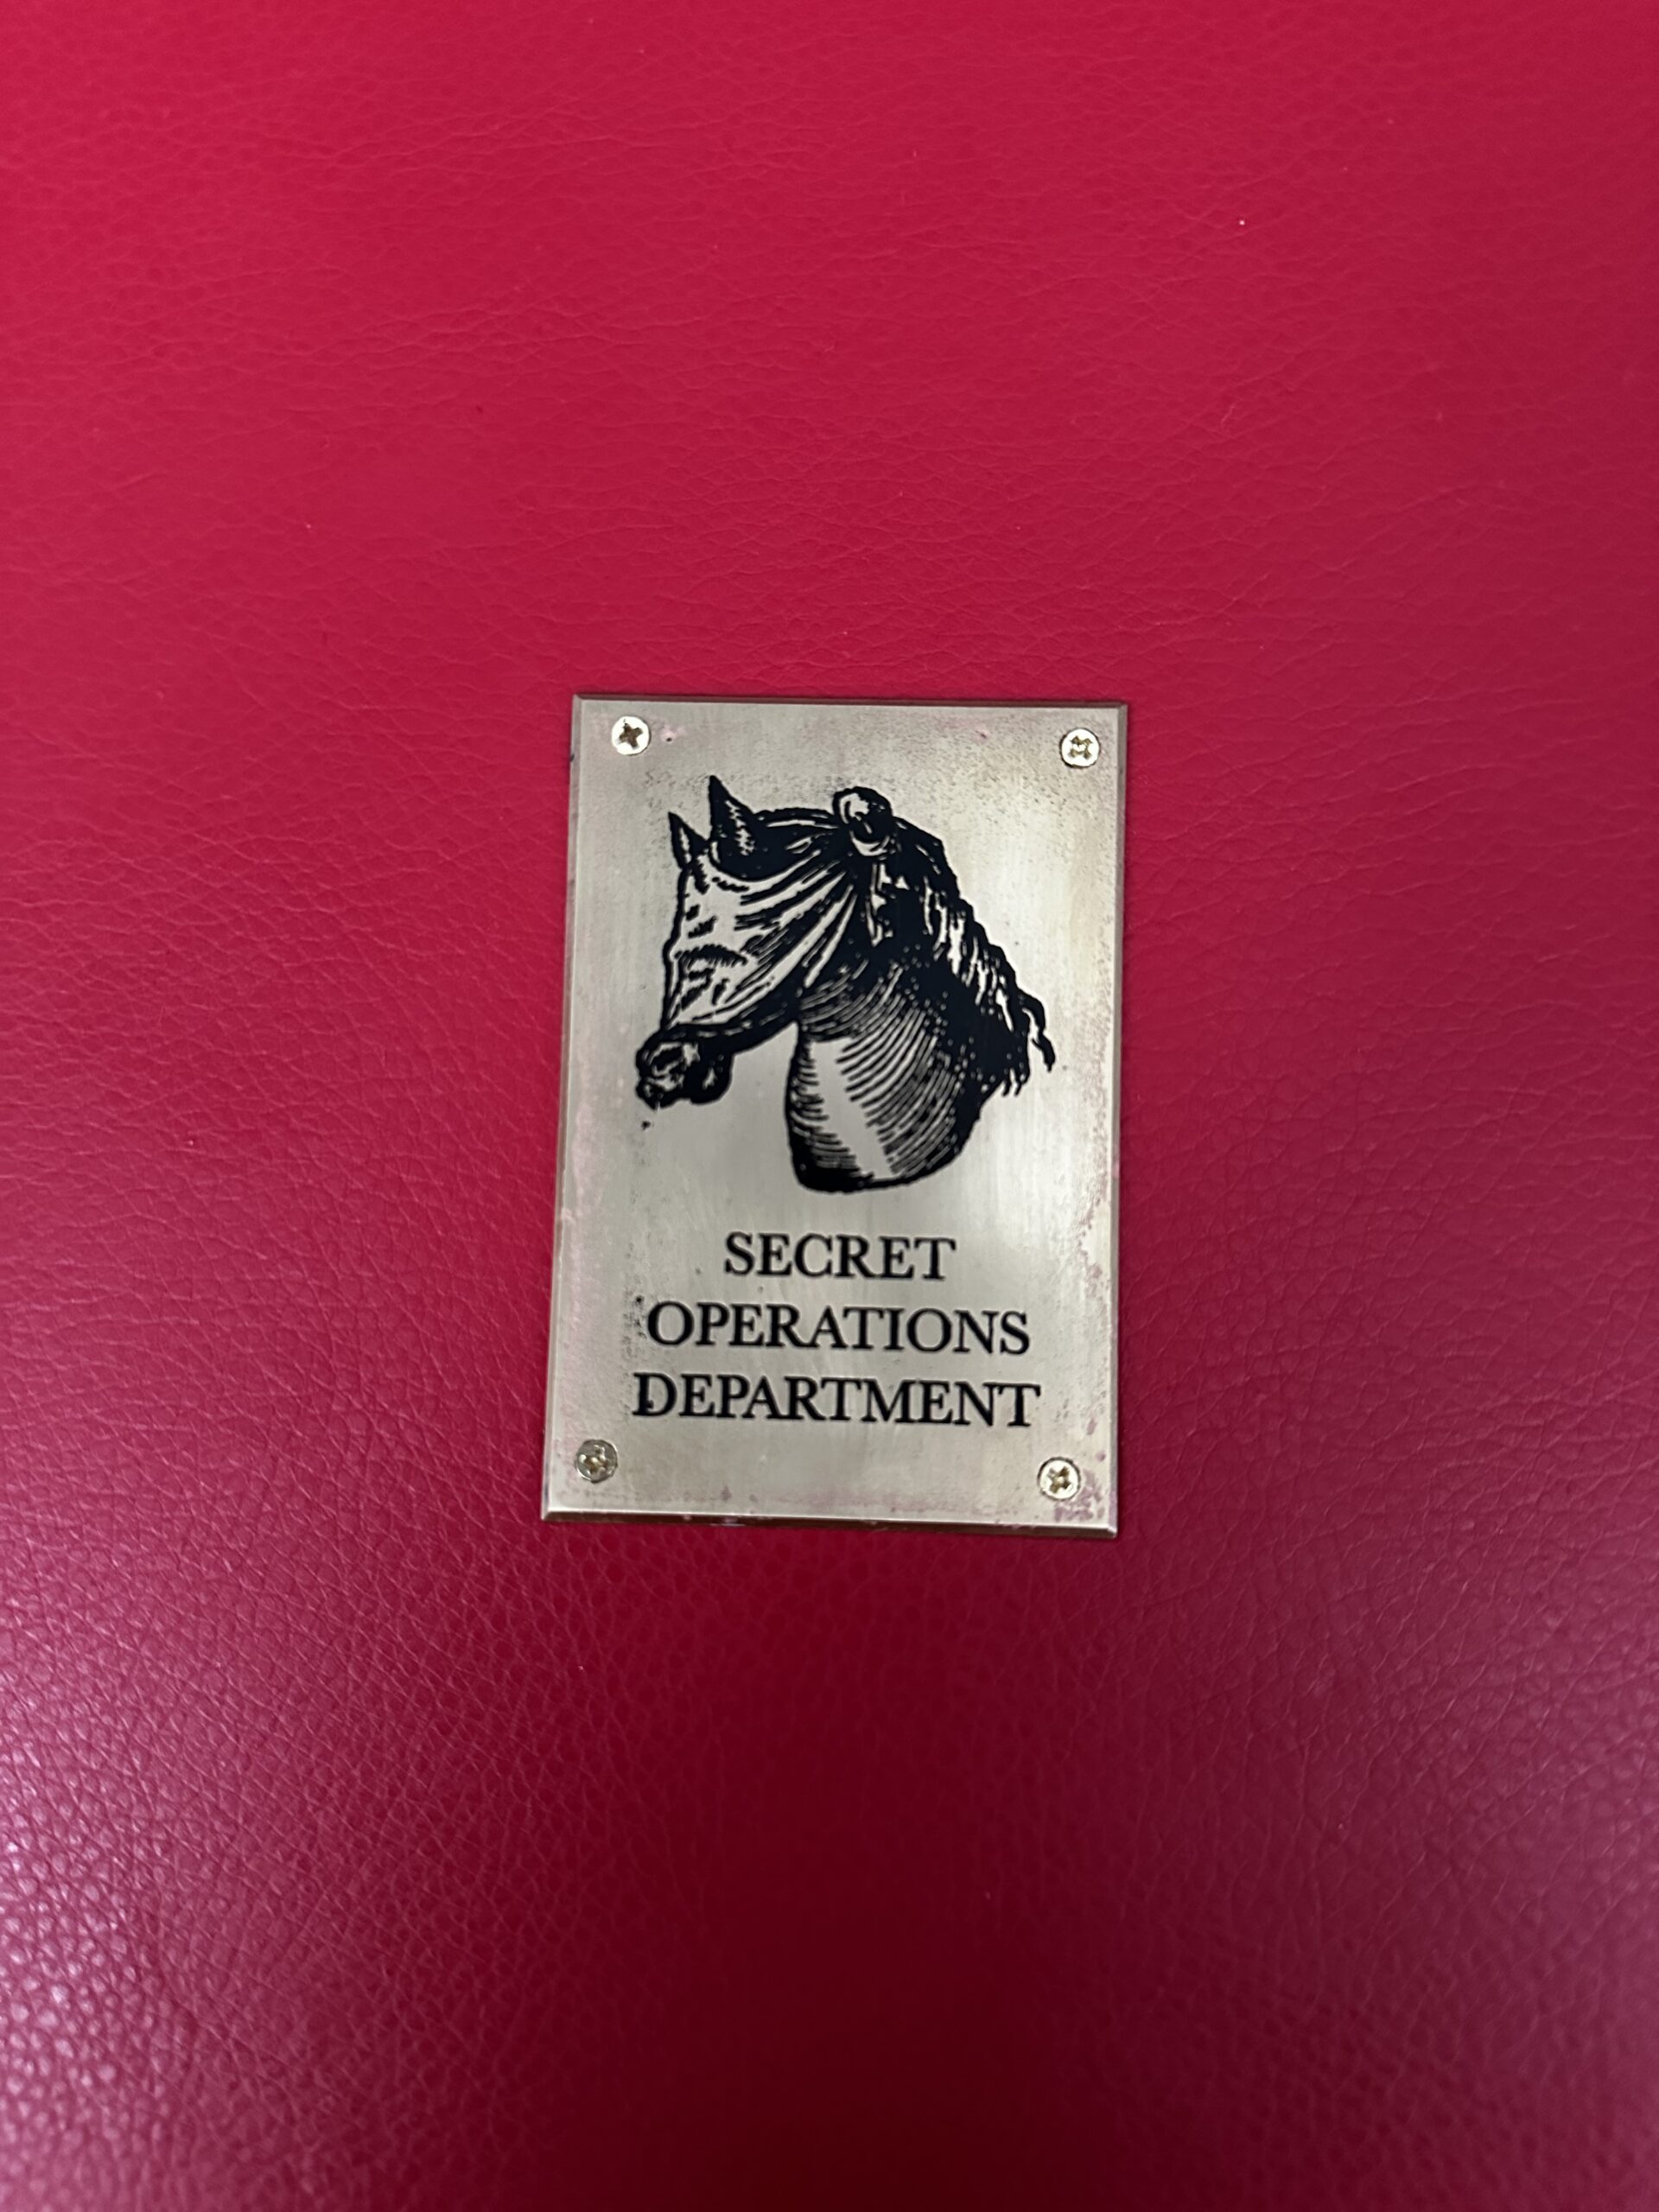
Every despatch box needs a nice brass name plate. Mine is no different. I can’t directly engrave metal, so I need to create a mask using spray paint and electro engrave using salt water.
Getting the right power on the laser was difficult. The relationship between size of the mark, power of the laser and thickness of the paint all meant a lot of trial an error. Also I made the mistake of trying to use latex based paint, which smears rather than sublimates when blasted by the laser.
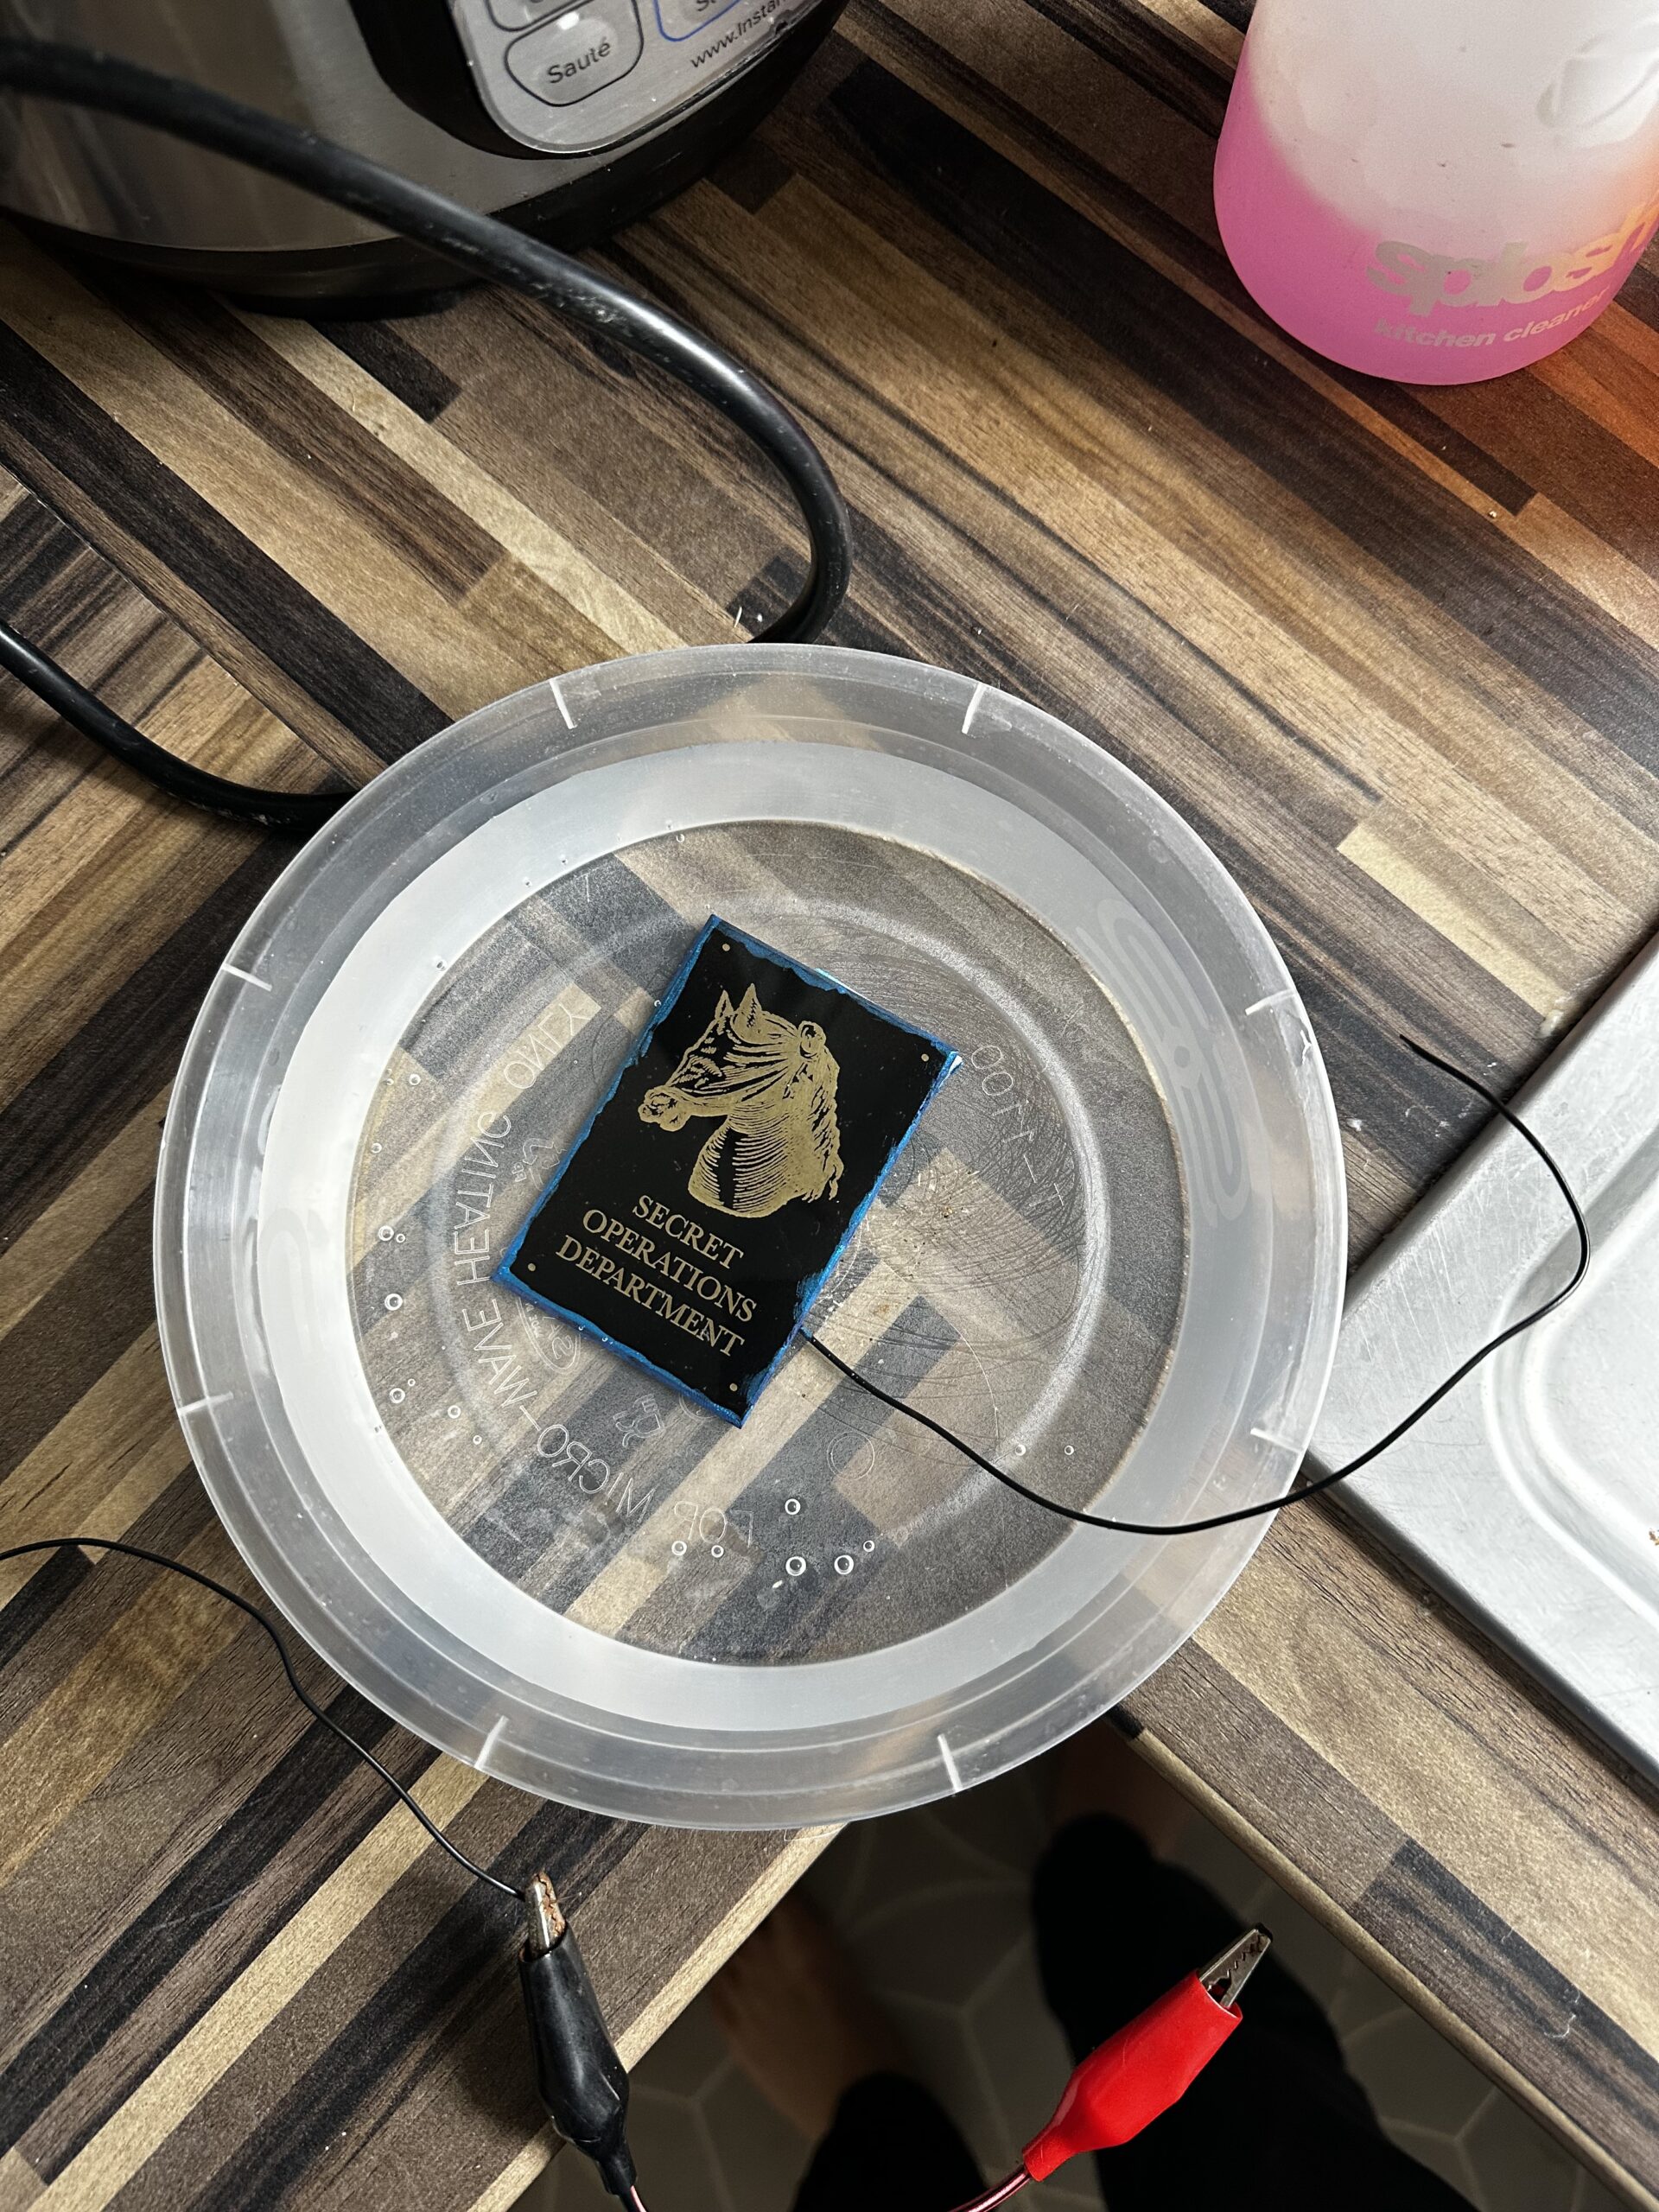
Note the blue around the edges. I didn’t properly cover the edges. To stop them being eaten away by the electricity I tried to use nail polish. but it turns out that it’s either porous or conductive.
Here I have masked off the edges with the pitting. I’m spraying the whole front, and then I’ll sand off the high spots to leave the positive image.
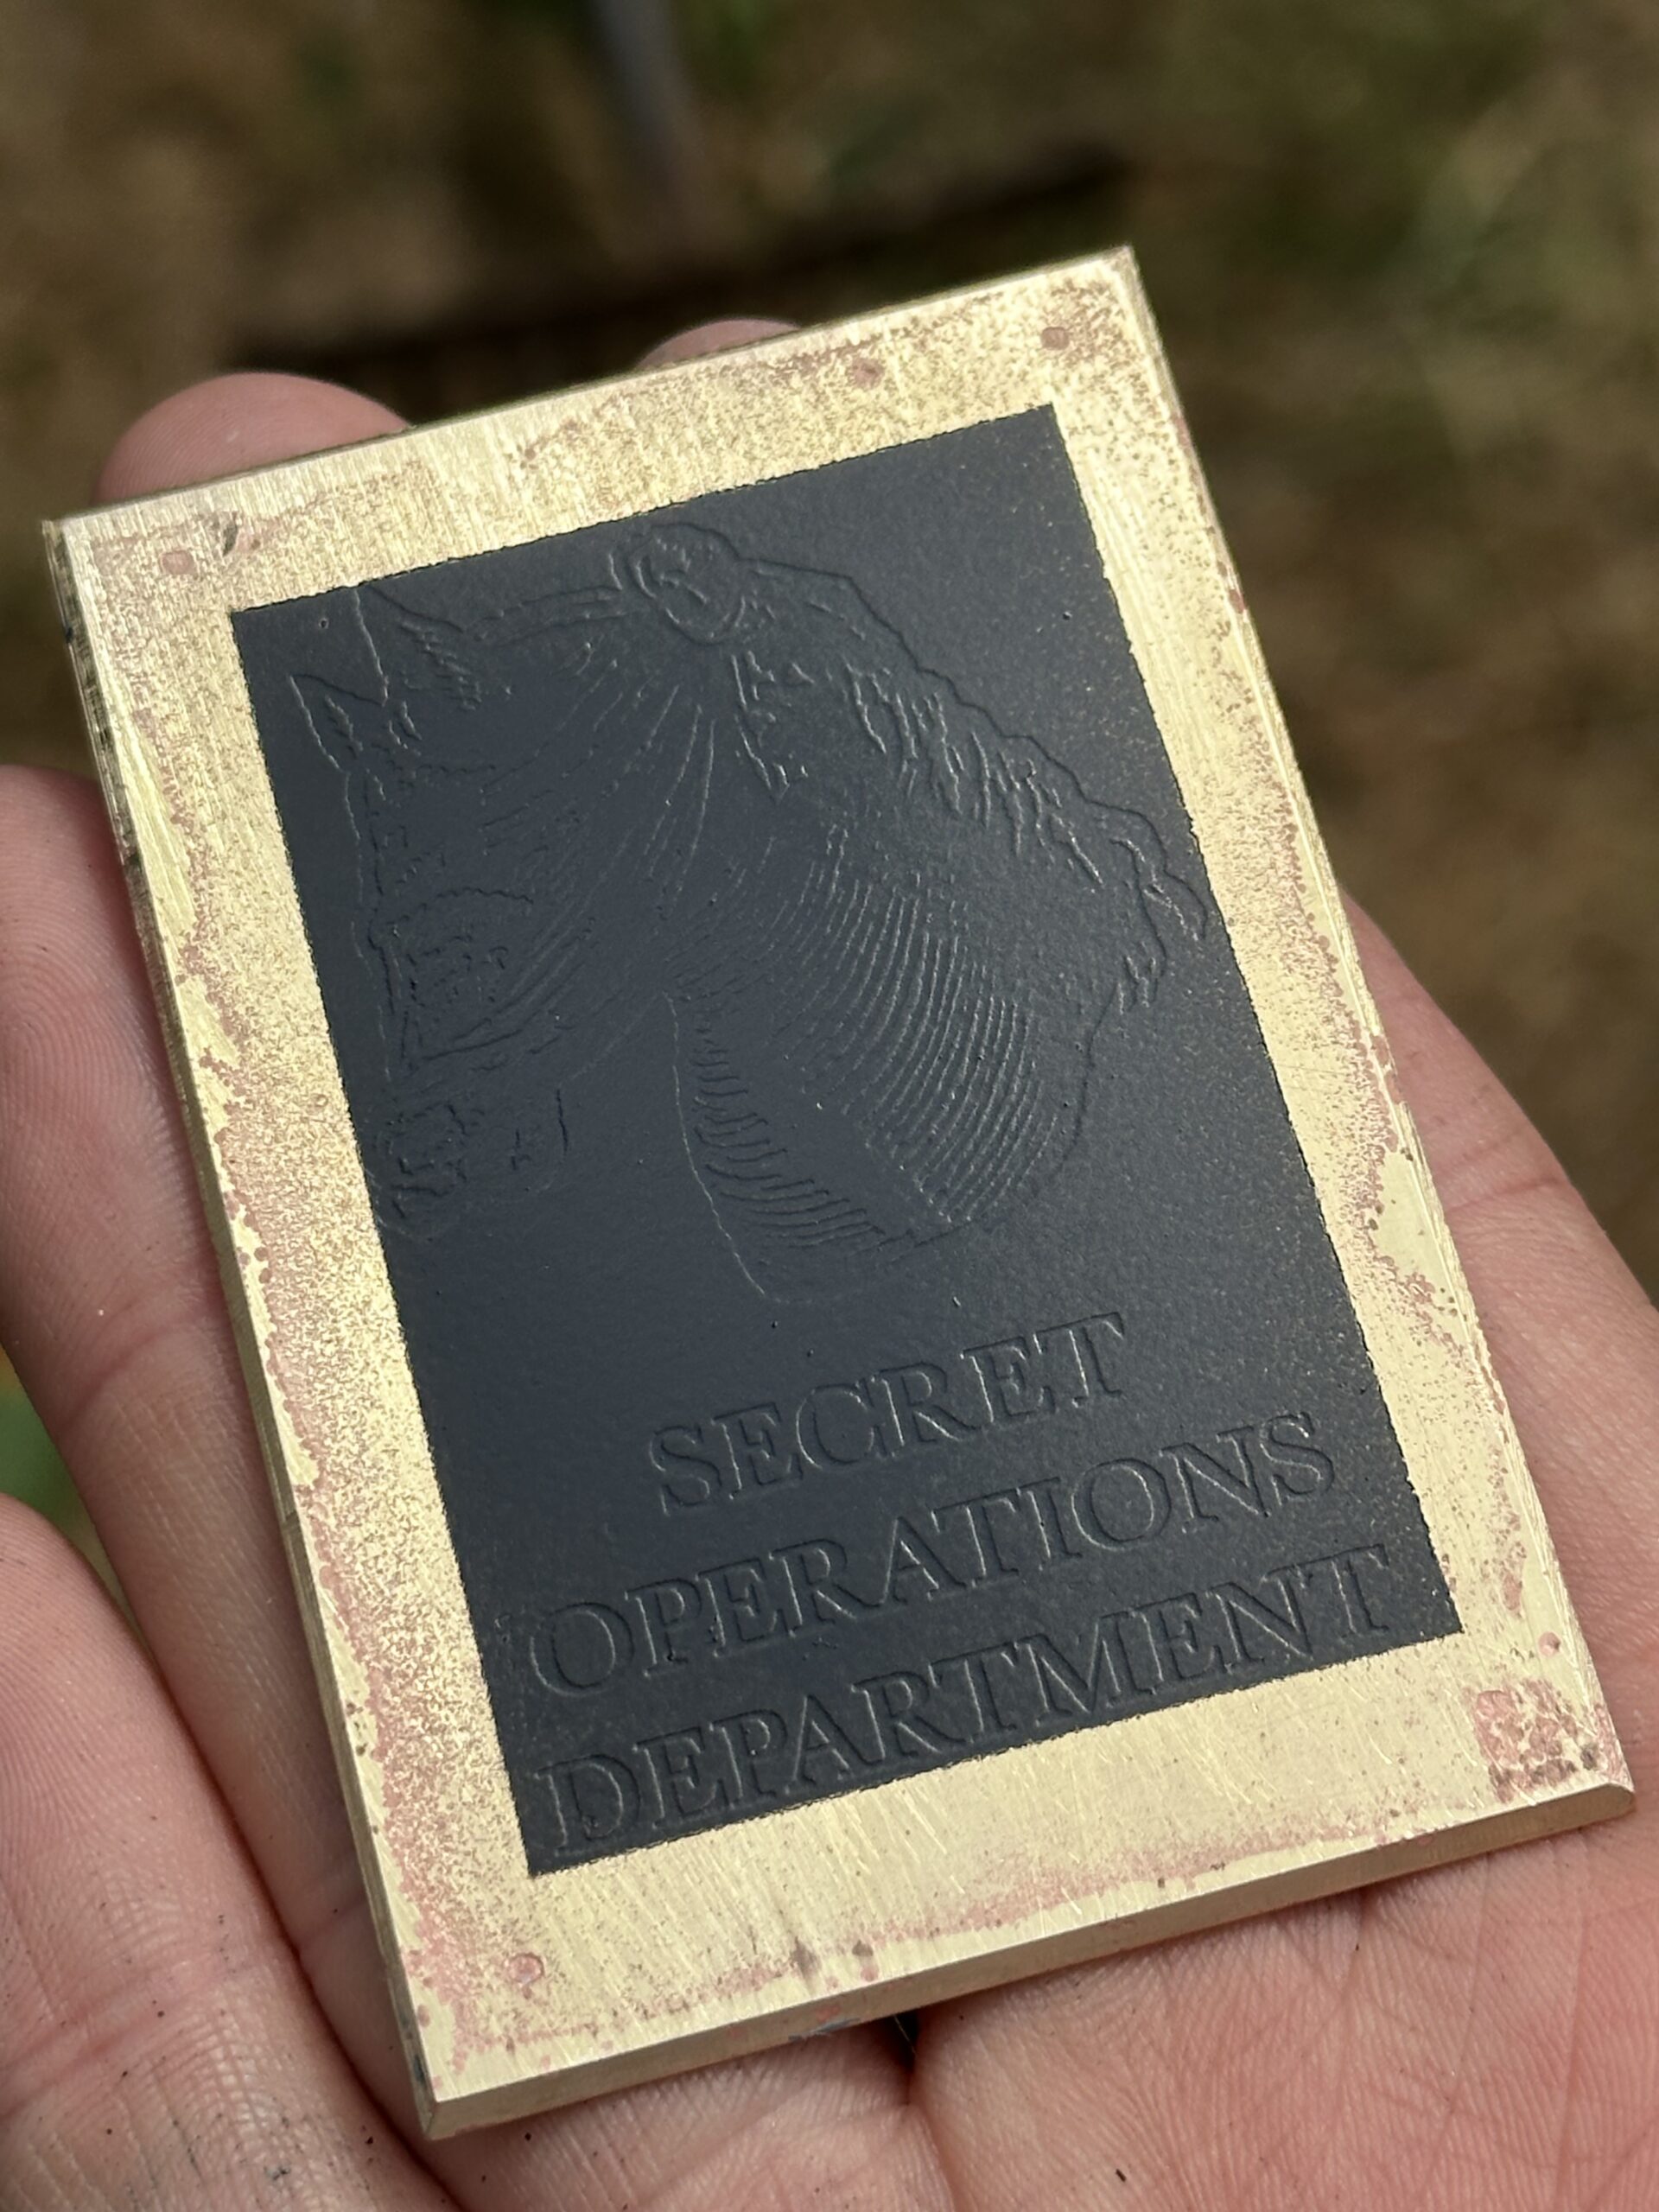
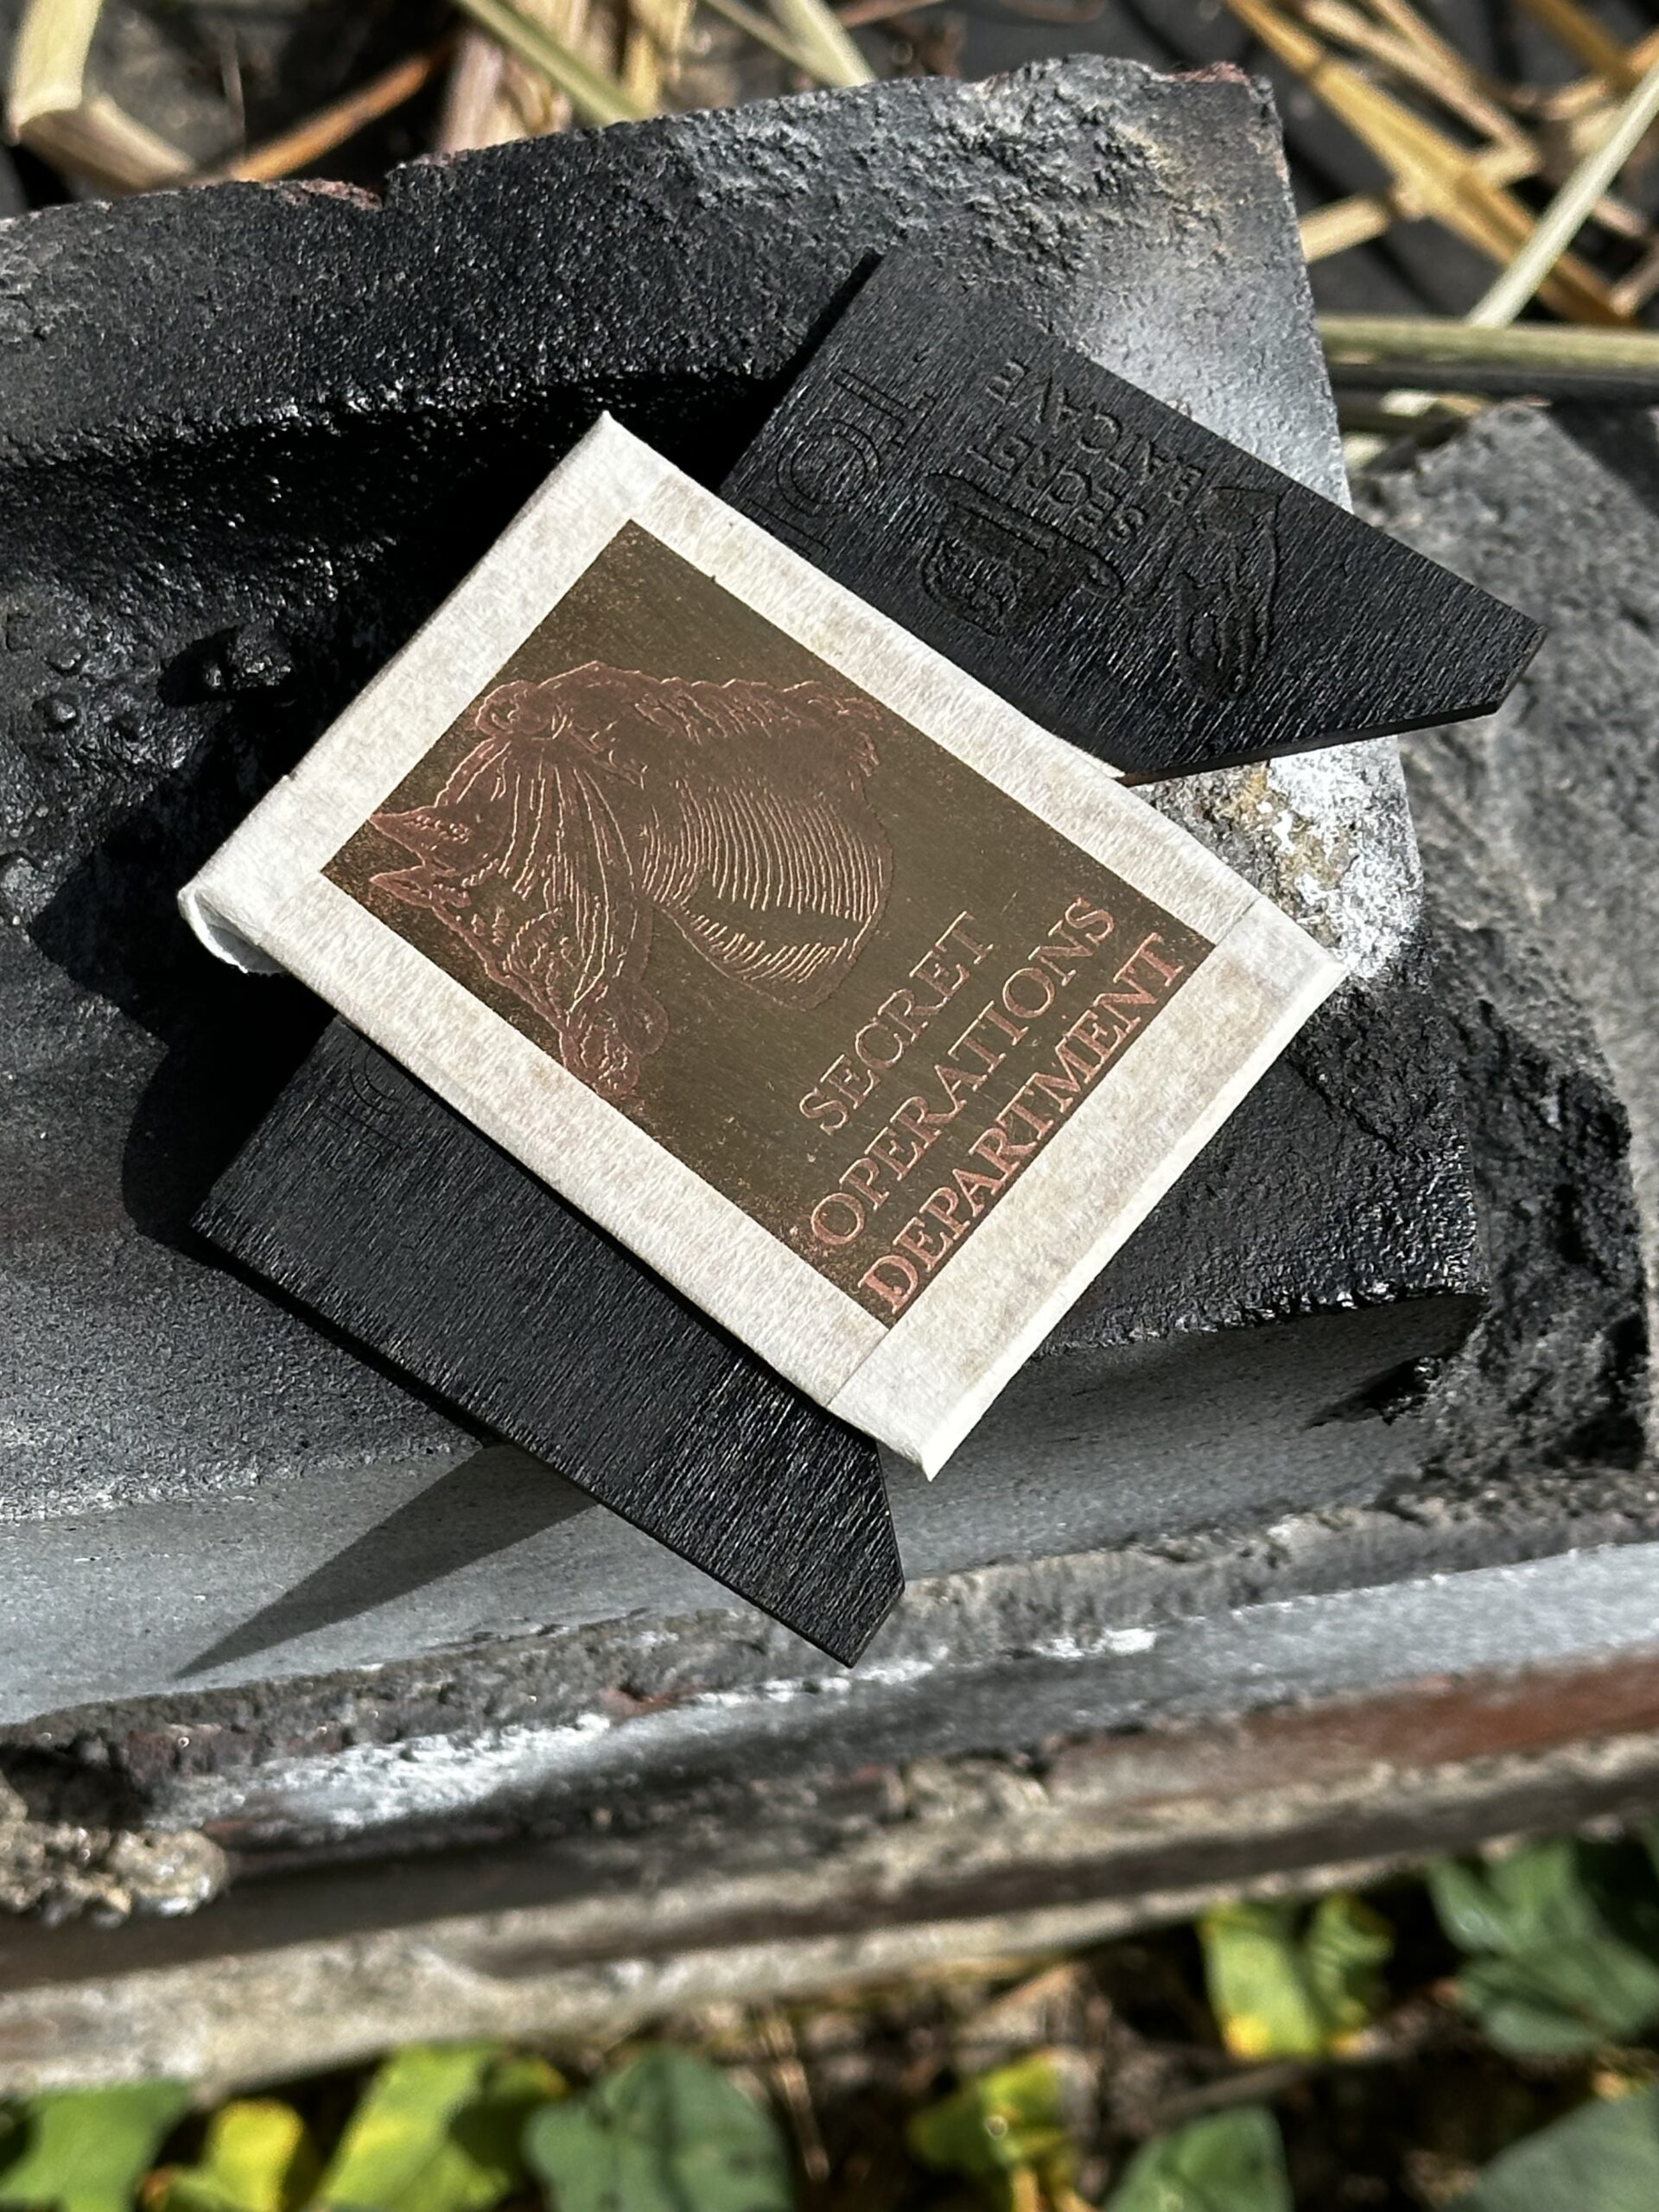
Here you can see how bad the edge got chewed up by the etching. A bit of sanding will sort most of that out.
sanded and screwed into place
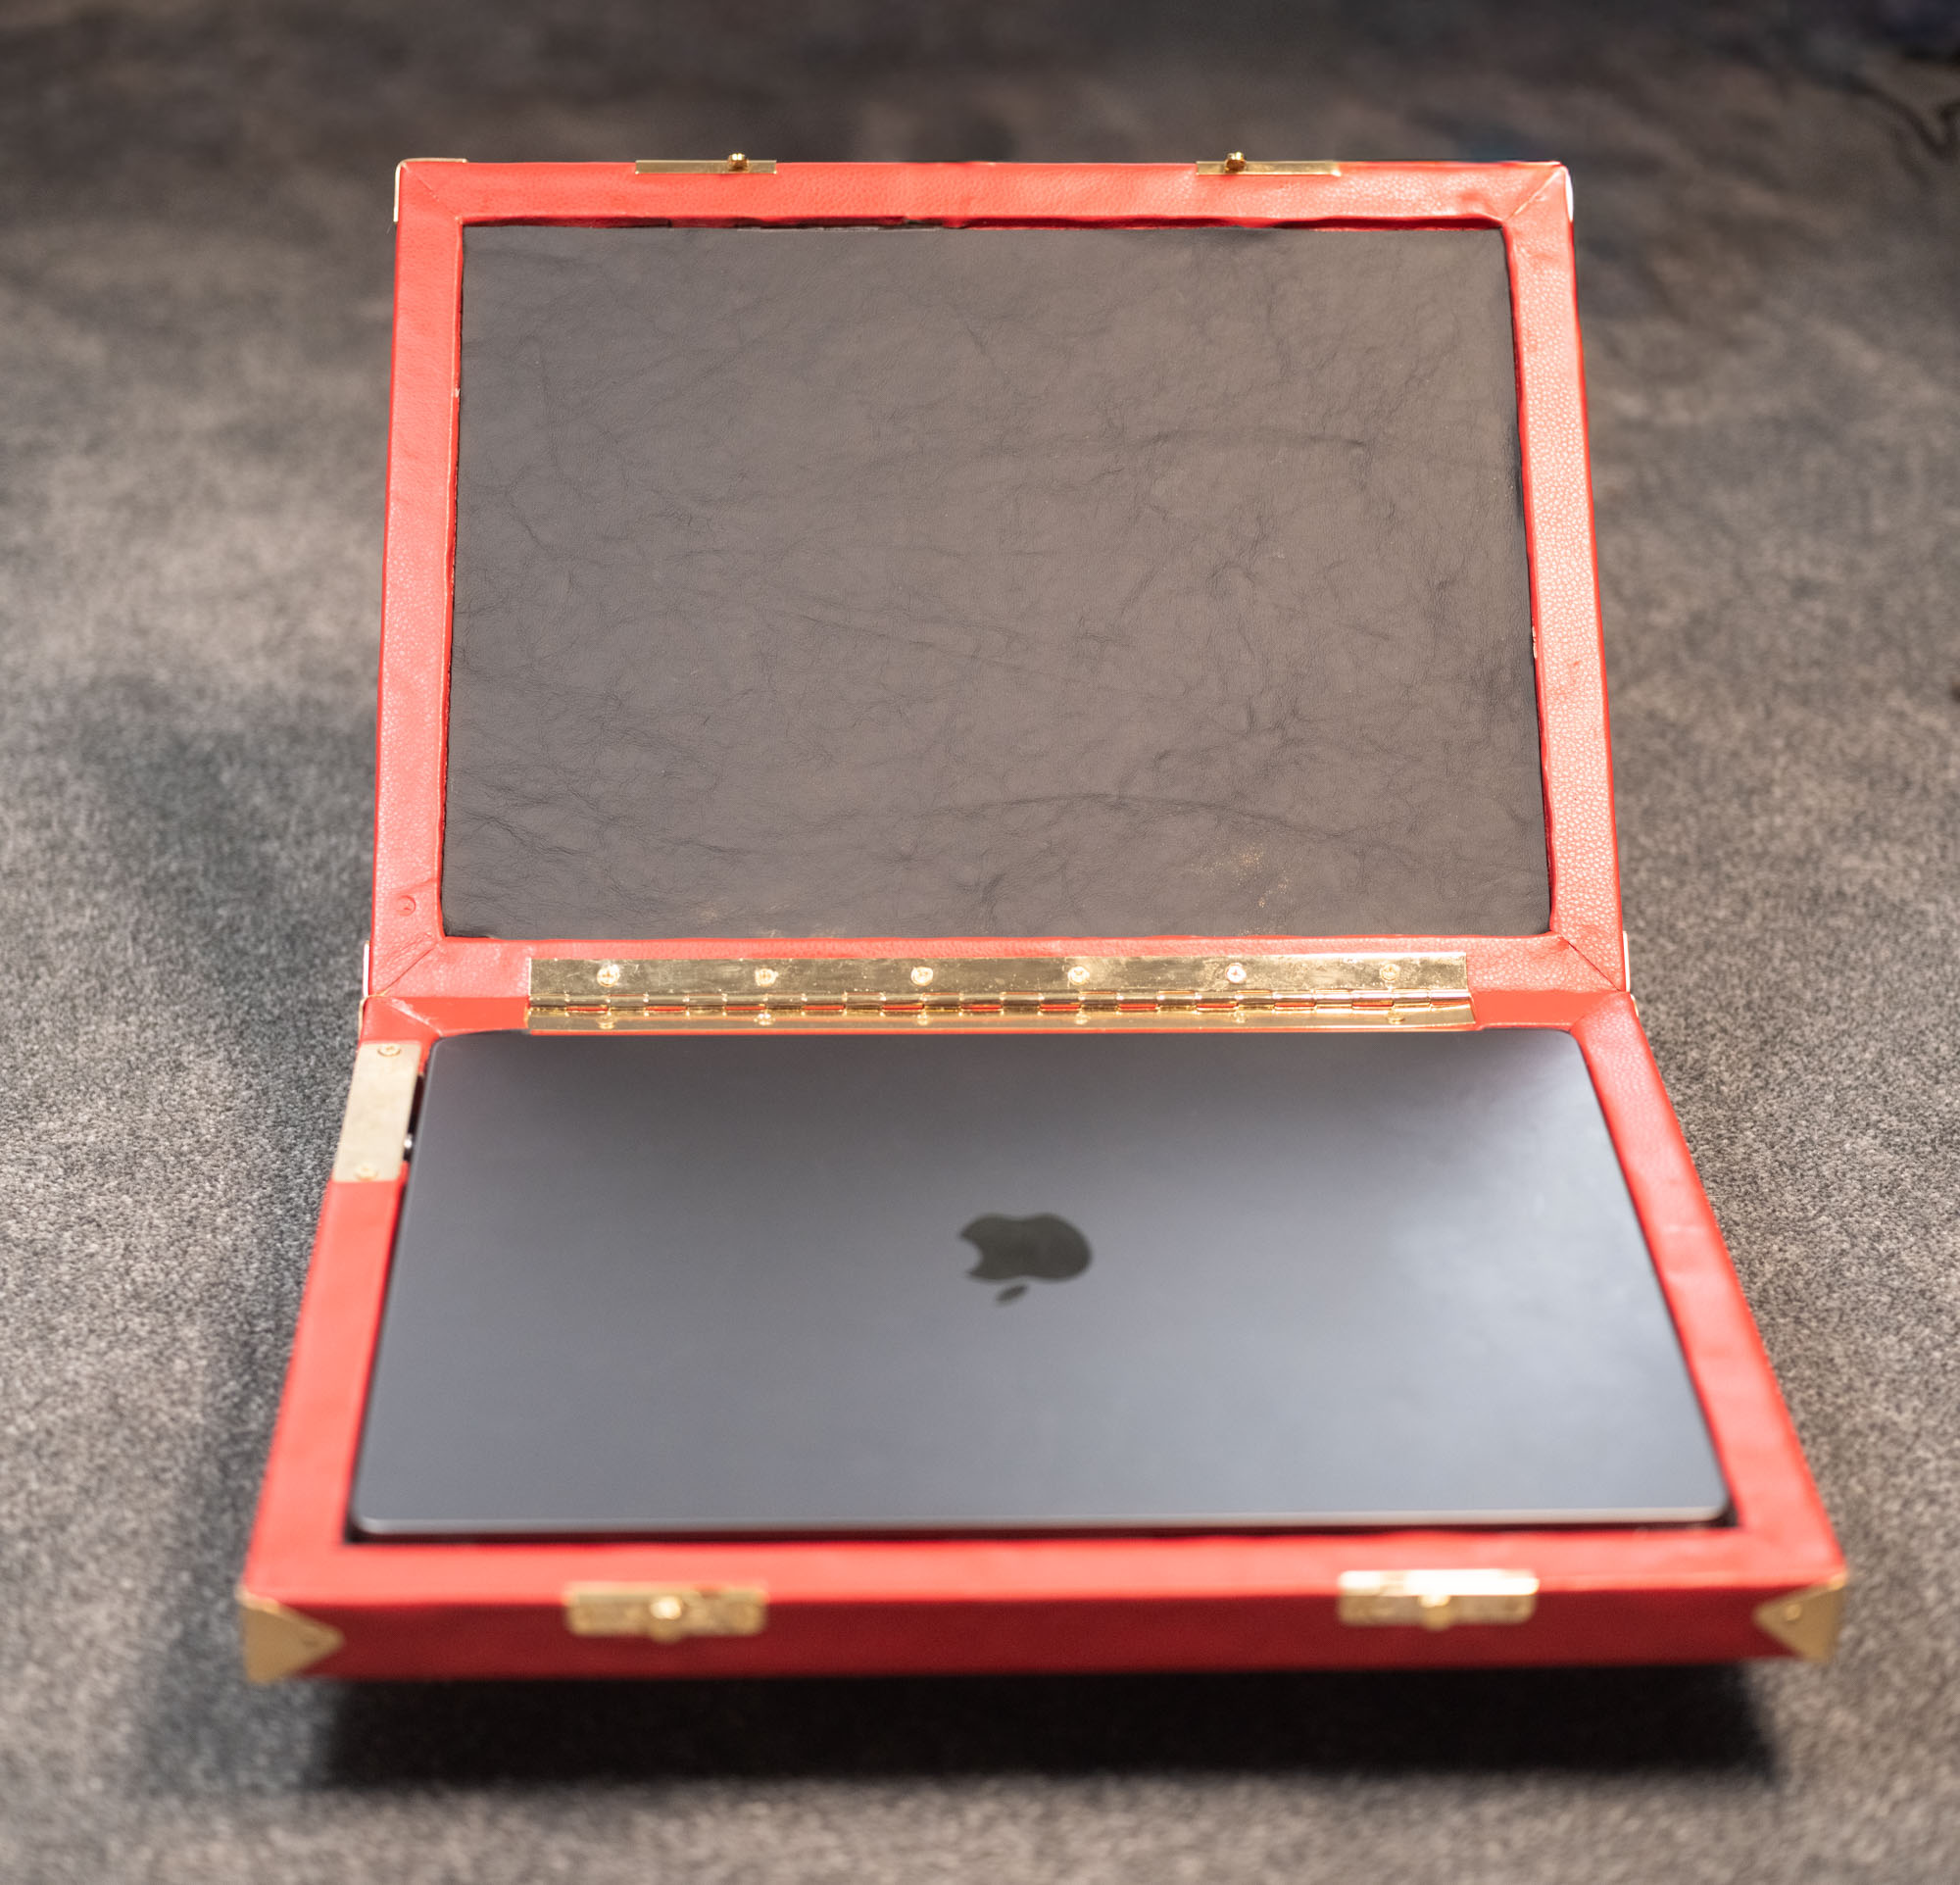
Fancy Photos:
What would I do differently?
I think the biggest change would be using real leather on the outside of the case. This would allow me to avoid the brass cornerplates. I would have to practice more, and learn how to skive, glue, stretch and corner leather. Basically I need to go on a fancy book binding course, that or go here.
Second, I’d make the edges of the case less thick. I think 6mm would probably more than enough compared to the 15mm I have now.
Thirdly, I’d redo the sticking of the leather on the lid. Its not adhered well in the slope. I should have stretched it more and applied more tension.
Lastly, I’d make it in a book form factor.