SHED OF AWESOME, Part III
Enough design, its time for the build.
Rough plan of action:
- Hire a digger
- Clear weeds and shrubs
- Remove top soil
- Put top soil into raised beds
- Begin removal of clay sub soil
- Excavate to 500-1000mm
- Install damp proofing
- Begin filling bags
- Stack bags
- Install window openings
- Finish final layer
- Install roof
- Install insulation.
- ??
- Profit.
Execute
Having procured 1 week of time off from work, I hired a 0.8 tonne mini digger from the local hire place. They were very helpful, and even gave me a quick tutorial. Much progress was had. The remains of the buddleia were vanquished, and the top soil was steadily being removed.
I needed a second pair of hands to help me move the soil from the massive heaps, into the final positions for the raised beds (It’s impossible to do this on your own quickly, without a motorised dumper.)
All was going well, until I started to shovel stuff around manually. That’s when I activated an old shoulder injury. The moral of the story is that I should have installed the peg board when I first moved it, and kept up the pullups.
Fuck, what do I do now?
I have two options: carry on, and dig a massive hole, not knowing whether I’ll be able to finish the shed, or swap to plan b: the shed of failure.
The wife has always been fond of plan B. She very much doubted my ability to execute anything other than a small range of programming related tasks. The shear unadulterated joy in her eyes as I told her my predicament was rather difficult to swallow. Nothing like “I told you so” to make you feel better.
Alas poor Yorick I knew him well
Before I’d seriously considered the options for sheds, I was sent a link to a dutch company that makes garden “buildings”. On the continent they don’t really go in to panel based sheds (like most standard garden sheds). They much prefer what they term “log cabins”. There are two main differences. The first is the thickness of the walls. A typical “shiplap” shed will have walls that are about 20mm thick, at best. A log cabin will have 50mm +.
The second major difference is the construction. Log cabins are mostly held together with gravity. This might sould like a massive problem, but it appears not to be. It does have the disadvantage that the walls shrink and grow with the seasons. This means you have to put a little more thought into how you attach things to the wall.
Anyway. The shed I have selected is the Yorick by Tuindeco. It has lots of windows, reasonable roof height (Most “garden offices” have door frames that are 1.8 meters high. Something that makes a tall person cry.)
Obviously the windows present challenges. Firstly they are difficult to sound proof, secondly how do you insulate them? Not only do they typically have a U value of around 1.8-2.2 they tend to be draughty. In summer you don’t really notice the slight draught, mainly because its offset by the ~8 kw of solar gain.
I’m going to need curtains, baffles and secondary glazing.
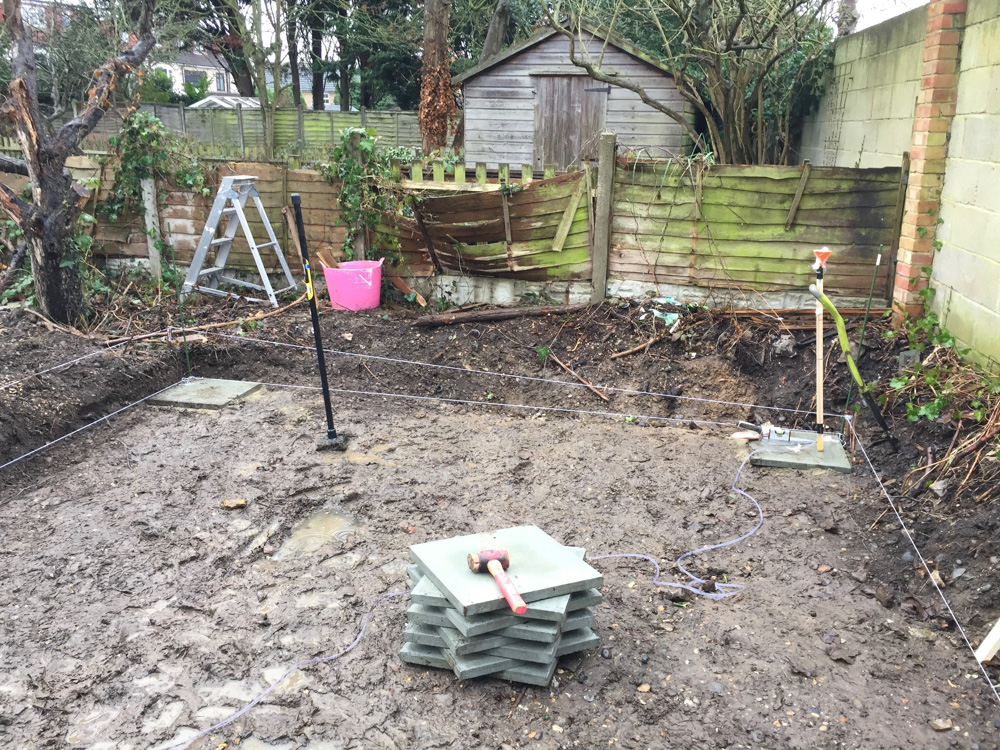
Foundations
Like most sheds, the Yorick needs a solid, level base. Fortunately I had enough time left with the digger to flatten out the subsoil and get it all roughly level. The hard part is working out if one corner is the same hieght as the other. They don’t make spirit levels longer than a meter…..
Roman tech
My dad pointed me to ye olde technique of clear plastic tubing and food colouring. You have two sticks onto which you attach each end of the tubing, fill up the tubing with coloured water (and washing up liquid to make the water runny-er ) wait for the bubbles to escape. Calibrate, and use.
This system is brilliant, because it allows you to measure everything against one point. You only have to move one stick assuming the “ground truth” stick doesn’t move, everything will be measured against one single reference point.
Obviously because each end of the tube is open, the water evaporates. So you’ll need to recalibrate regularly. (once a day is good, if its hot, maybe more.)
Foundations.
As fabulous as the Yorick is, the floor is optional. This is a double edged sword. On the one hand it means that I can insert as much or as little insulation as I want. However it means that I’m going to have to do one of three things:
- Have a dirt floor
- Make a suspended wooden floor
- Lift up the shed and have a suspended wooden floor.
- Have a concrete floor.
Option 1 is bollocks, as its going to be cold. I’ll still need a floor of somesort. Option two is quite appealing, but it will reduce the cieling hight. Option 3 is a bit harder. I’ll have to calculate how to make a load bearing frame on which to construct the shed. But this does yield extra ceiling height.
Option 4 can fuckoff. Pouring concrete is hard, plus I’d still have to insulate and put re-enforcement round the edge to stop the weight of the cabin deforming the concrete.
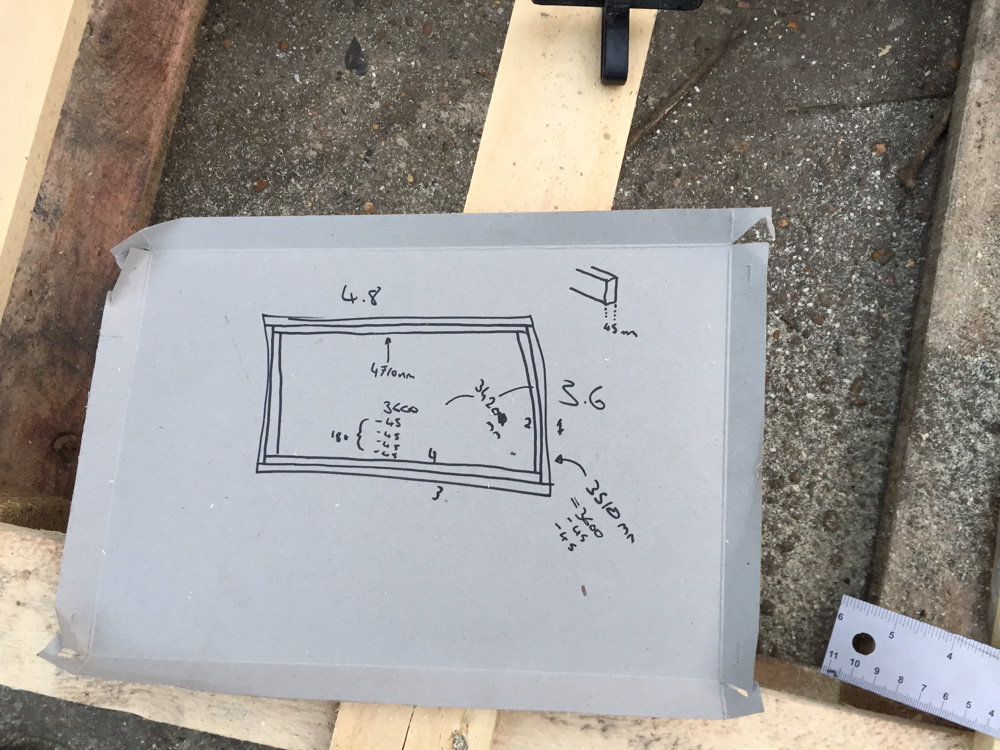
So option 3 it is. A double course of 4×2 timbers around the base, glued and bolted to form a solid rectangle. Damp proof sheeting inserted between the floor and the joists, so that the water can’t penetrate in.
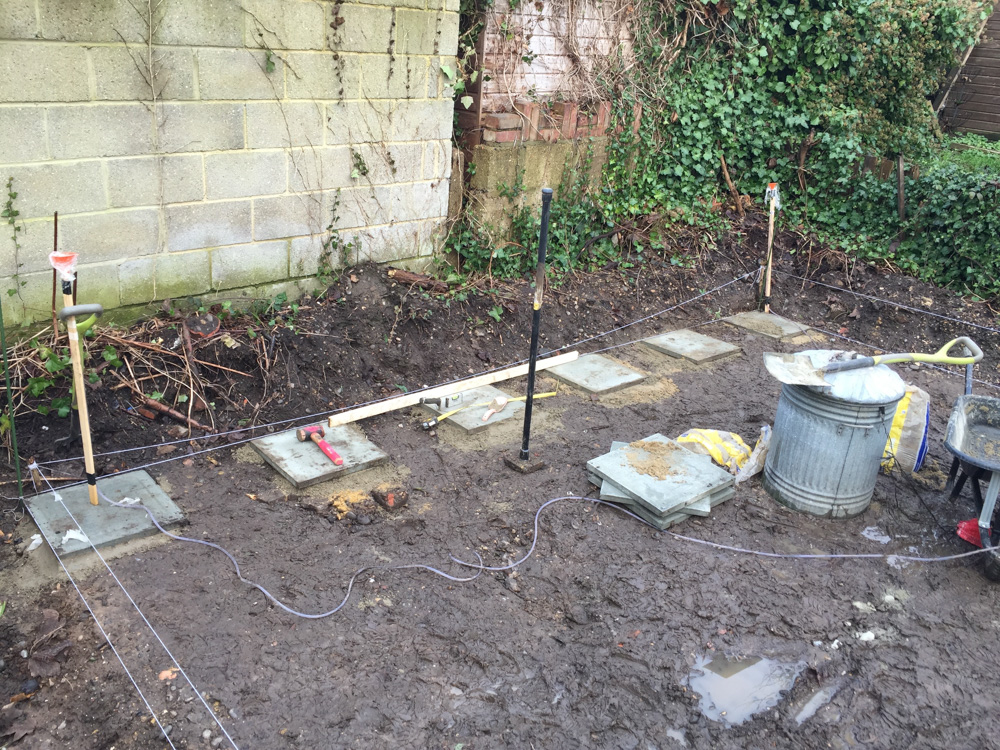
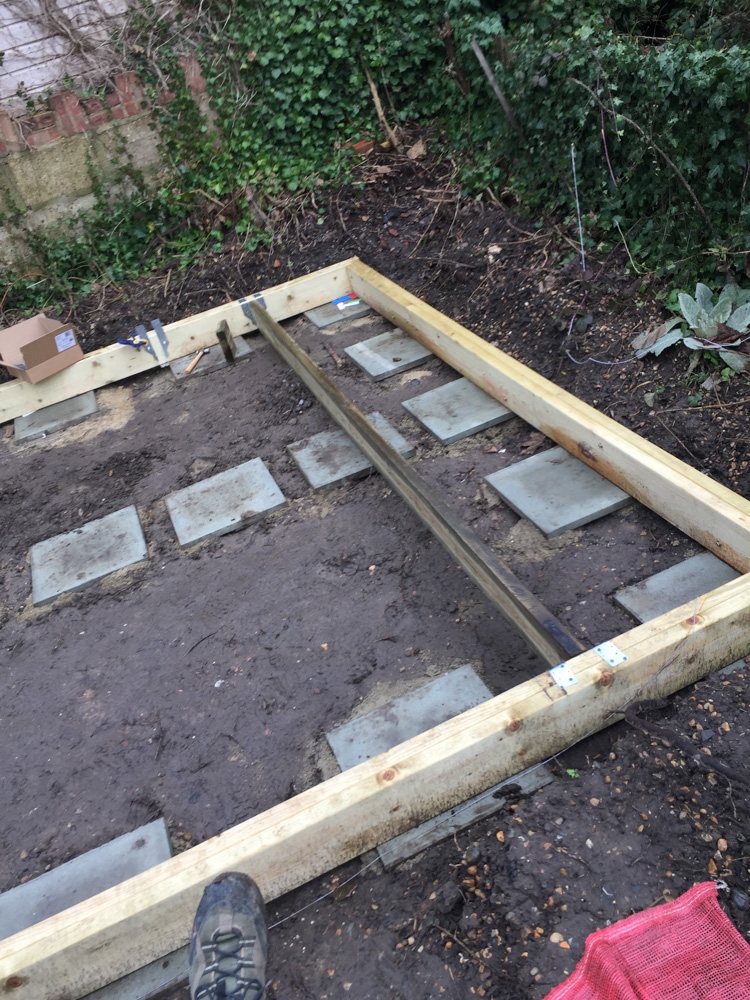
Building the base:
Each paving slab has to be level with each other. No ifs, no buts. Because all of the weight of the shed is on directly under the walls, it doesn’t really make that much sense to spend lots of money putting concrete in the middle to form a “pad”. Assuming the stated weight of 1200Kgs, 24 paving slabs would each have to carry 50kgs.
This seems like a reasonable weight, especially as it’ll be spread over a 45mm (or 100mm) by 450mm area.So the actual pressure exerted will be far less that high heels or garden furniture.
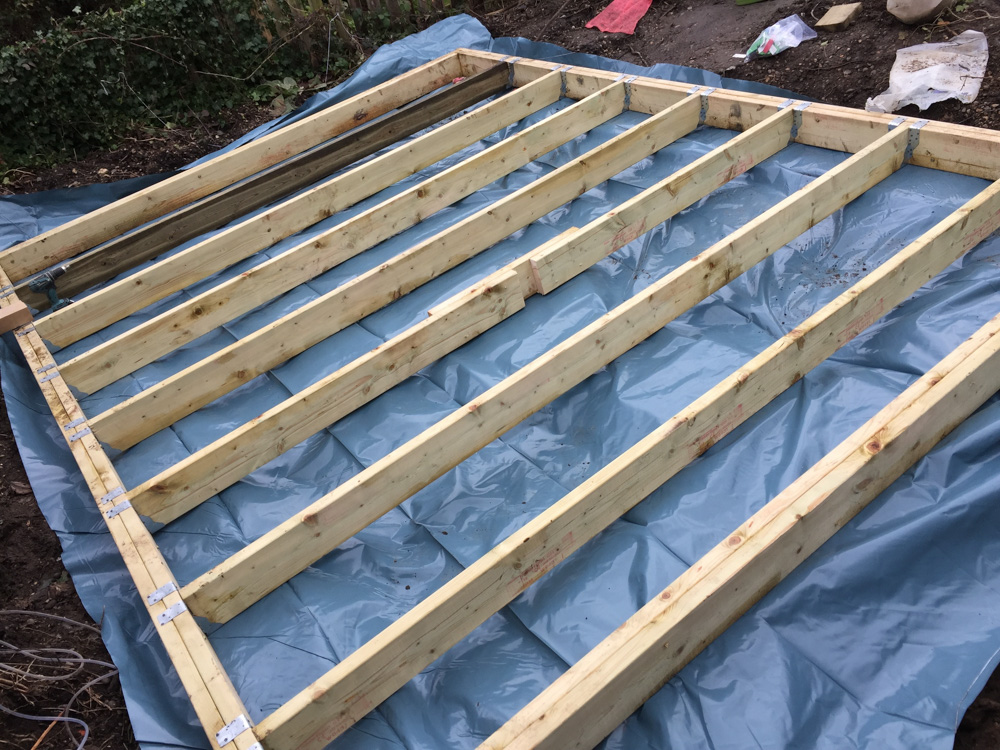
Flooring.
The Floor is going to suck the heat out of the place, so we need to allow for insulation. The bundled floor is alright, but doesn’t really allow for much depth. Using 175mmx45mm (6×2) joists will give us enough space to put decent insulation in the void.
Obviously there will need to be support bricks mid joist. The span tables are pretty clear that 6×2 can’t reach very far unsupported.
Base Joists
To make sure that both the flooring and the shed get decent support, I’m going to have to do something about the perimeter. This is analogous to foundations in a standard house. I’m not a joiner, so this bit requires a lot of research.
Fortunately the load on the perimeter base is evenly distributed. This means that we can “get away with” standard flooring joists. However that’s not very solid, as making sure that the four joists are secured to each other permanently is difficult. It also requires a high level of precision, anything less and the shed might fall off its base.
The solution? Joists doubled up, with the inner joist one width smaller than the outer. Basically a square within a square. This gives us a much more solid base, more slop for expansion and measuring mistakes, and more space to attach the floor joists.
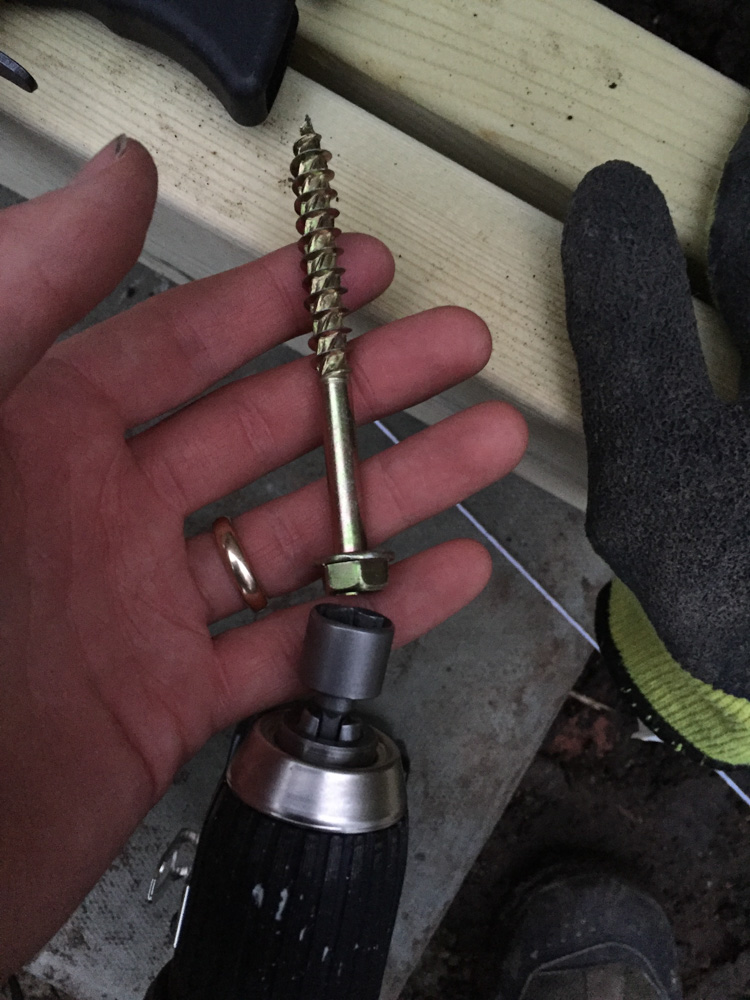
I don’t anticipate much lateral or warping force, however 100mm M10 coach screws every 600mm should stop that.
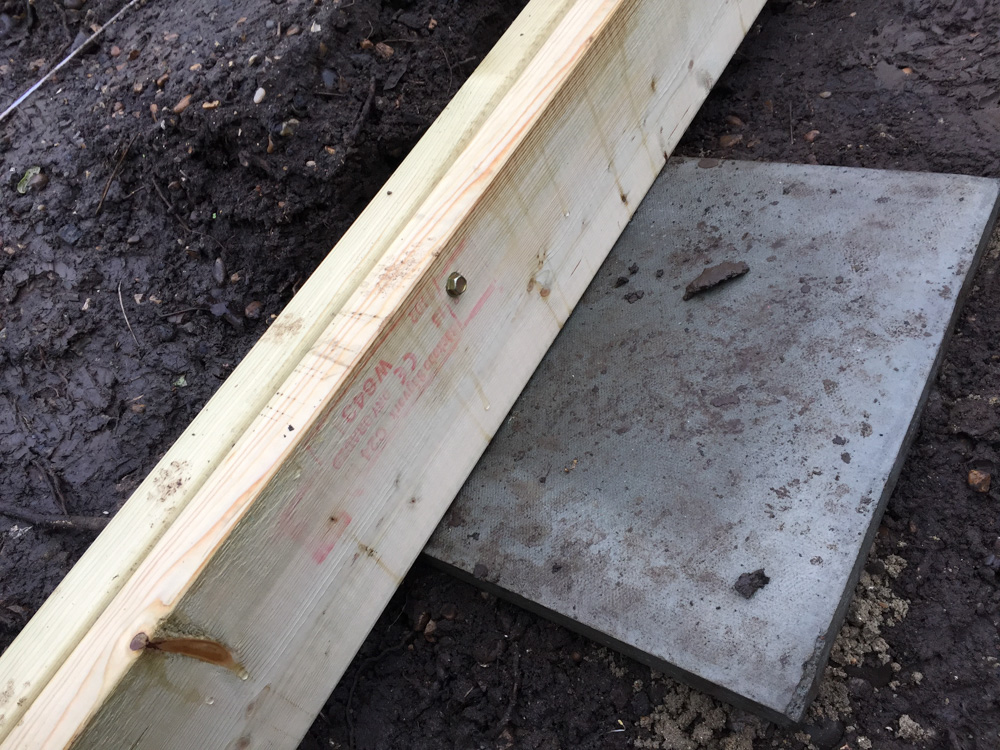
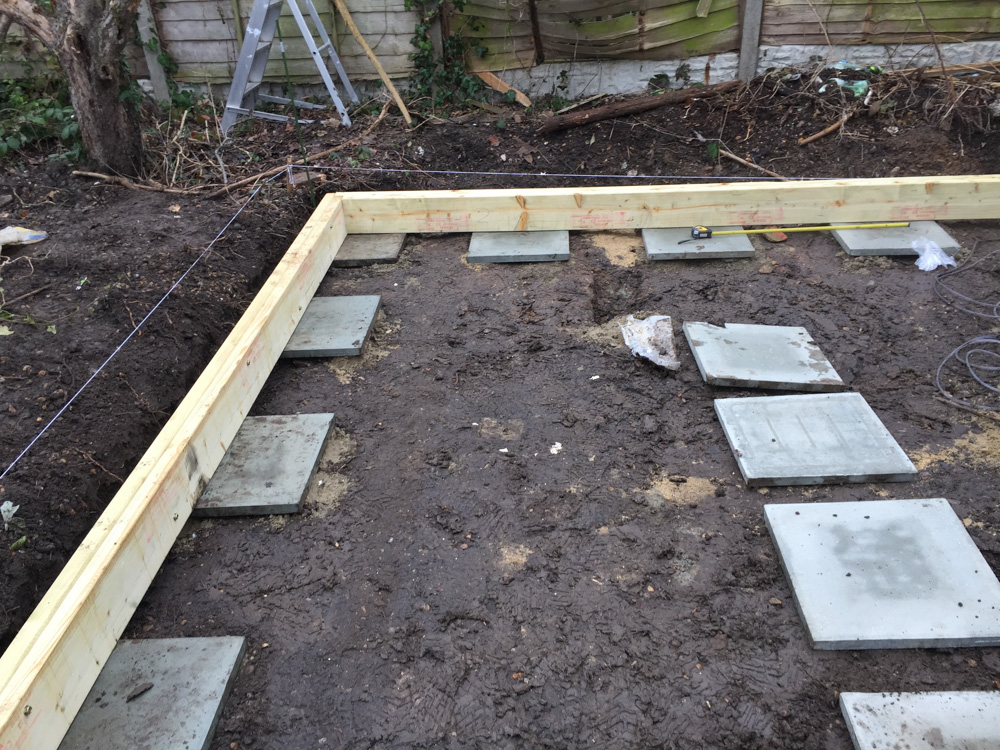
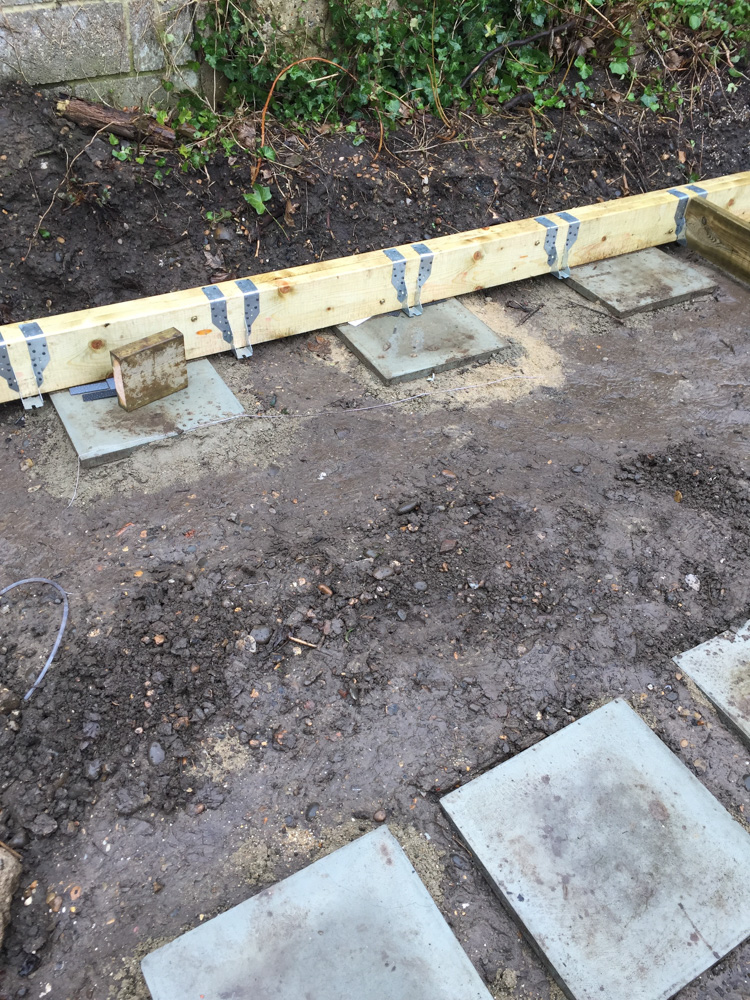
Attaching Joists
Needs lots of hammering:
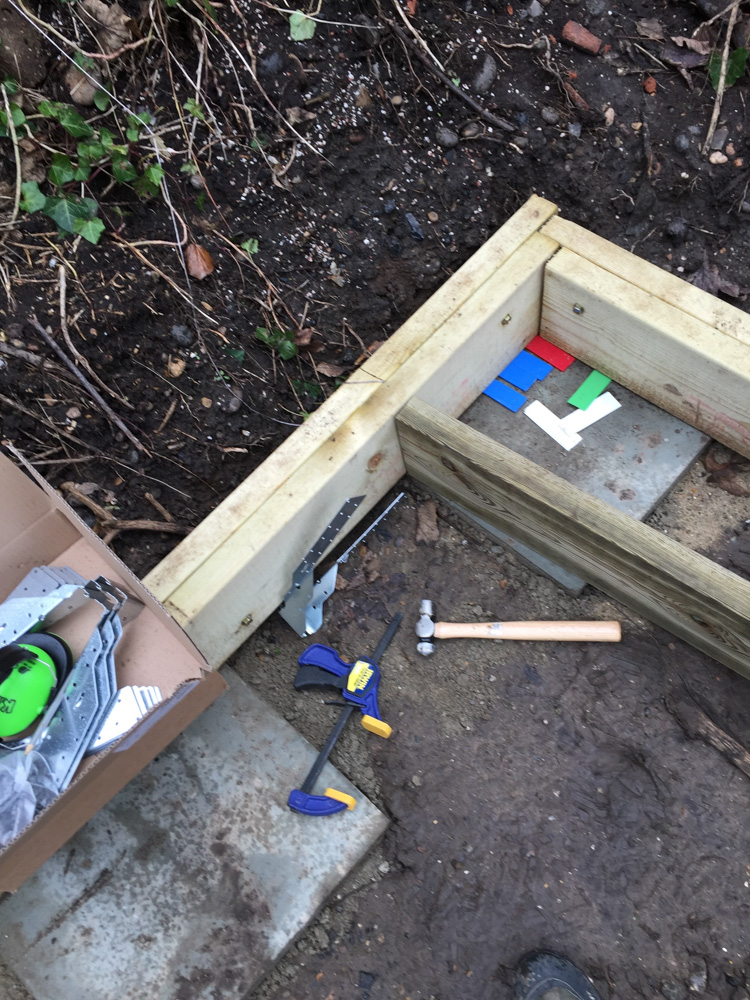
Testing to see if the joist fits.
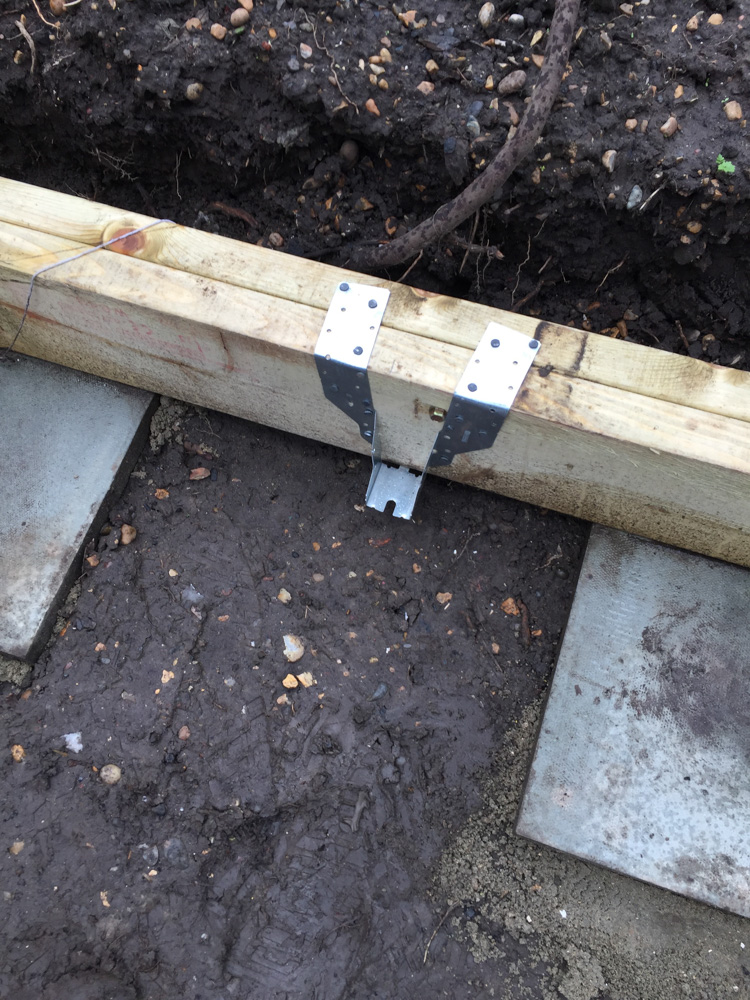
Note the support slab in the middle of the joist span. This reduces the span to ~1.5 meters reducing the load on the joist hanger and tripling the rated load of the joist.
Water proofing
We need to make sure that water doesn’t seep in. So a nice thick heavy duty damp proof membrane is installed:
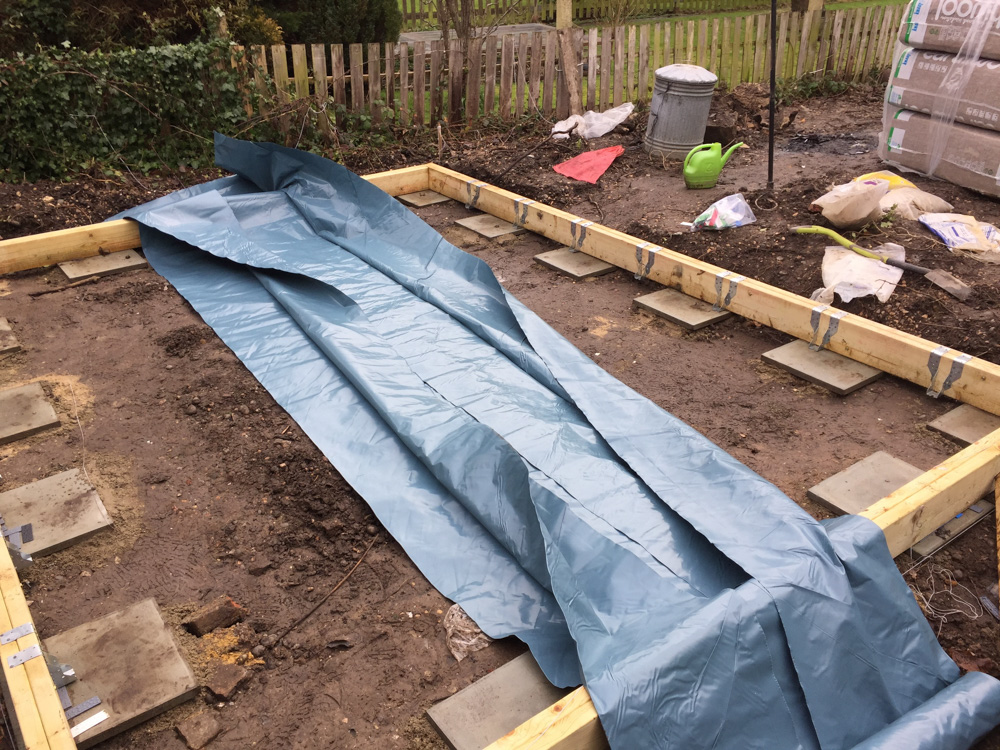
Which keeps the water both out, and in.