HAL9000: Get used to the machine
This is a brief overview of how I made HAL9000, the raspberrypi powered Jasper bot
The core of this build is the Velbon wide angle adaptor. I had been clearing out one of my cupboards and came across it after many years. I’d also been listening to the film programme‘s show marking an anniversary of space 2001.
Taking a deep look at the adaptor, I remembered that the original HAL console was based around a nikkor 8mm lens (gratuitus lens pics here) I’d been looking for an excuse to try laser cutting stuff, and this seemed like the perfect answer.
Initial Designs
I have a notebook that contains all my decent ideas from the last year or so. I started to sketch out a small spec.
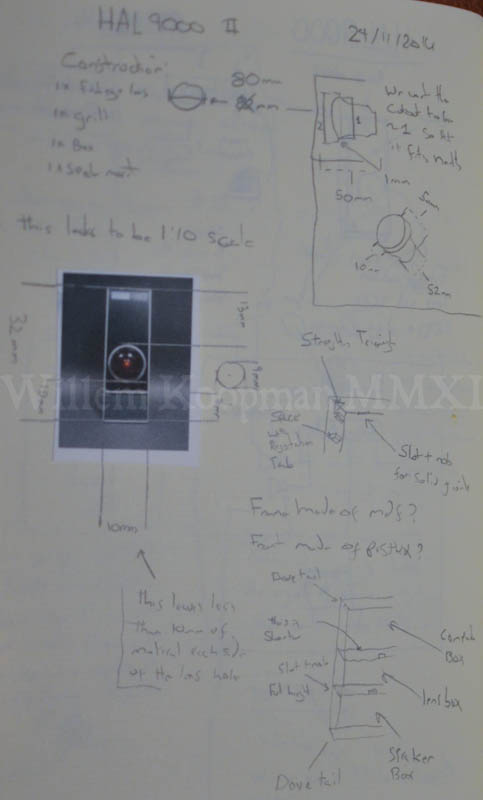
I found a mockup of HAL which was good enough to get size ratios right. From there I could work out what compartment would be needed.
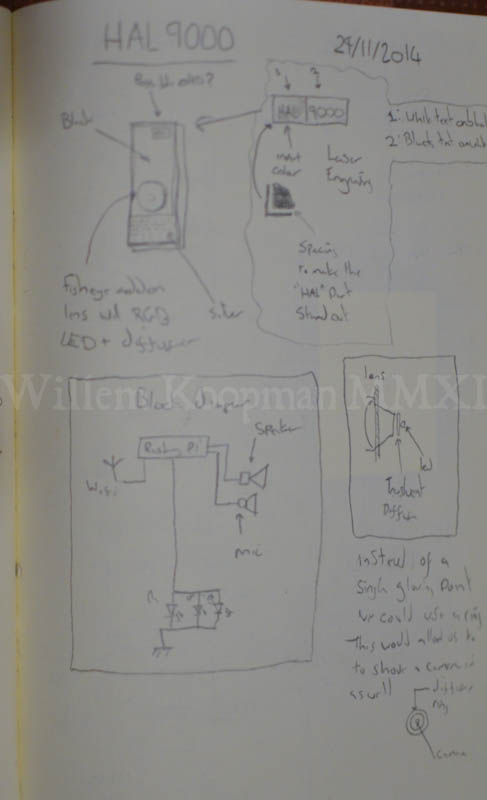
Because I only had one known size (the lens), getting the size for everything else was pretty simple.
Obviously I’ll need a raspberry pi to run everything, so I needed to find out the correct mounting holes for both the camera and the motherboard.
Laser cutting a Box
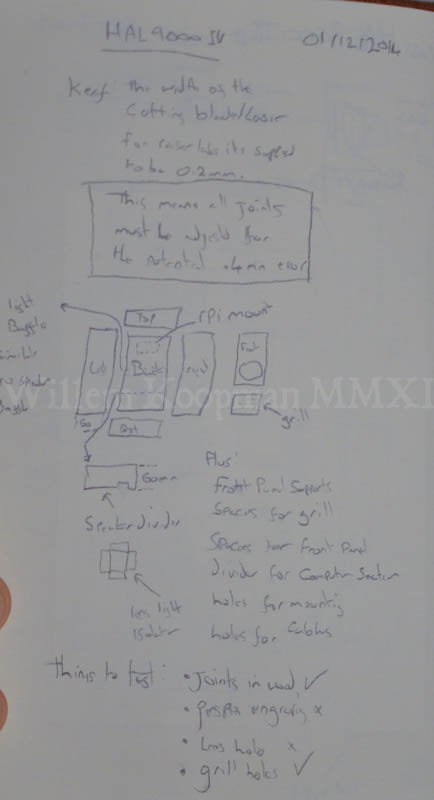
The key thing is to find a piece of software that you are familiar with. Most places accept .svg, with more advanced people also accepting .dxf and .ai.
I know Illustrator fairly well, and I trust its ruler system.
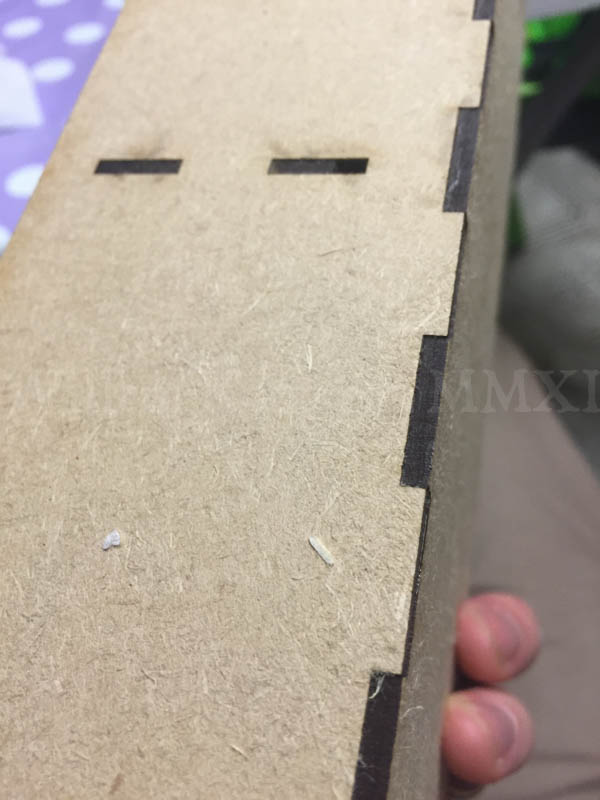
To make sure I had a nice solid build, I created dove joints. This allows more surface area for the glue to stick to. It also is impossible for someone like me to do by hand.

Build
Once the box had come back from the cutters, I checked to see if everything fitted (it did). Then its glueing time:
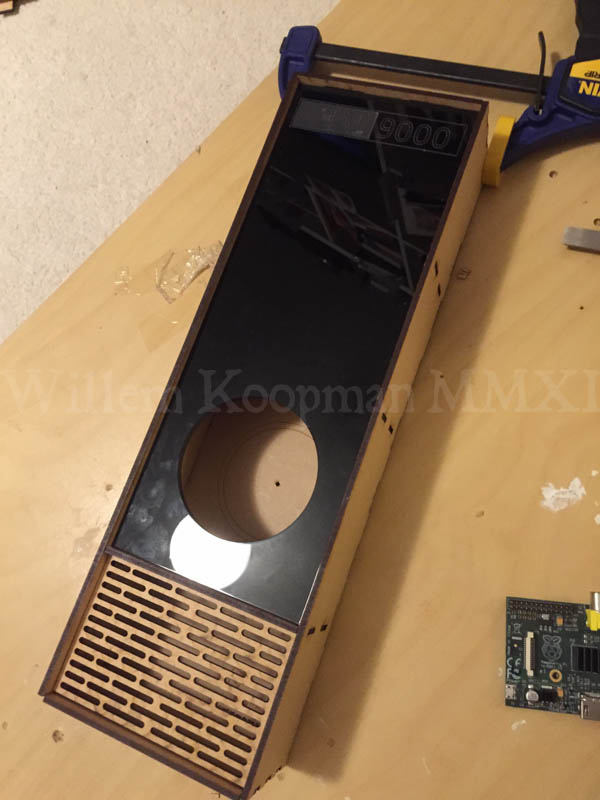
Because even MDF is a “natural” medium, it warps and bends. To get a decent build, I clamped the box shut when I glued it. This meant that everything turned out flush.

You can see the supports used to make sure the face plate doesn’t disappear inside the box.
Painting
I don’t have that many pictures of the painting. Mainly because it was full of terrible mistakes. The first mistake was to attempt to sand the MDF to make sure the spray primer stuck.
The second mistake was using spray primer. I was fearful of brush marks, so assumed that spray primer would be superior. I was wrong.
The technique that I have figured out (and should have listened to those that know) is:
- Apply decent primer by brush
- Allow to dry
- Lightly sand with fine sandpaper (90-130)
* Pay special attention to the corners
* Make sure you don’t accidentally sand the wood underneath.
4. Apply another coat of primer
5. Sand.
* if no wood shows through, proceed to step 6, else go back to 1
6. Apply glossy spray paint
7. Sand
8. Reapply
9. [optionally apply varnish]
Electronics
Now that you have painted everything, you can now install the electronics. (don’t do it the other way round.)
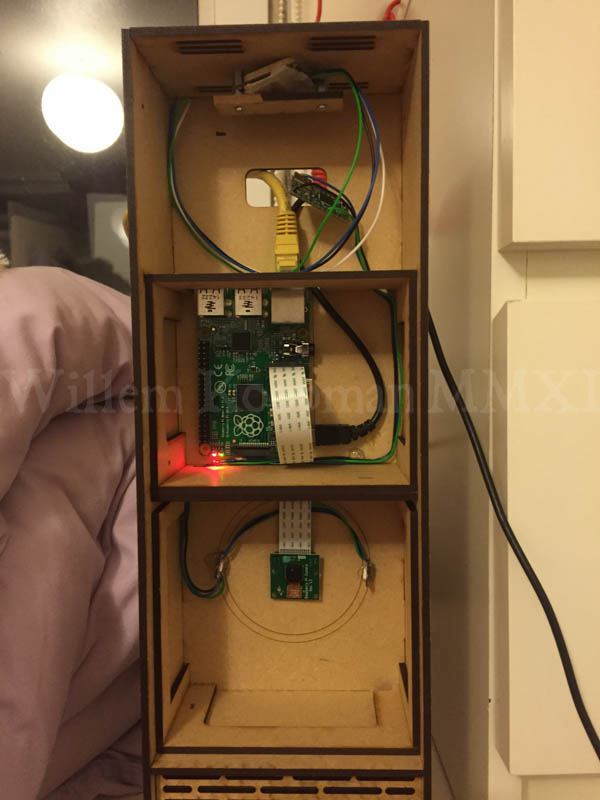
Everything is fitting nicely. Its almost like I spent months designing it.

Here you can see the final layout. At the very top is a Teensy, which controls the two Neopixels either side of the camera. Under that is the Raspberry pi with prototype hat. Under that the Pi camera module with LEDs, and finally the USB power Speakers.
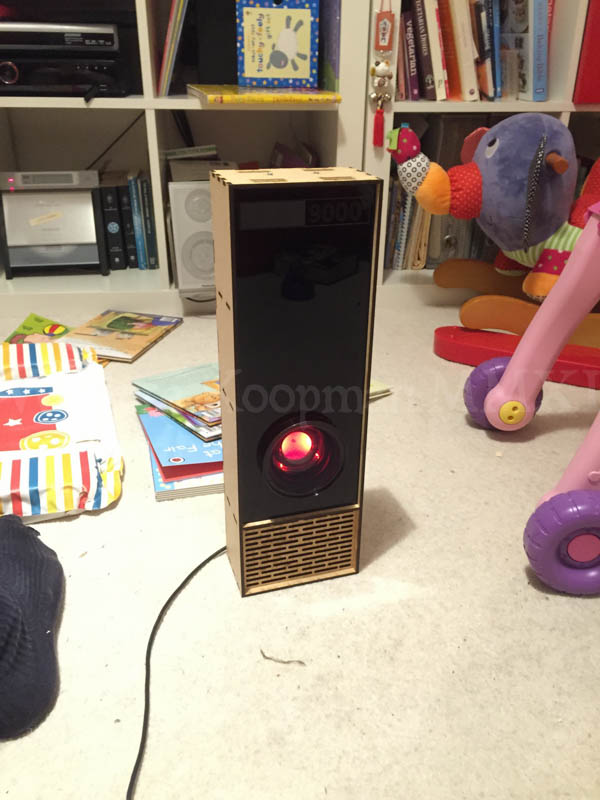
Sexy Pictures
Here is a picture of angry Hal:
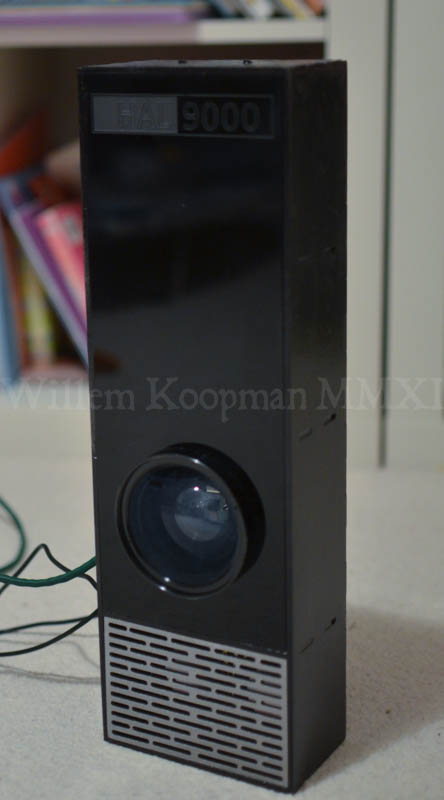
And a fully painted Hal:
Software
I’m using raspbian, which means that I need to compile jasper from scratch. The first thing to do is make sure you download the right pocketSpinx(the docs now give a link). The second word of caution is OpenFST. You need to make sure you have as much ram as possible, otherwise you’ll hit the dreaded Out Of Memory Killer(OOM Killer).
User raspi-config to limit GPU memory down to 16 megs. However thats not enough, you need to enable a temporary swap partition.
Warning: this will hammer your SD card, be sure you have backed it up first, and you’ve bought a decent one. You might want to consider how hot the Pi gets too.
sudo -s
To run as root, then you need to create an empty file:
# dd if=/dev/zero of=/swap bs=M count=1024
change the permissions:
# chown root:root /swap
# chmod 0600 /swap
Then you need to mark /swap as a swapfile:
# mkswap /swap
and finally enable the swap file:
# swapon /swap
Then you can build OpenFST, however it took about ten hours when I did it.
Configureing Jasper
PocketSpinx is wonderful, however its a bit deaf, and the sound model is designed for US English. It does however understand the word jasper quite well.
Google Talk is really reliable, but it involves sending every word to the “man”. Something I’m not really keen on. The workaround is to get jasper to listen out for the key word, and then send the following sound file to the googles. This means that I can have decent voice recognition, but only when I explicitly ask jasper to do something.
I searched the Google Group and stumbled upon this
You put it in the Google STT engine class . I have it in the WitAiSTT as that is the >engine that I use but it should work with google too.
You then select the Google STT engine and it will fall back to sphinx for passive >listening (wake up word).
Hope that helps.
Marco
    @classmethod
    def get_passive_instance(cls):
        phrases = vocabcompiler.get_keyword_phrases()
        return PocketSphinxSTT.get_instance('keyword', phrases)
This allows Google STT to be used for all words after ‘jasper’
3 replies on “HAL9000”
Very nice project. 🙂 I didn’t realise laser cutting was a simple deal nowadays.
Could you share some info about the microphone aspects of your build? I also looks like a pi2 in the box. Is that correct?
Hi there,
The microphone is just a cheap £5 jobbie from amazon. Its a simple USB mic that presents as a standard USB audio device, so doesn’t need any drivers.
I’m using a B+, not a 2. When I started the 2 was a mere twinkle in Raspberrypi’s eye.
[…] HAL9000 […]