What went wrong
So whilst the original dovecot was well received, it didn’t work all that well. It had limited aim-ability due to the stupid rocket lifting mechanism, was never going to be weatherproof, because the doors never really closed properly, and if it fired rockets, it’d probably burn the enclosure.
So as a proof of concept, its alright, but not great. I’m still proud of what I achieved. However, I can do better.
What Needs to change?
- It needs to be more weather proof (No more split roof)
- It needs a much better rocket aiming system
- More fire-proof
- Needs to be able to take bigger rockets
Better rocket steering
The first thing I want to do is replace the stupid rocket mount. If abandon the idea of using an X,Y & Z mount, and just stick with X & Y, we can reduce complexity significantly.
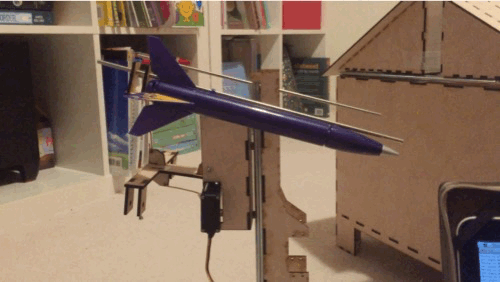
I also plan to avoid using servos where possible. They are are noisy, weak and a pain in the arse to use outside of a set number of applications.
One of the key flaws with the old system is that the roof had no hard stop at the centre. This was partly inexperience, but also to make sure that we could press the two parts of the roof together to make a tight seal.
Because it used servos with long linkages, there was a significant mechanical disadvantage to overcome. Yes, they opened quickly, but they also jammed easily. They also required lots of calibration as the sliders changed friction.
In short it was a nice idea, but never survived contact with reality. I wanted to have as much vertical space as possible, so opening at the “apex” of the roof seemed better than sliding the whole lot to the side. It does look better, but its really difficult to make it reliable.
Version 2!
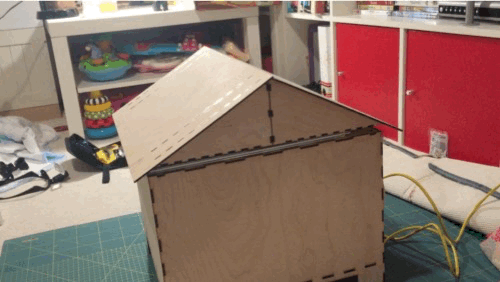
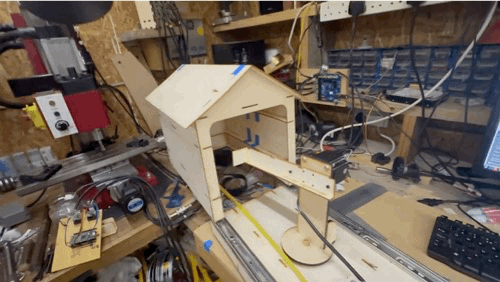
So, now that we are keeping the rocket carriage in one place, it can be made much more sturdy. We are not lifting the entire rocket assembly out of the top of the roof, we need to change the way we move the weatherproofing. In the image below, we can see that we move the entire top housing. This means that the rocket assembly is at a fixed height, and can be much more rigid.
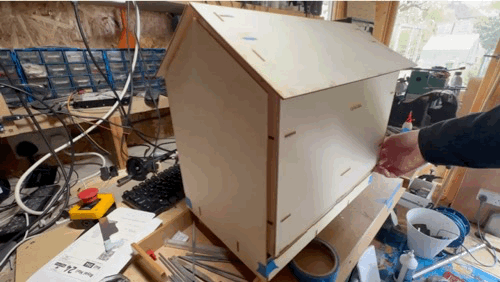
Much more simple and sturdy! We also only need one actuator to open and close the “roof” section. Its also a much better seal against rain, as there is no gap in the middle of the roof. The end wall is floating, but its there to stop up the gap where the rocket carriage emerges from the housing.
But its not plane sailing
It might seem like its all figured out, but sadly that not the case. I need to open the weather proof housing. Initially I looked at linear motors, because off the shelf is far better than custom made.
However, the slider moves almost twice it’s length. Trying to find a linear motor with 100% stroke length is apparently impossible:
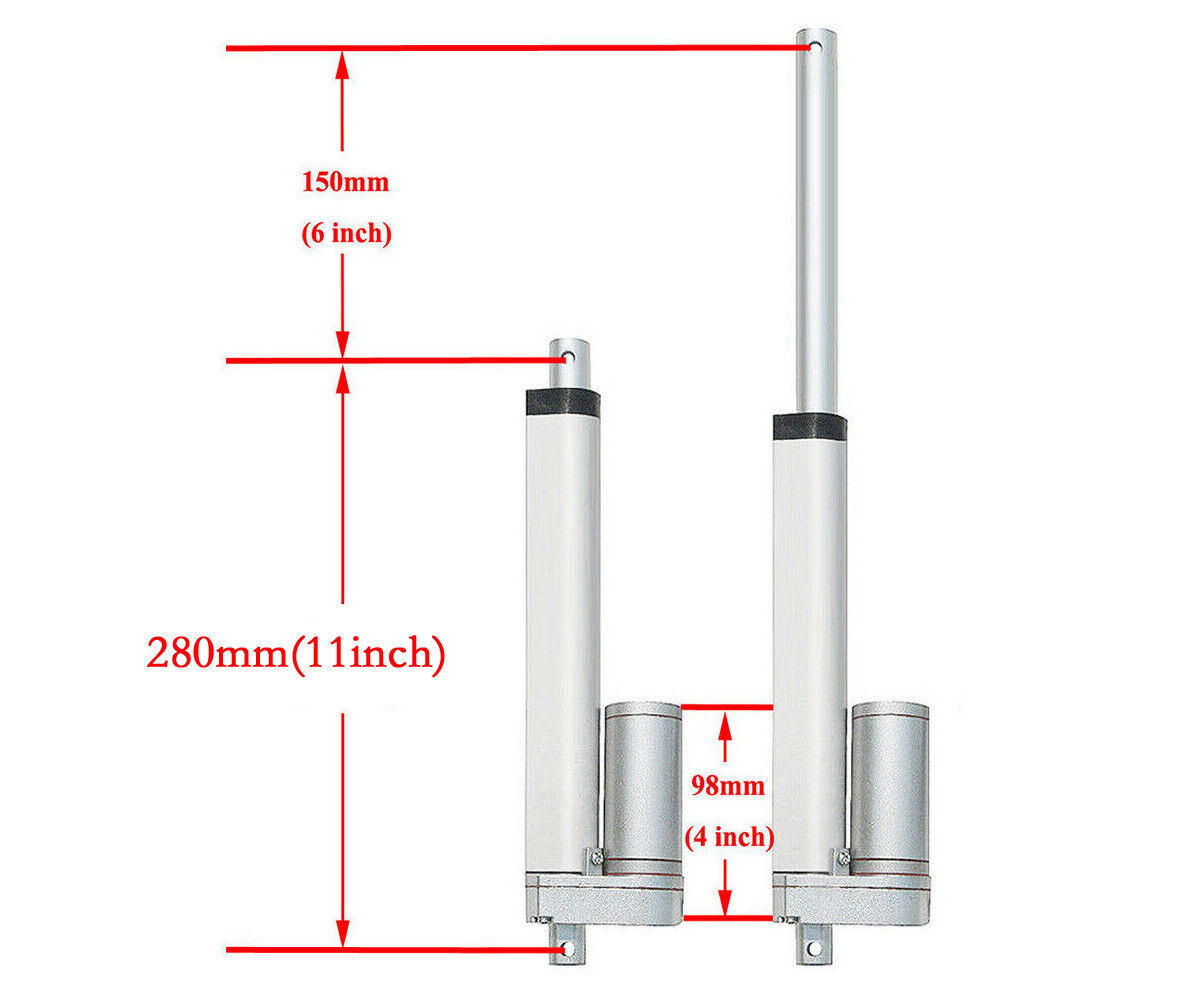
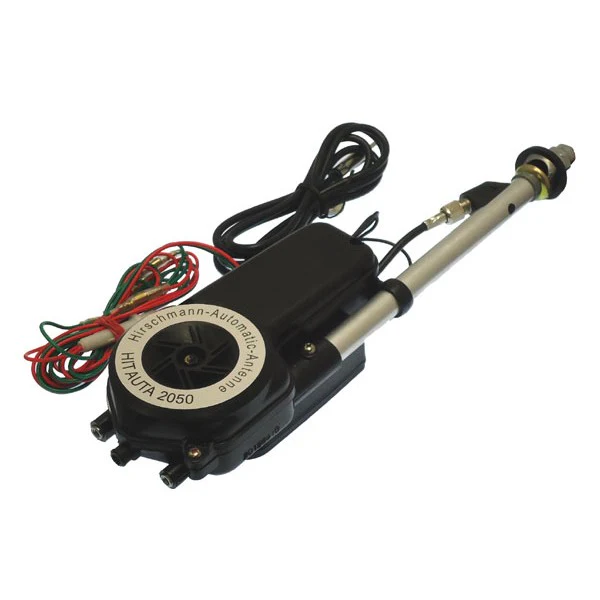
This one has a 50% stroke, which is standard. “multi-stage” actuators don’t appear to exist. So my next idea was to use a retractable car antenna. However they seem to be over £80, and quite large. Plus they are not really designed for pushing/pulling things.
Custom Mechanical Actuator Time.
fuckshitballs. I’m going to have to actually make a mechanism that can push/pull around 250 grams worth of friction, reliably. I spent a while trying to work something to with string and pullies. Nothing I can imagine will work. I spent a while looking at Victorian pulley magic, again nothing I can reliably use or make.
Enter, the tape measure. One of the children was playing with a tape measure, they using it to push off objects from the table. so begins the prototype:
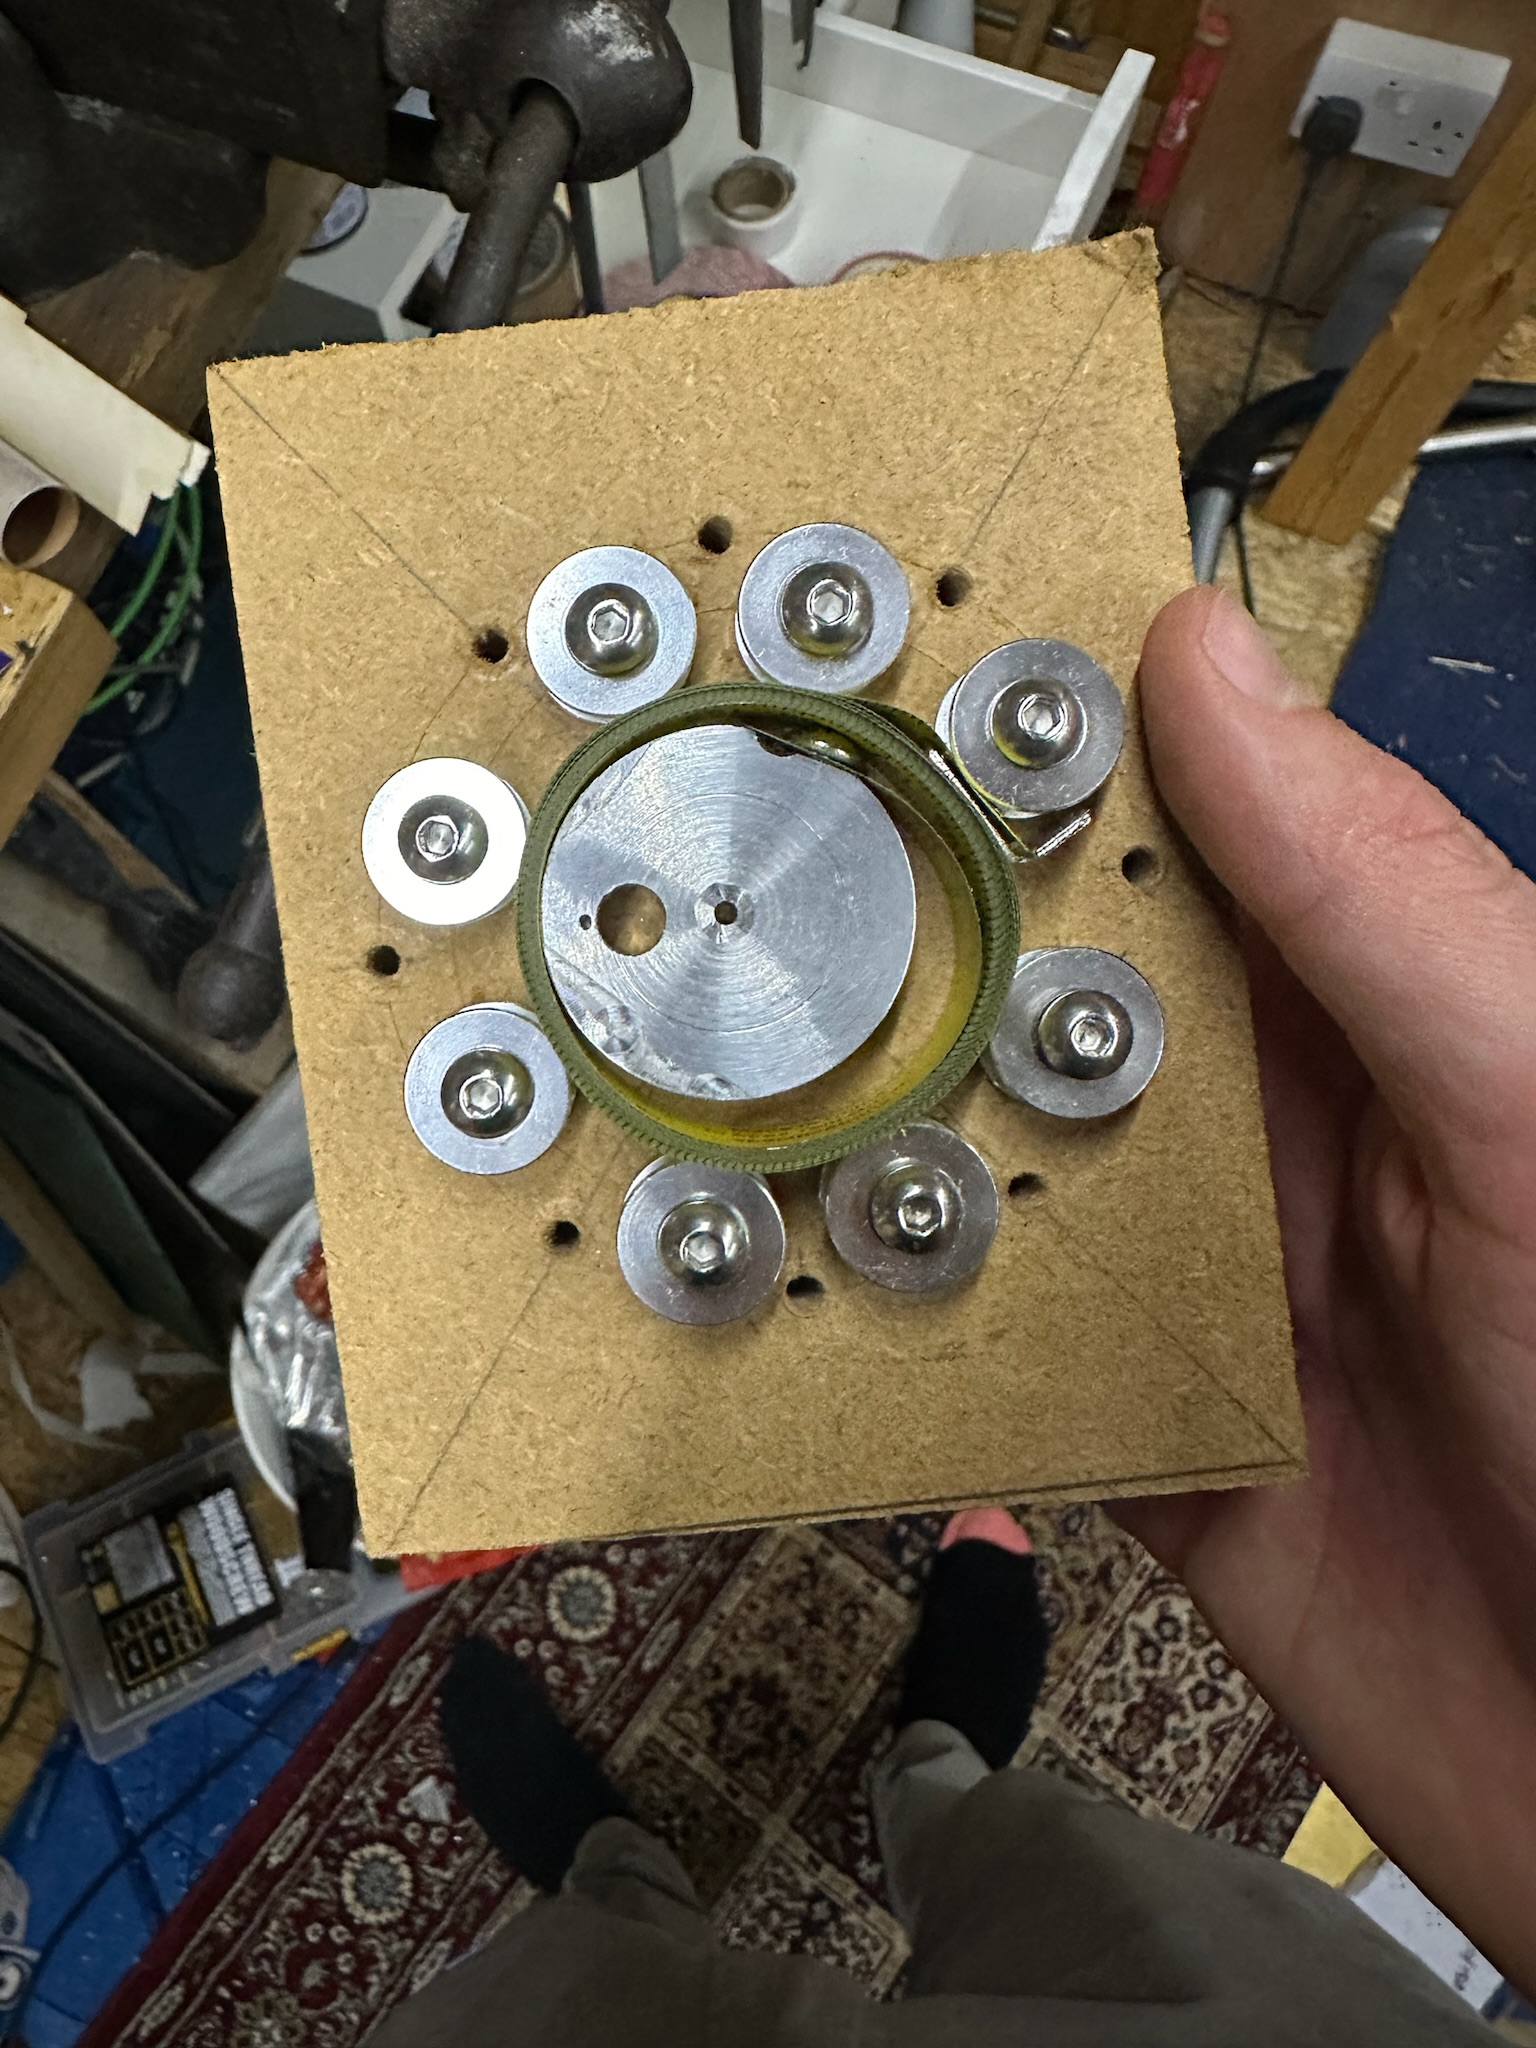
A tape measure is constrained inside belt idlers. I’ve made an arbour for the tape to wrap round out of scrap aluminium (Go I love lathes.)
The big drawback of this approach is that any gap between the arbour and the idler wheels results in slack when changing direction. I probably could have avoided this if I had clamped a driver wheel to a undestroyed tape measure. I do have experience of doing this:
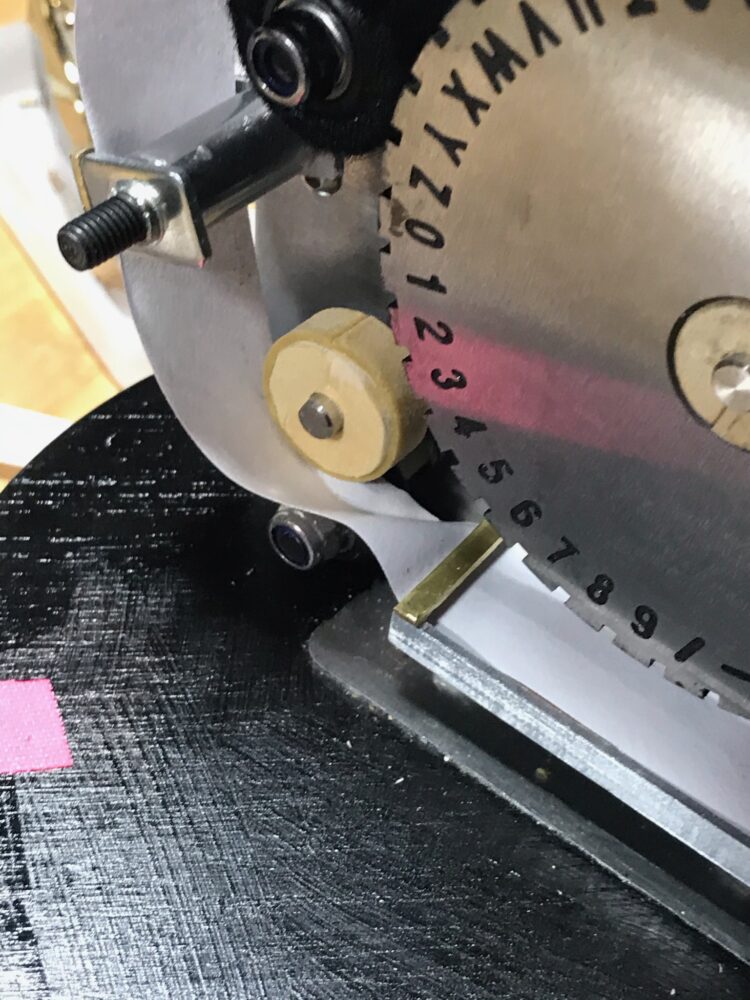
But, it was a massive faff to implement, and as you can see, wasn’t successful the first time. However, if I’d used a normal unmodified tape measure, the spring tensioner would have ensured that there would be no slop. We live and learn.
Putting it all together
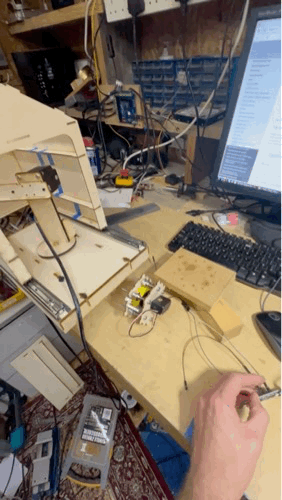
To drive the tape arbour, I am recycling one of the continuous servos I used for the old system. I drilled and tapped some holes so that I can screw the servo horn directly into the aluminium.
We now have a system the open and closes reliably! Next section will be about the rocket x/y carriage